
|
|
SUBSIM: The Web's #1 resource for all submarine & naval simulations since 1997
|
SUBSIM: The Web's #1 resource for all submarine & naval simulations since 1997 |
 03-16-15, 03:28 PM
|
#2 |
|
Growing Old Disgracefully

 Join Date: Dec 2012
Location: Hythe - Southampton
Posts: 9,607
Downloads: 1132
Uploads: 0


|
Last updated 15th May 2019
THEBERBSTERS All In One Beginners Mega Mod for SH4 v1 This Post has all the information about this Mega Mod. This Mega Mod takes the Stock/Vanilla Game to the next level thanks to Websters excellent GFO Mega Mod which removes a lot of the bugs and glitches from the unmodded Stock Game. For the benefit of newcomers and anyone else who would like to mod a Mega Mod but is not sure what to do I have taken some of the best mods around by various modders and created a simple installation for you. This will give you a very playable and enjoyable game. Important Installation Instructions Must Be Read First The first important thing to do now is to create a New Folder Now on your system before you Download the Zip file. Did you remember to create the new folder that I mentioned in my SH4 tutorial? No > Exit the Zip file and copy and paste the Zip file to your New Folder. Ok, so you have your New Folder and your Zip File Download is in it. Open the Zip file and you will see 5 items. Click on the Extract Tab. Follow the prompt to Extract and Exit the Zip file. You will now see the contents of the Zip file in your New Folder along with the Zip File you downloaded. Copy and Paste the MODS Folder that you can see to your SH4 Main Game Folder. Installing JSGME Copy and Paste the JSGME Application to your SH4 Main Game Folder. Open the JSGME Application and accept the prompts. Untick the option to View online user guide. Click on Finish to complete the installation. Open JSGME and Enable the Mods. Document Folder This contains all the information regarding the mods used in this collection. Note 1. If you have previously been playing a modded game you may wish to install this mega mod on a clean SH4 installation having used a Registry Cleaner. Note 2. If you have been playing an unmodded Stock/Vanilla Game then there is no need to re-install. Note 3. Large Address Aware (LAA) is an essential application for those of you who have a certain amount of spare ram. The SH4 game only allows 2gb of ram to be used. LAA allows your system to use what ram is available to your game. By using this application stops ctds where without it ctds would undoubtedly occur in the game at some time. Further information and instructions can be found in my Post #13 Large Address Aware (LAA) Easy Install. Picture 1. > Main folder needs to be opened. 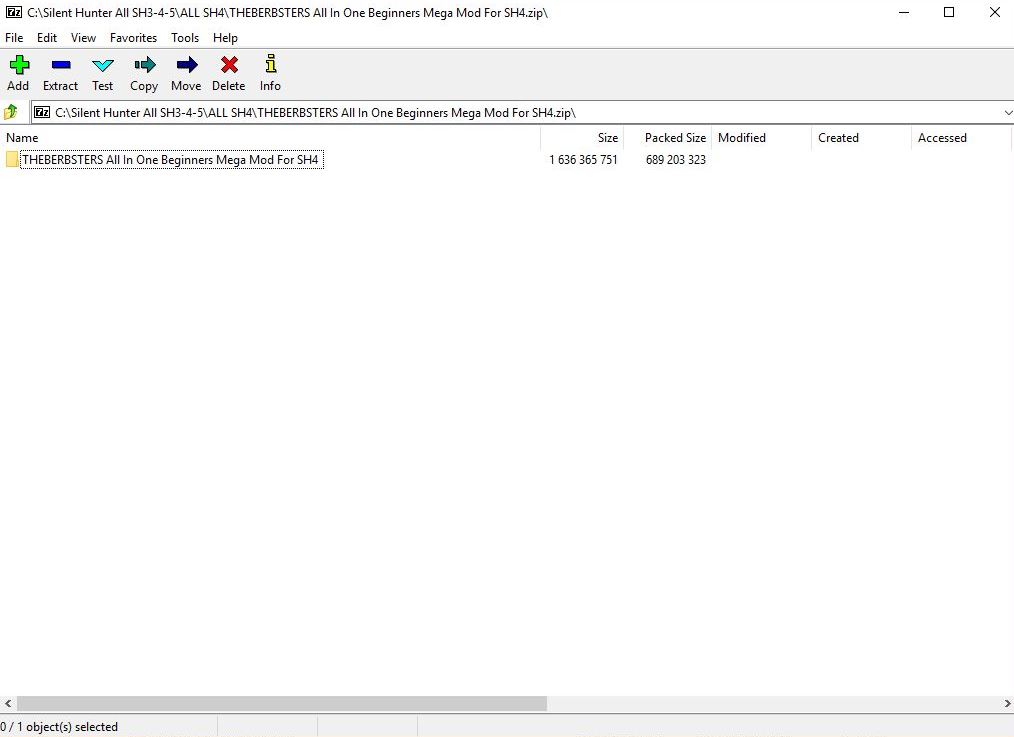 Picture 2 > Contents of Downloaded Zip File.  Picture 3. > These are the Mods used in this Mega Mod with options showing that can be changed by you. Note 4. Mod 2 New Orders Bar Menu does not need to be enabled when enabling the mod Max Optics IV for GFO 1.1 Note 5. Mod 17 should not be enabled. 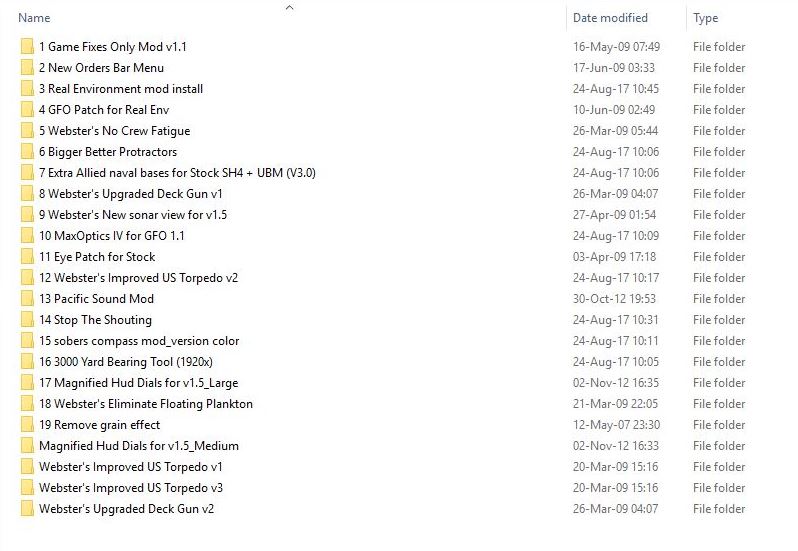 Picture 4. > Document Folder Mod Information Text Files you can open and read. 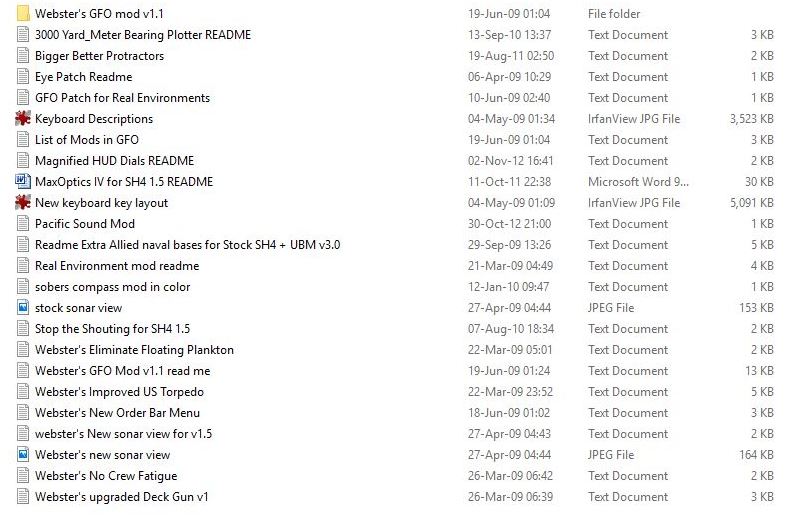 If you are going to install more than 1 version of SH4 the following options are available here. MulitiSH4 by Potoroo Silent Hunter 4 Corruption Management System (SH4CMS) Courtesy acknowledgement to all modders. A special thank you to Webster.
__________________
LSH3-2015 <> TUTORIALS <> ALL YOU NEED TO KNOW <> ALL IN ONE PLACE SH4 <> TUTORIALS <> HOW TO DO IT <> INFORMATION <> DOWNLOAD LINKS SH5 <> TUTORIALS <> HOW TO DO IT <> INFORMATION <> DOWNLOAD LINKS Always Here To Help A Fellow 'Subber' | Need An Answer to A Question Just Send Me A PM Last edited by THEBERBSTER; 05-15-19 at 04:09 PM. Reason: changed picture 2 |

|

|
|
03-16-15, 03:29 PM
|
#3 |
|
Growing Old Disgracefully
Join Date: Dec 2012
Location: Hythe - Southampton
Posts: 9,607
Downloads: 1132
Uploads: 0
|
How to move STEAM from the protected Program Files (x86) Directory to a new game folder.
Orignially Posted by propbeanie http://www.subsim.com/radioroom/show...postcount=5223 Originally Posted by Rockin Robbins Also, hopefully, said Steam game folder is not part of your \Program Files or \Program Files (x86) protected system directories ("directories" is what we call them on real computers, not "folders") Set up Steam to put new games in a different directory. Then you'll have to reinstall SH4 (you DO have the U-Boat Missions version, don't you?) in a root directory. Mine is C:\Steam games. Should be end of problem unless the mod isn't installed correctly. Keep us posted and we'll get you running! Originally Posted by lukterran How do you do that? Ever time I try and tell Steam to move the files into another directory it only wants to give me to move it into the D: drive and leaves no other options other than the default. Originally Posted by dodougla In Steam, Under Settings - > Downloads, there's a folder called Steam Library Folders and you can manage them there.
__________________
LSH3-2015 <> TUTORIALS <> ALL YOU NEED TO KNOW <> ALL IN ONE PLACE SH4 <> TUTORIALS <> HOW TO DO IT <> INFORMATION <> DOWNLOAD LINKS SH5 <> TUTORIALS <> HOW TO DO IT <> INFORMATION <> DOWNLOAD LINKS Always Here To Help A Fellow 'Subber' | Need An Answer to A Question Just Send Me A PM Last edited by THEBERBSTER; 01-17-18 at 05:15 PM. Reason: Retitiled |
|
|
|
|
03-16-15, 03:30 PM
|
#4 |
|
Growing Old Disgracefully
Join Date: Dec 2012
Location: Hythe - Southampton
Posts: 9,607
Downloads: 1132
Uploads: 0
|
Last updated 18th September 2018
More Advanced Mod List For SH4 When trying to find a popular suitable mod list that is interesting and challenging to a gaming level of expertise then I would place TMOwTw 2.50 at the level below. Only select 1 difficulty level from the 6 below. 1. Stock/Vanilla 2. Websters GFO 2. THEBERBSTERS All In One Beginners Mega Mod For SH4 v1 3. TMOwTw 2.50 = RFB 2.0 4. TMO v2.5 5. Fall Of The Rising Sun Ultimate (FOTRSU) 6. Traveller Mod v2.6 Final for TMO 2.5 Note > At level 4 TMO v2.5 will be a challenge to far for many but the level 3 interface mods offer a variety of a good selection of accompanying mods. Correct Mod Order with Download links. TMOwTw 2.50 Note > wTw 2.50 Max Optics with Crosshair (Found in the 5th Folder) Webster's Eliminate Floating Plankton Eye Patch for TMO v1.7 (Found in 3rd Folder) Bigger Better Protractors Convoy Routes TMO Pacific Sound Mod Stop The Shouting wTw 2.50 Stock Sub Underwater Marker (Found in the 7th Folder) Note > TMOwTw 2.50 contains a number of add on mods that are included in the Documentation Folder
__________________
LSH3-2015 <> TUTORIALS <> ALL YOU NEED TO KNOW <> ALL IN ONE PLACE SH4 <> TUTORIALS <> HOW TO DO IT <> INFORMATION <> DOWNLOAD LINKS SH5 <> TUTORIALS <> HOW TO DO IT <> INFORMATION <> DOWNLOAD LINKS Always Here To Help A Fellow 'Subber' | Need An Answer to A Question Just Send Me A PM Last edited by THEBERBSTER; 09-18-18 at 10:47 AM. Reason: FOTRSU added |
|
|
|
|
03-16-15, 03:30 PM
|
#5 |
|
Growing Old Disgracefully
Join Date: Dec 2012
Location: Hythe - Southampton
Posts: 9,607
Downloads: 1132
Uploads: 0
|
Last updated 4th March 2015
This is a simple Tutorial for those having used Auto Targeting would like to have a try at using Manual Targeting. 1. When the Target first appears on the Map Pause the game, take the Ruler and draw a straight line from the Stern through the Bow centre to past your sub. 2. This is the Target Course Line (TCL). 3. Next is to get the Targets Speed using the 3.15 second rule. 4. With the Protractor draw out a 90ᴼ line on the TCL and move the sub on to it. 5. Dive to Periscope depth so you are not seen. 6. The sub must be stopped before taking any further measurements. 7. If the target is using a fixed course then the only later change needed will be to the Range. 8. Identify the Target as soon as possible. 9. Set up the Torpedoes and use the Q key to open the Torpedo doors. 10. Make sure that the Protractor arrow is in the middle of the sub and move the 90ᴼ to 80ᴼ. 11. Take the Ruler and from the centre of the sub and draw down the 80ᴼ line to the TCL. 12. The distance showing is the Range. 13. The Periscope firing position will either be 10ᴼ or 350ᴼ depending which way the target is approaching. 14. 10ᴼ = 80ᴼ AOB Port 15. 350ᴼ = 80ᴼ AOB Starboard. 16. We have all the Data needed to enter manually in to the TDC > Speed > AOB > Range. 17. Position your Periscope Bearing first and do not forget to press the Red Button each time you enter Data in the TDC. 18. Move the Periscope to lock the Target and lower it a little so it will not be seen. 19. You will notice as the Target moves so your Periscope Bearing moves with it. 20. When the target is about 1,500 yards away Pause the Game redraw the TCL > redraw 80ᴼ redraw Range. 21. Enter any new Range in to the TDC adding 20 yards and pressing the Red Button to update the TDC. 22. When the Target shows on the Periscope Bearing either 10ᴼ or 350ᴼ press the Position Keeper (PK) Button and it will show a red colour to let you know it is tracking the Target. 23. Press the F6 (Attack Map) immediately and you will see your firing solution. 24. If you have followed my instructions you should be seeing a near perfect firing solution. 25. Fire the Torpedoes. You will have noticed that this simple method does not use the Stadimeter. Using this method if you are within a 1,000 yards it should give you a high level of success.
__________________
LSH3-2015 <> TUTORIALS <> ALL YOU NEED TO KNOW <> ALL IN ONE PLACE SH4 <> TUTORIALS <> HOW TO DO IT <> INFORMATION <> DOWNLOAD LINKS SH5 <> TUTORIALS <> HOW TO DO IT <> INFORMATION <> DOWNLOAD LINKS Always Here To Help A Fellow 'Subber' | Need An Answer to A Question Just Send Me A PM Last edited by THEBERBSTER; 01-17-18 at 05:15 PM. |
|
|
|
|
03-16-15, 03:31 PM
|
#6 |
|
Growing Old Disgracefully
Join Date: Dec 2012
Location: Hythe - Southampton
Posts: 9,607
Downloads: 1132
Uploads: 0
|
Directly from the un-modded game:
Mark 10 Torpedo Speed: 36 kt|Range: 3,200 m|Propulsion: Steam Mark 14 Torpedo Speed: 46/31 kt|Range: 4,100/8,200 m|Propulsion: Steam Mark 16 Torpedo Speed: 46 kt|Range: 12,500 m|Propulsion: Hydrogen Peroxide Mark 18 Torpedo Speed: 29 kt|Range: 3,600 m|Propulsion: Electric Mark 23 Torpedo Speed: 46 kt|Range: 4,100 m|Propulsion: Steam Mark 27 Cutie Torpedo Speed: 12 kt|Range: 4,500 m|Propulsion: Electric Homing torpedo Courtesy acknowledgement to fred8615
__________________
LSH3-2015 <> TUTORIALS <> ALL YOU NEED TO KNOW <> ALL IN ONE PLACE SH4 <> TUTORIALS <> HOW TO DO IT <> INFORMATION <> DOWNLOAD LINKS SH5 <> TUTORIALS <> HOW TO DO IT <> INFORMATION <> DOWNLOAD LINKS Always Here To Help A Fellow 'Subber' | Need An Answer to A Question Just Send Me A PM Last edited by THEBERBSTER; 01-17-18 at 05:16 PM. |
|
|
|
|
03-16-15, 03:32 PM
|
#7 |
|
Growing Old Disgracefully
Join Date: Dec 2012
Location: Hythe - Southampton
Posts: 9,607
Downloads: 1132
Uploads: 0
|
Check the location link below for more information.
http://www.subsim.com/radioroom/show...5&postcount=45
__________________
LSH3-2015 <> TUTORIALS <> ALL YOU NEED TO KNOW <> ALL IN ONE PLACE SH4 <> TUTORIALS <> HOW TO DO IT <> INFORMATION <> DOWNLOAD LINKS SH5 <> TUTORIALS <> HOW TO DO IT <> INFORMATION <> DOWNLOAD LINKS Always Here To Help A Fellow 'Subber' | Need An Answer to A Question Just Send Me A PM Last edited by THEBERBSTER; 12-07-18 at 04:47 PM. Reason: Additional information |
|
|
|
|
03-16-15, 03:32 PM
|
#8 |
|
Growing Old Disgracefully
Join Date: Dec 2012
Location: Hythe - Southampton
Posts: 9,607
Downloads: 1132
Uploads: 0
|
Changing Nvidia and AMD Radeon GPU Settings.
Check that your GPU is using the latest drivers! NVIDIA Picture 1 > Adjust the > Desktop Size and Position. Change the GPU Scaling Mode to > Aspect Ratio. Go to the > Control Panel to do this. Select > Your GPU Control Panel  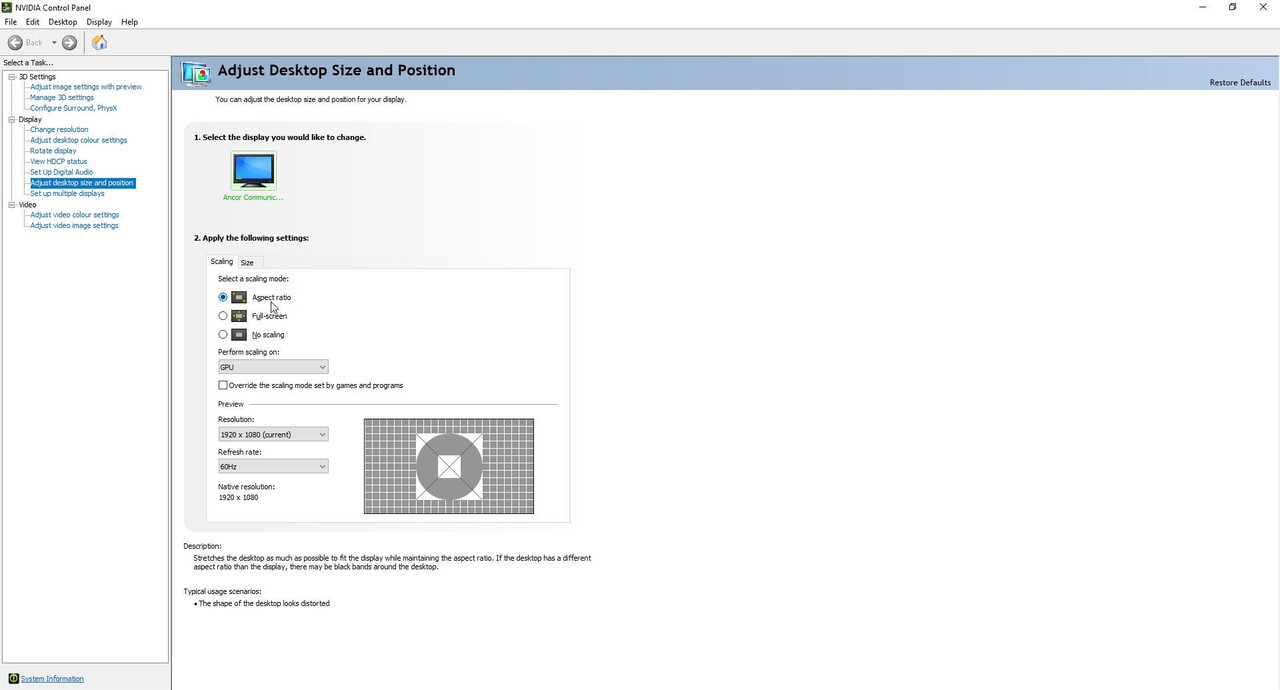 Picture 2 > Adjust the > Desktop Size and Position. Change the GPU Scaling Mode to perform on > GPU Go to the > Control Panel to do this. Select > Your GPU Control Panel  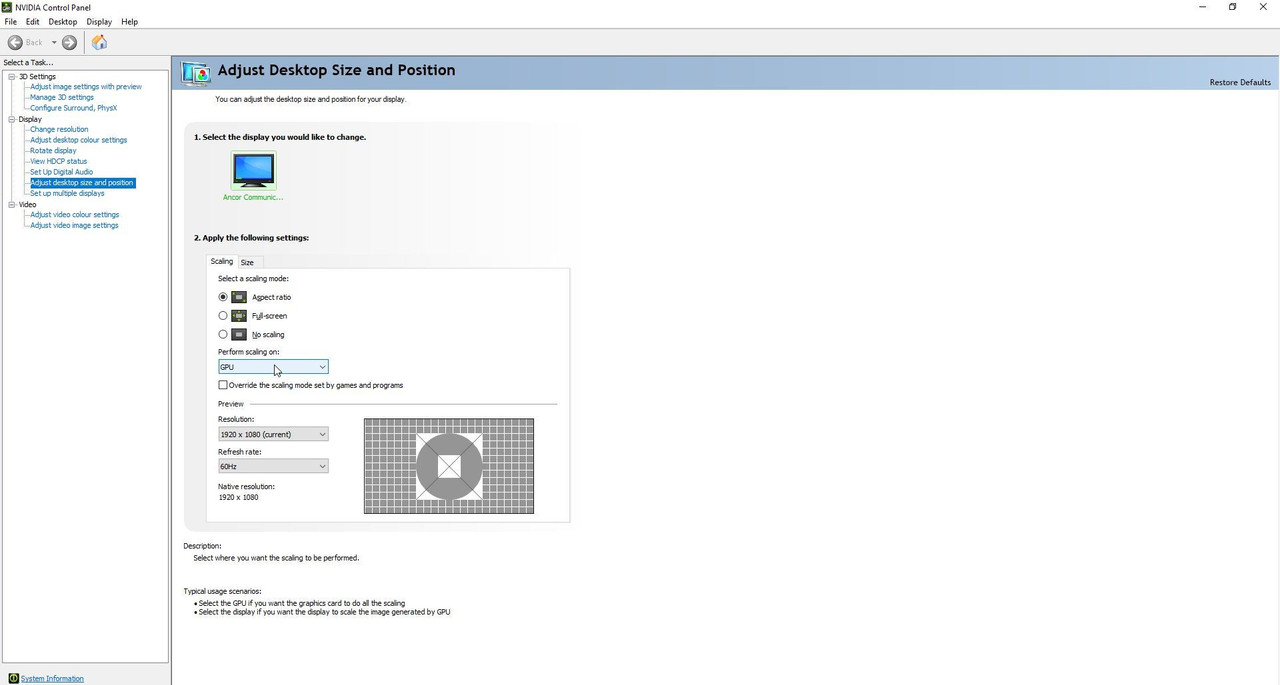 Last edited by THEBERBSTER; 05-01-18 at 05:41 PM. |
|
|
|
|
03-16-15, 03:33 PM
|
#9 |
|
Growing Old Disgracefully
Join Date: Dec 2012
Location: Hythe - Southampton
Posts: 9,607
Downloads: 1132
Uploads: 0
|
Changing AMD Radeon GPU Settings
This is a generalisation for AMD GPUs yours maybe different but the principal needed is just the same. Go to > AMD Radeon GPU Driver Settings In The AMD Catalyst Control Centre. Click the Right Mouse Button > Select AMD Catalyst Control Centre. Go to > Advance View > Settings > Options Under My Digital Flat Panels Select > Properties Change the following settings options as available: Image Scaling > Enable GPU Scaling or Image Scaling > Maintain Aspect Ratio or Image Scaling >Scale Image To Full Panel Size Apply to save the changed settings. Confirm. Re-boot your system. Last edited by THEBERBSTER; 01-17-18 at 05:17 PM. |
|
|
|
|
03-16-15, 03:33 PM
|
#10 |
|
Growing Old Disgracefully
Join Date: Dec 2012
Location: Hythe - Southampton
Posts: 9,607
Downloads: 1132
Uploads: 0
|
New Tutorial 2nd May 2018
How To Change SH4 To Full Wide Screen Resolution In SH4 > Option > Graphics you should be able to see your Monitor/Laptops Native Resolution by using the drop down box. If it is showing then you can make the change permanent. The default resolution for SH4 is 1024 x 768 which is based on the old VGA monitors using the 4.3 format when the game was first released. In this Tutorial I will show you how to change the resolution for example to the popular 1920 x 1080 wide screen resolution. The principal is the same for any Native Monitor/Laptop Resolution. Go to your > C: Drive > If you only have 1 drive it will be C: Go to > Documents Select > SH4 (Or your own saved game folder > Tutorial example is GFO) Go to > data Go to > Cfg Picture 1 > Highlight > the Main.cfg File and right click on it with your mouse and select > Properties.  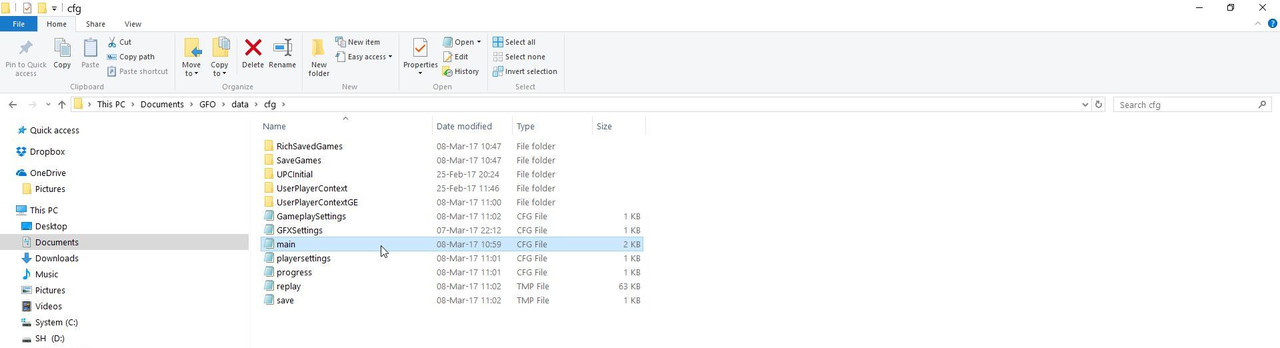 Picture 2 > If Read Only is ticked it needs to be unticked.  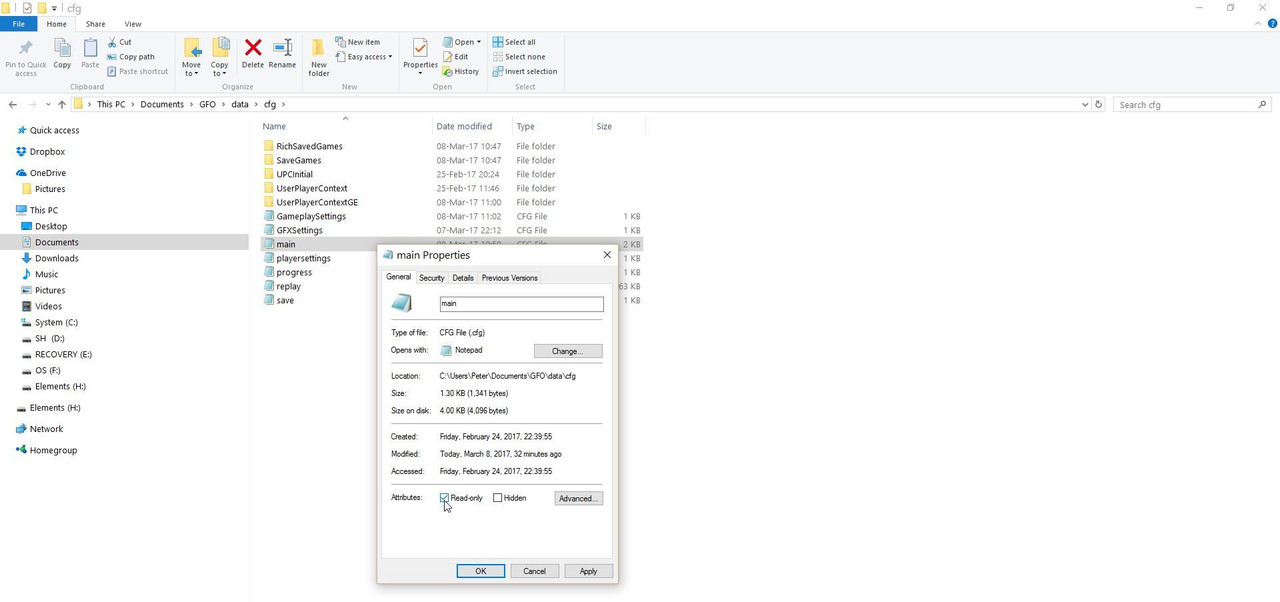 Picture 3 > Apply and then Ok to save the changes.  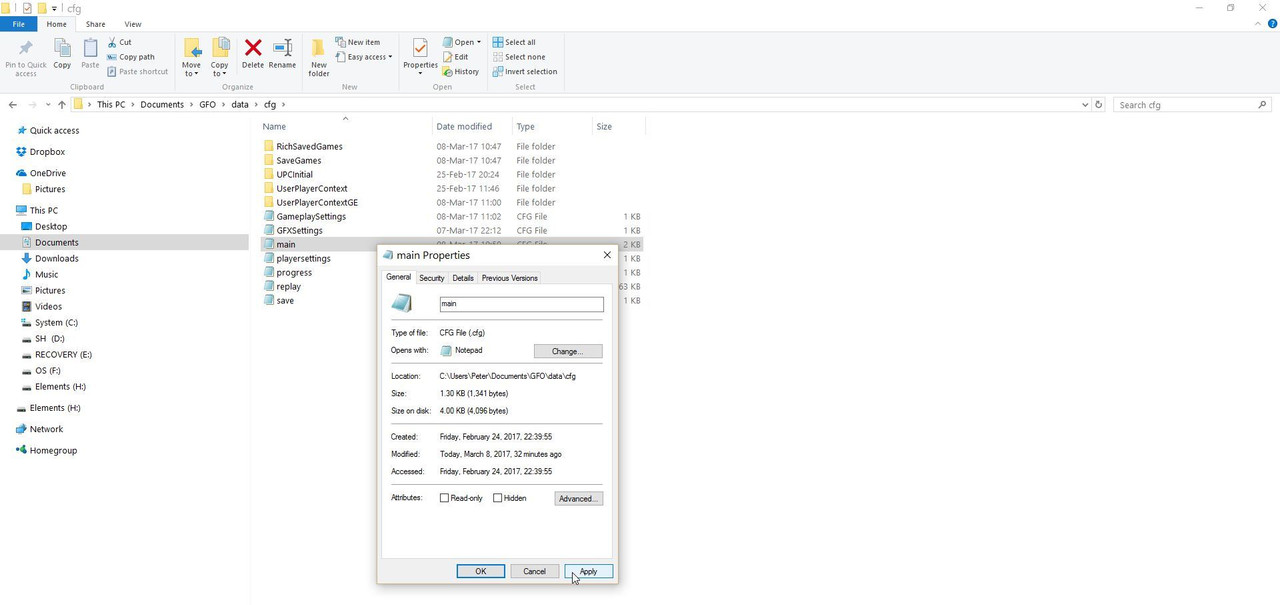 Open > Main cfg File. Picture 4 > Is showing the default setting 1024 x 768 60 HZ 22 on the left Notepad. The picture on the right Notepad shows the changed wide screen resolution to 1920 x 1080 60HZ > the 22 should not be changed. Enter your Native Monitor/Laptops Resolution and HZ.  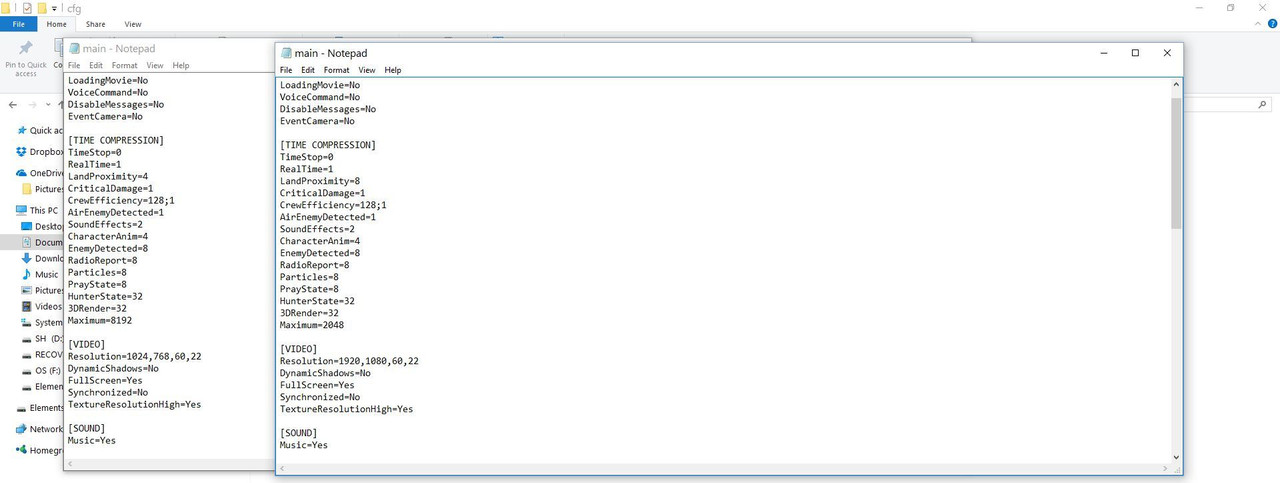 Go to > File Select > Save Exit.
__________________
LSH3-2015 <> TUTORIALS <> ALL YOU NEED TO KNOW <> ALL IN ONE PLACE SH4 <> TUTORIALS <> HOW TO DO IT <> INFORMATION <> DOWNLOAD LINKS SH5 <> TUTORIALS <> HOW TO DO IT <> INFORMATION <> DOWNLOAD LINKS Always Here To Help A Fellow 'Subber' | Need An Answer to A Question Just Send Me A PM Last edited by THEBERBSTER; 05-02-18 at 02:41 AM. Reason: Replaced missing pictures |
|
|
|
|
03-16-15, 03:34 PM
|
#11 |
|
Growing Old Disgracefully
Join Date: Dec 2012
Location: Hythe - Southampton
Posts: 9,607
Downloads: 1132
Uploads: 0
|
JSGME How To Move > Reposition > Delete > Add Mods Using A Mep File.
Important The only rule with using a Mep File is that the mod must exist in JSGME either disabled or enabled. The first thing to do is make a new folder where you want to store your Mep files and give it a name. You might also want to make a desktop shortcut so you can find the folder easily. You can Minimize and Maximize JSGME and the access it easily from the Task Bar. Go to Tasks in JSGME Select Save mod profile Save it in your new folder. Name it Mep1 Make a copy of it. Rename it Mep2 Lets say for example that you wanted to change the resolution of the 3000 Yard Bearing Tool (1440x) Mod to the 1024x resolution. See Note 1 You have downloaded the new mod and it is in the disabled side of JSGME. Open Mep2 Go to the mod and carefully remove only 1440 and replace it with 1024. To finish, the mouse curser must be placed at the end of the last mod. Go to > File. Select > Save. Exit. Go to Tasks in JSGME Select Load mod profile It should take you to the new folder where you have the 2 mep files showing. Double click on Mep2 You will see the mods being disabled to get back to the mod that needs changing. It then rebuilds the mod file enabling the 1024x and disabling 1440x It might appear that nothing is happening but it is, so be patient. Mods can be edited this way or even over typed as long as it appears exactly as the mod shows in JSGME or you will see an error message and the mod will be excluded. Saving an Existing Mep File as a different number. To save an existing Mep file as a different number. The easiest way is just make a copy of it and give it a new name/number. The original copy is always available if needed as a backup. You always work with the new Mep number. Saving a Mep File using Save As. To finish, the mouse curser must be placed at the end of the last mod. Go to > File. Select > Save As. Give the Mep File a name and add after it .mep Use the drop down arrow and change the file type to All files Click on > Save Exit. Adding new mods. Enable the mods you want to add in JSGME after the last mod in any order. See Note 2 Save the Mod profile as before and give it a new number. Open the Mep file. Go to the mod above where you want to position one of the new mods. (The new mod will be positioned below it). Position the mouse curser at the end of the mod as you want to create an empty space below it. Press return and an empty space will be created. Highlight and Cut the mod you want to reposition. Put the mouse curser at the beginning of the empty space and paste. Use the Del Key to delete the empty space where the mod was Cut from. To finish, the mouse curser must be placed at the end of the last mod. Go to > File. Select > Save. Exit. Go to Tasks in JSGME. Select Load mod profile It should take you to the new folder where you have the Mep files. Double click on the correct Mep number. It then rebuilds the mod file in the order you made disabling the mods as far back as it needs before re-enabling to the new mod order you chose. It might appear that nothing is happening but it is, so be patient. Deleting a Mod Follow the previous instruction regarding making a new Mep File. Highlight the mod to be deleted. Press the Del Key. Press the Del Key again to remove the empty space. To finish, the mouse curser must be placed at the end of the last mod. Go to > File. Select > Save. Exit. Important. There must never be an empty space below the last mod in the Mep File otherwise you will get an error message as will happen if you forget to put the curser at the end of the last mod. Note 1. If you have in yourmod list the 3000 Yard Bearing Tool mod being overwritten it will not work and needs to be moved. Use the Adding New Mods instructions how to create the new space. Note 2. When adding mods at the end of JSGME if they do not overwrite any other mods other than the main mod then you should not need to reposition them.
__________________
LSH3-2015 <> TUTORIALS <> ALL YOU NEED TO KNOW <> ALL IN ONE PLACE SH4 <> TUTORIALS <> HOW TO DO IT <> INFORMATION <> DOWNLOAD LINKS SH5 <> TUTORIALS <> HOW TO DO IT <> INFORMATION <> DOWNLOAD LINKS Always Here To Help A Fellow 'Subber' | Need An Answer to A Question Just Send Me A PM Last edited by THEBERBSTER; 01-17-18 at 05:17 PM. |
|
|
|
|
03-16-15, 03:35 PM
|
#12 |
|
Growing Old Disgracefully
Join Date: Dec 2012
Location: Hythe - Southampton
Posts: 9,607
Downloads: 1132
Uploads: 0
|
Last updated 2nd May 2018
How to roll back your GPU Driver to a previous version. If you have just experienced a black screen when starting your Silent Hunter game then a Windows update will have changed your GPU Driver to a later version. This tutorial will show you how you can get your game back. Picture 1 > Go to the Windows start Icon in the bottom left hand corner.  Picture 2 > Click on the Settings Icon. 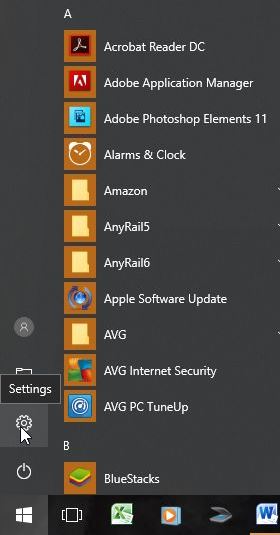 Picture 3 > Click on System. 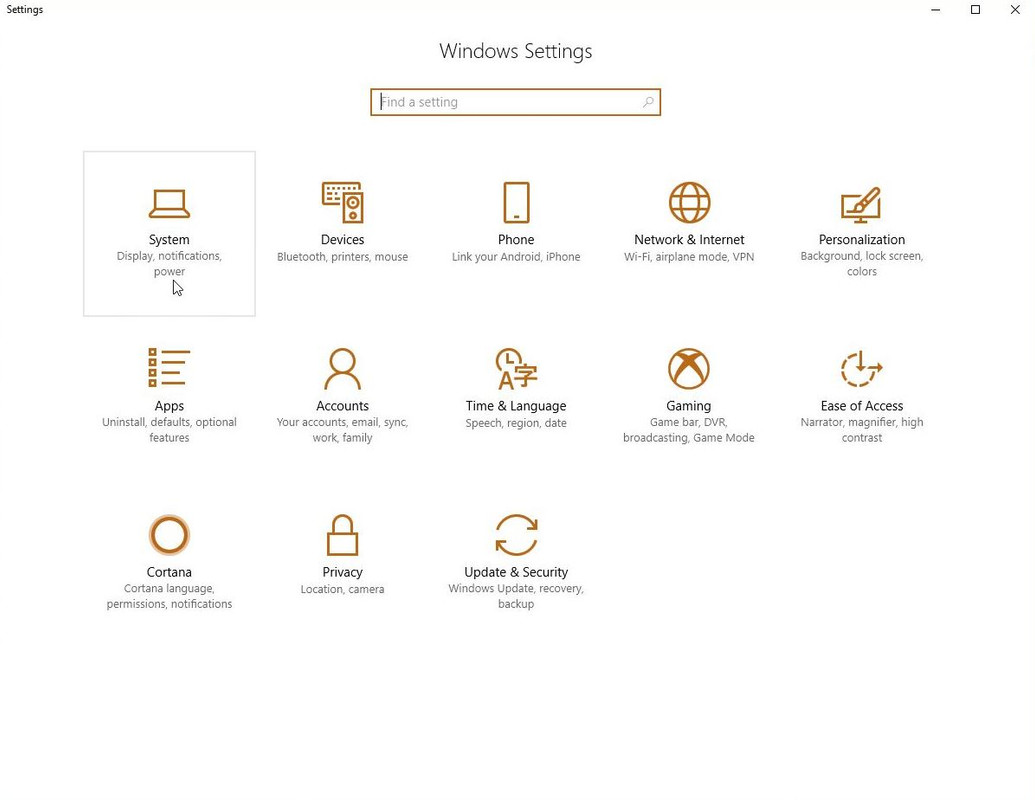 Picture 4 > Click on Display Adaptor Properties. This will show the Adaptor Tab. 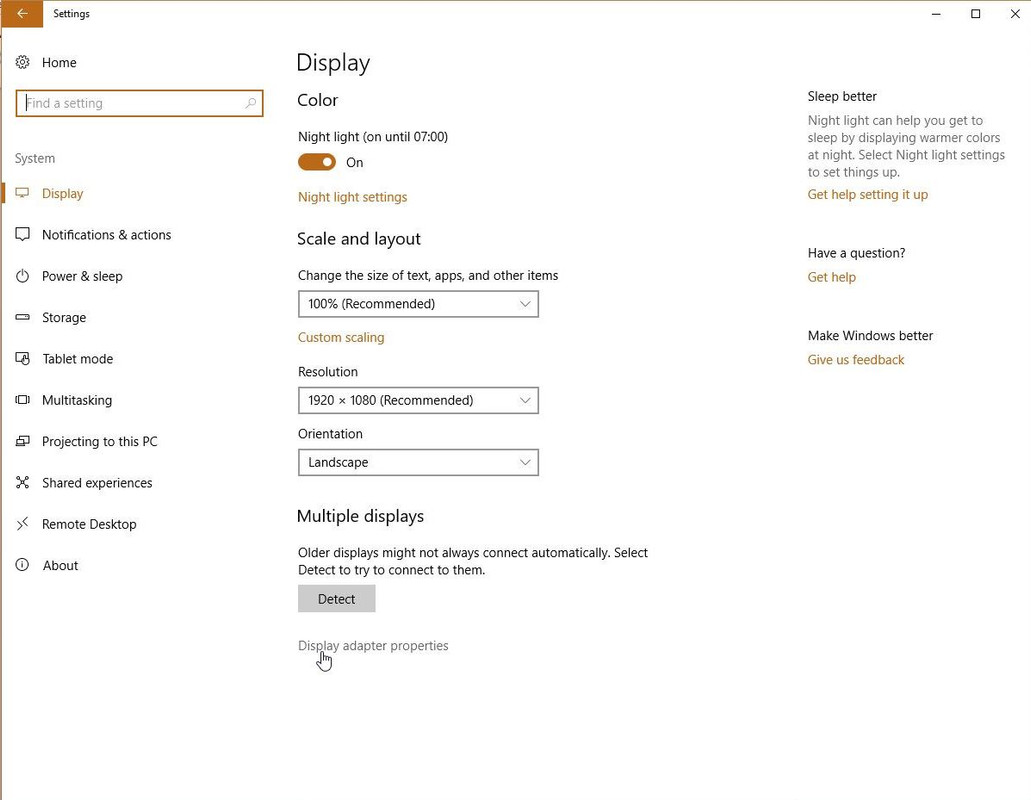 Picture 5 > Click on Properties. 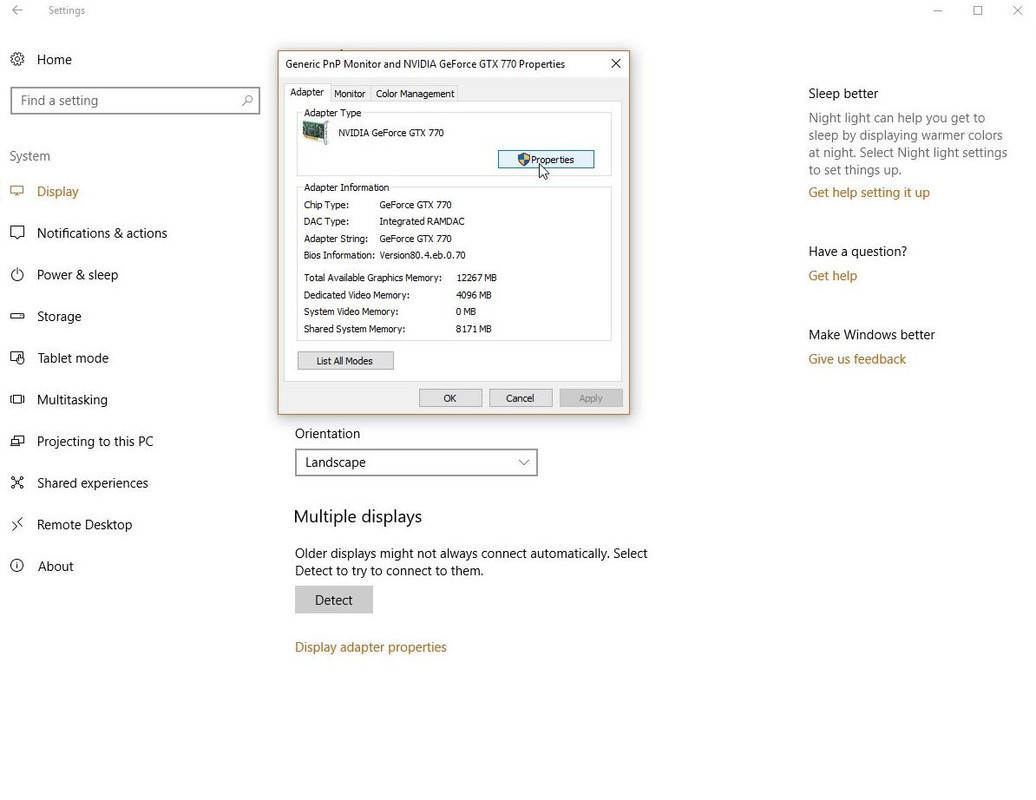 Picture 6 > Change from General to Driver Tab. The Driver Tab shows various options available to you. Update Your Driver is worth considering as it may fix the problem. 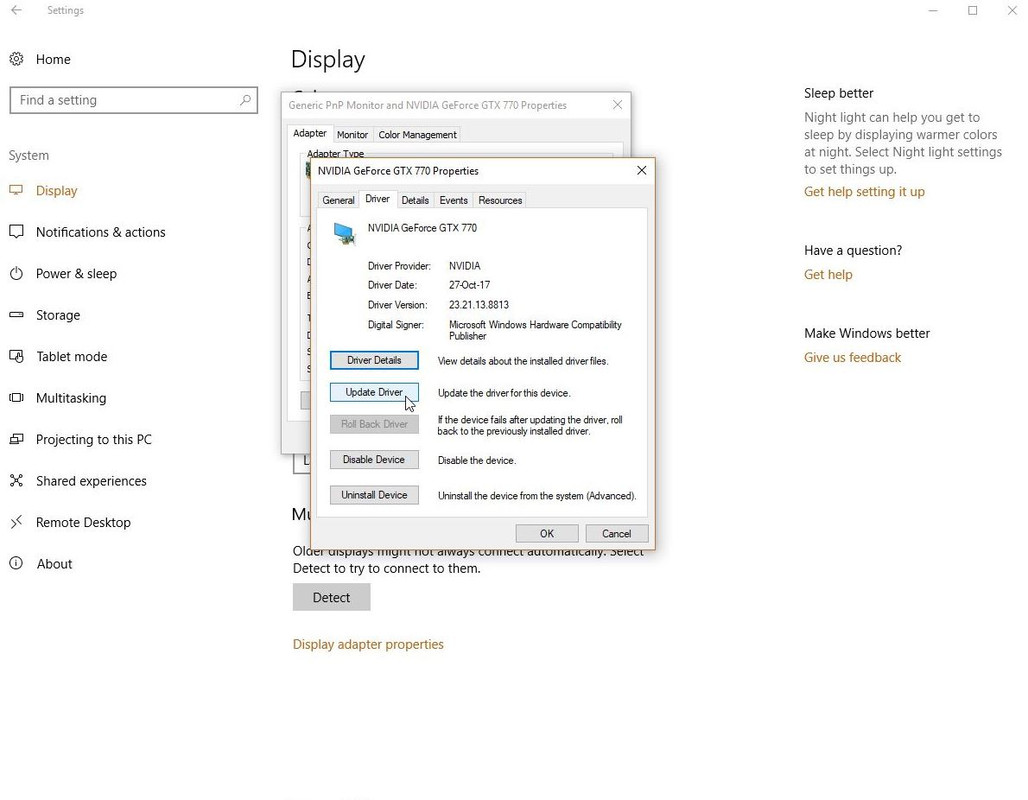 Picture 7 > Option 3 is to Roll Back Driver. 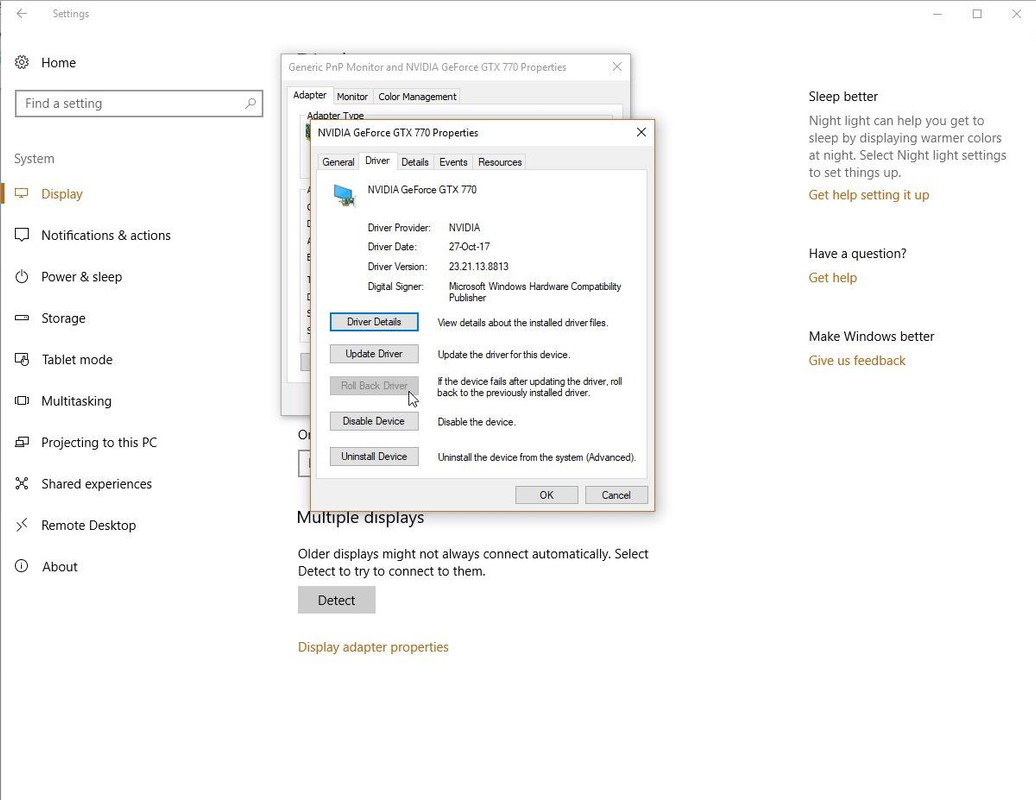 If this is not greyed out as in the picture then this option is available to you and recommended. The Roll back process takes less than a minute to do this. Click on Close to finish the process. Restart your system. You now need to make changes to your GPU settings as these will have been removed in the roll back process. Post #8 Changing The GPU Settings > Pictorial
__________________
LSH3-2015 <> TUTORIALS <> ALL YOU NEED TO KNOW <> ALL IN ONE PLACE SH4 <> TUTORIALS <> HOW TO DO IT <> INFORMATION <> DOWNLOAD LINKS SH5 <> TUTORIALS <> HOW TO DO IT <> INFORMATION <> DOWNLOAD LINKS Always Here To Help A Fellow 'Subber' | Need An Answer to A Question Just Send Me A PM Last edited by THEBERBSTER; 05-02-18 at 02:49 AM. Reason: Replaced missing pictures |
|
|
|
|
03-16-15, 03:35 PM
|
#13 |
|
Growing Old Disgracefully
Join Date: Dec 2012
Location: Hythe - Southampton
Posts: 9,607
Downloads: 1132
Uploads: 0
|
Last updated 28th May 2022
Large Adress Aware (LAA) Easy Install LAA can be installed anywhere as it uses a browser that you point to find your SH4.exe. Click on the icon and you will see this screen.   Click on the browse button and look for your SH4.exe application icon. Common example would be C:\Ubisoft\Silent Hunter 4 Click on it. You will see it show in the path. The path will now show as in the picture example. 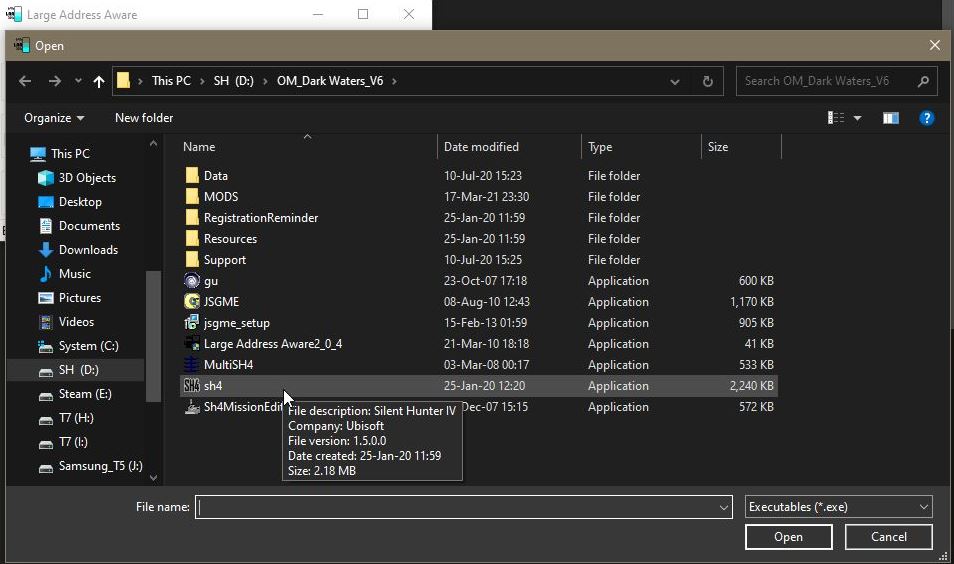 In Step 2 just tick the box. Click on Save and you are done and will not need to do this again. Optional. Repeat the same for the JSGME apllication.
__________________
LSH3-2015 <> TUTORIALS <> ALL YOU NEED TO KNOW <> ALL IN ONE PLACE SH4 <> TUTORIALS <> HOW TO DO IT <> INFORMATION <> DOWNLOAD LINKS SH5 <> TUTORIALS <> HOW TO DO IT <> INFORMATION <> DOWNLOAD LINKS Always Here To Help A Fellow 'Subber' | Need An Answer to A Question Just Send Me A PM Last edited by THEBERBSTER; 03-28-22 at 06:53 AM. Reason: Replaced missing pictures |
|
|
|
|
03-16-15, 03:36 PM
|
#14 |
|
Growing Old Disgracefully
Join Date: Dec 2012
Location: Hythe - Southampton
Posts: 9,607
Downloads: 1132
Uploads: 0
|
Hours and Minutes Imperial Speed Chart Tables
Download link http://www.mediafire.com/file/flga1e...26%20Hours.zip  
__________________
LSH3-2015 <> TUTORIALS <> ALL YOU NEED TO KNOW <> ALL IN ONE PLACE SH4 <> TUTORIALS <> HOW TO DO IT <> INFORMATION <> DOWNLOAD LINKS SH5 <> TUTORIALS <> HOW TO DO IT <> INFORMATION <> DOWNLOAD LINKS Always Here To Help A Fellow 'Subber' | Need An Answer to A Question Just Send Me A PM Last edited by THEBERBSTER; 05-02-18 at 03:57 AM. Reason: Replaced missing pictures |
|
|
|
|
03-16-15, 03:37 PM
|
#15 |
|
Growing Old Disgracefully
Join Date: Dec 2012
Location: Hythe - Southampton
Posts: 9,607
Downloads: 1132
Uploads: 0
|
How To Change DPI Scaling Having Changed The GPU Settings And You Still Have A Problem
Use this fix if you still have a problem in your game after you have carried out the instructions on Tutorial Posts 8 or 9. Picture 1 > Right click on the SH4.exe 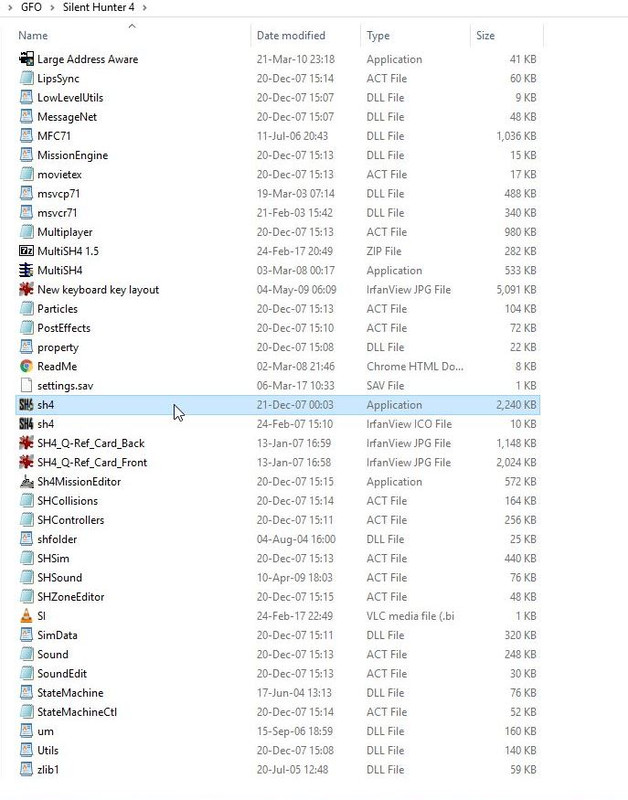 Picture 2 > Select Properties. 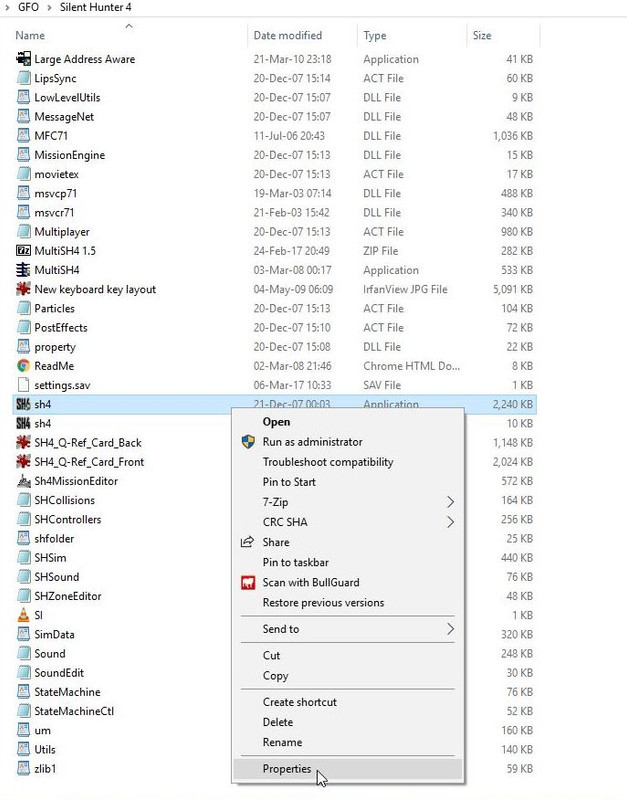 Picture 3 > Select Compatibility. 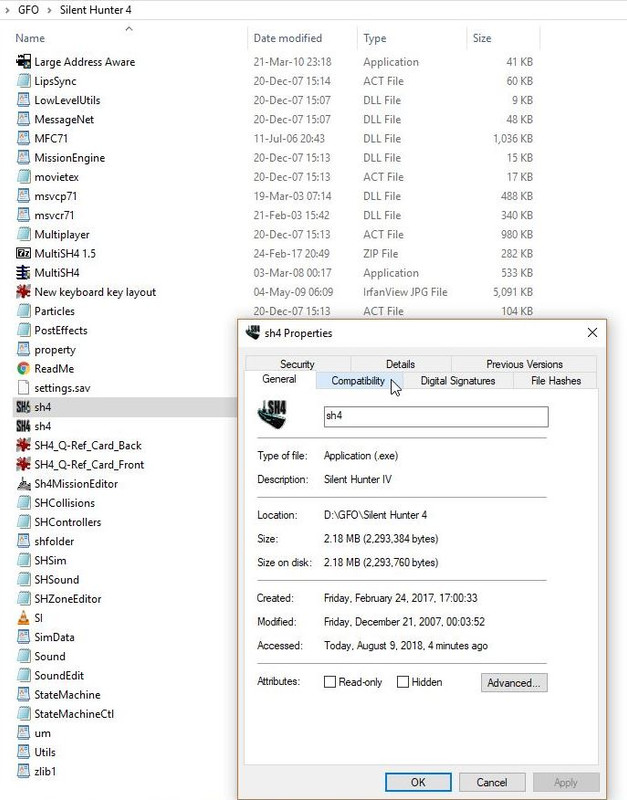 Picture 4 > Click on change High DPI settings. 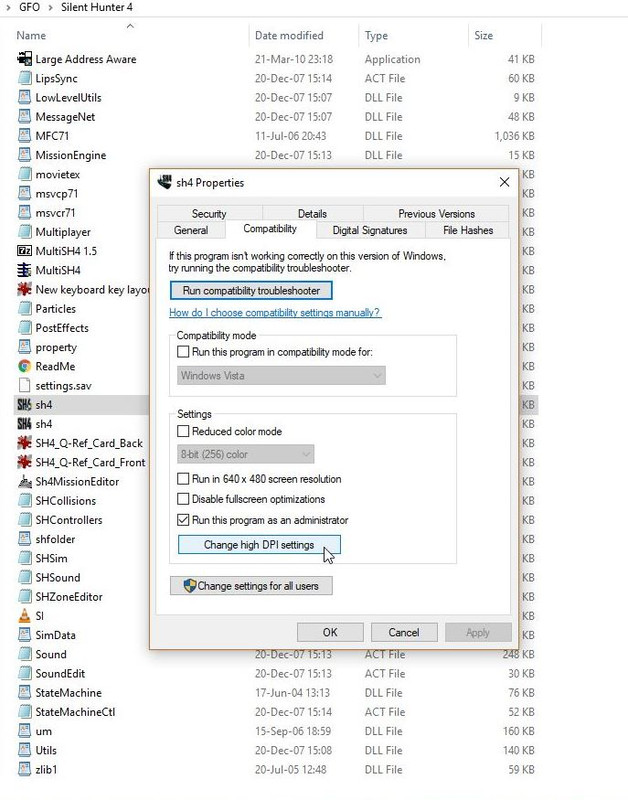 Picture 5 > High DPI Scaling Box. 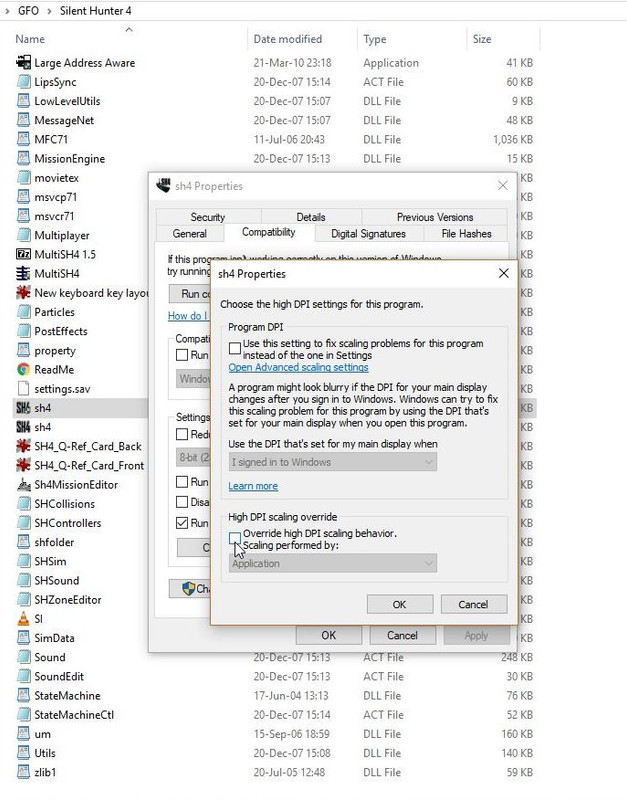 Picture 6 > Tick the Box. 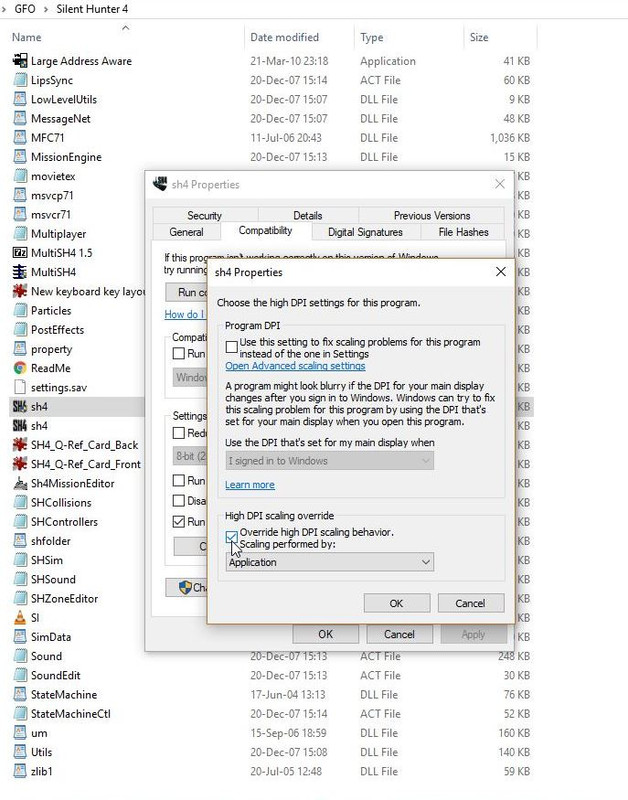 Picture 7 > Click OK to confirm the change. 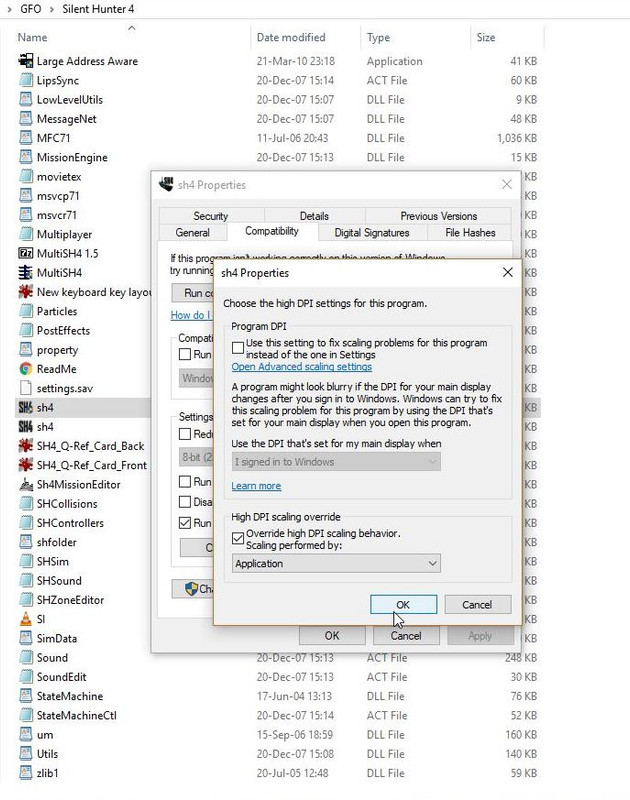 
__________________
LSH3-2015 <> TUTORIALS <> ALL YOU NEED TO KNOW <> ALL IN ONE PLACE SH4 <> TUTORIALS <> HOW TO DO IT <> INFORMATION <> DOWNLOAD LINKS SH5 <> TUTORIALS <> HOW TO DO IT <> INFORMATION <> DOWNLOAD LINKS Always Here To Help A Fellow 'Subber' | Need An Answer to A Question Just Send Me A PM Last edited by THEBERBSTER; 08-09-18 at 04:31 AM. |
|
|
|
 |
|
|


 Linear Mode

