
|
|
SUBSIM: The Web's #1 resource for all submarine & naval simulations since 1997
 |
SUBSIM: The Web's #1 resource for all submarine & naval simulations since 1997 |
 10-31-14, 04:35 AM
|
#1 |
|
Royal Kinotropist
Join Date: Mar 2007
Location: Sheffield, UK
Posts: 987
Downloads: 18
Uploads: 0
|
Morning chaps, been a little while since I posted anything on here. I mentioned a few months ago that I'd finally got round to getting Revell's awesome Flower Class kit. It's now nearing completion so I thought I'd post a build thread if it's any interest to you guys.
This is copy and pasted from the Flory Models forum on which I have entered it into their Operation Overlord Group Build, hence the captions on the photos, and if any text seems a bit odd lol - I've tried to edit it somewhat to make it make more sense. Anything in [square brackets] I've added just on here if any extra info was needed. Enjoy ---------------------------------------------------------------------------------- [20/07/2014] It was payday last Tuesday, so while things were slow at work I decided to jump on eBay to try and find some figures for my DUKW build [I built the Italeri 1/35 offering for the same Group Build, fantastic kit and I had a lot of fun with it - plenty of stowage!] Unfortunately after that everything went a bit hazy and a Flower Class Corvette turned up on my doorstep yesterday. Whoopsie!  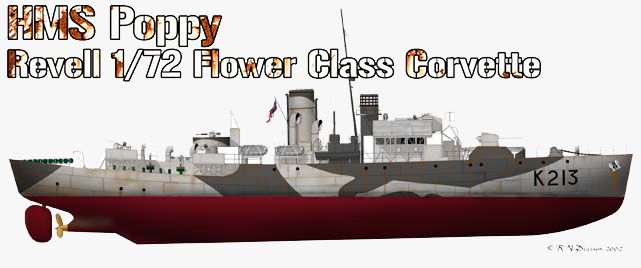 I've gotta say this is somewhat of a personal project, not in that I knew anyone who served on Poppy, but in the sense that this is something I have been wanting to do for a very long time. 15 years in fact. I remember when I was around 6 years old I went to my local boating lake with my dad to sail my teeny little Nikko (are they still around?) R/C boat. There was this old chap there around the other side of the lake with what was, to 6 year old me, a battleship! I'm sure you can guess that it was in fact a Flower Class Corvette, and is still to this day one of the most impressive models I've ever seen. It had movable guns (with sounds!), lights, anchors, and even the ship's boat could be raised or lowered on its davits, all controlled from the mother of all R/C transmitters around the guy's neck. I remember thinking to myself then, "one day, when I'm older and I have a job and money, I'm gonna build one of those." So here goes nothing! THE KIT: 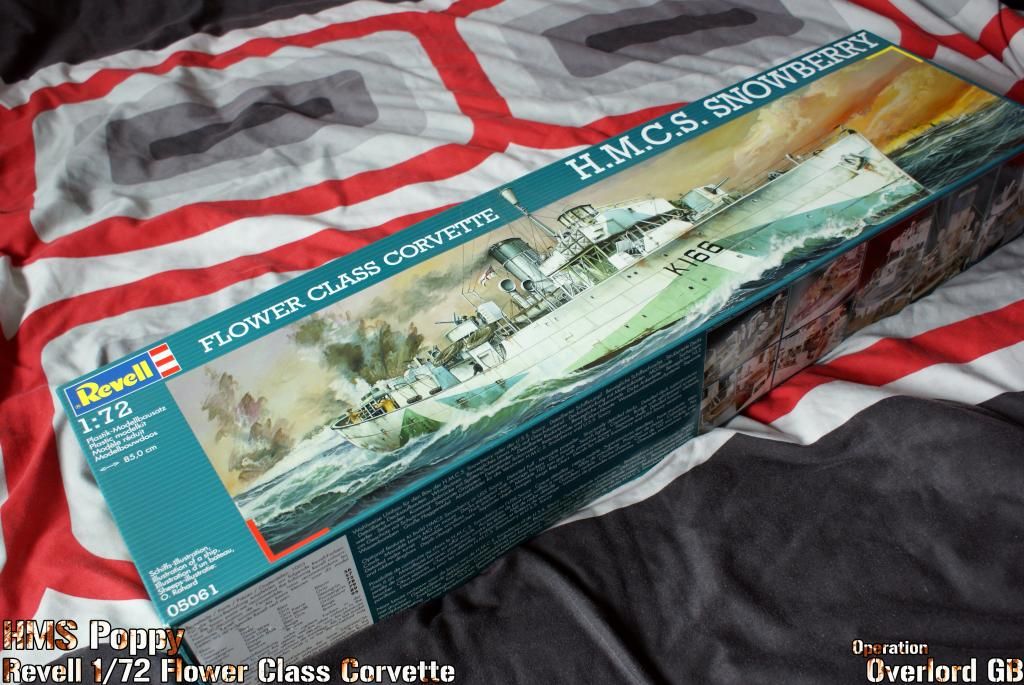 It comes in rather a large box it has to be said lol 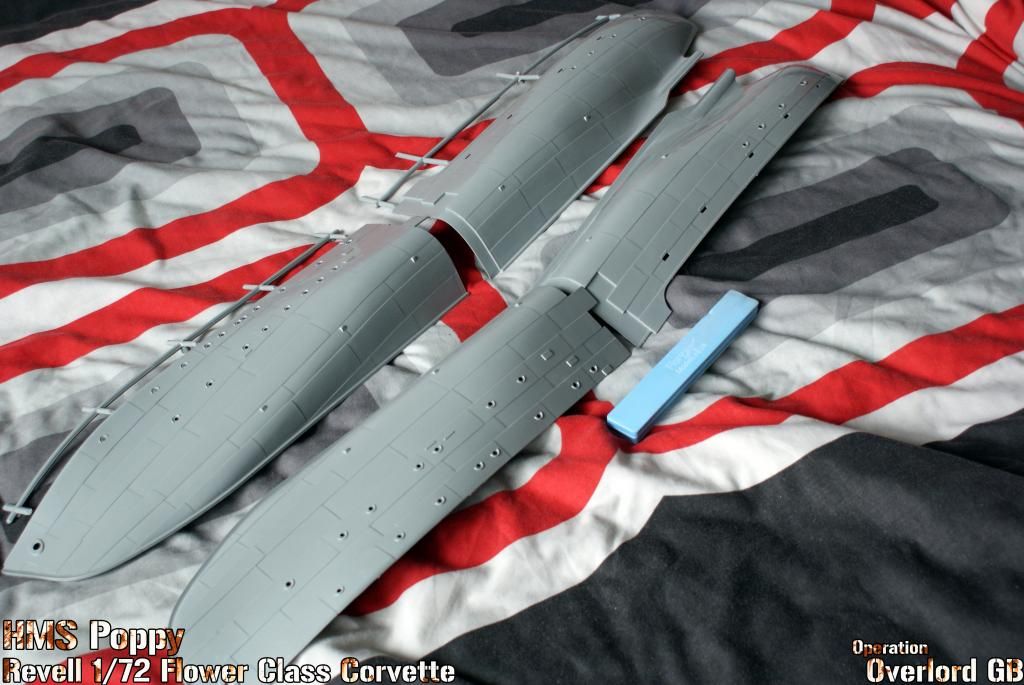 The hull is in 4 parts, with a Flory polishing sponge for scale 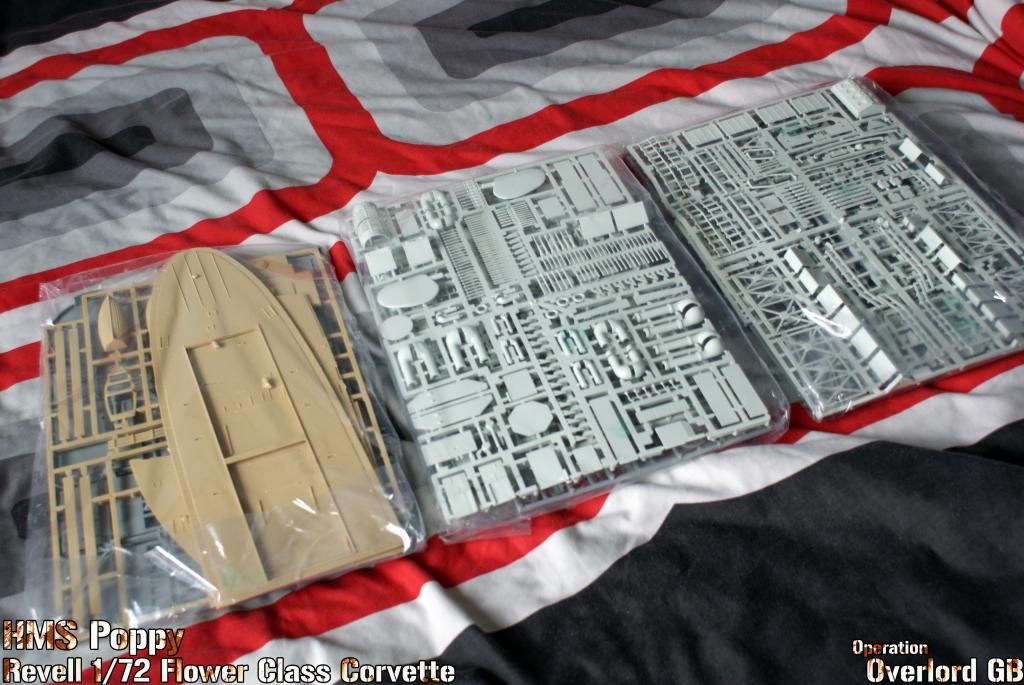 You will have to excuse me for not opening the sprues, I wanted to keep everything as safe as possible untill I need it. There's 3 sprues in each of those bags! 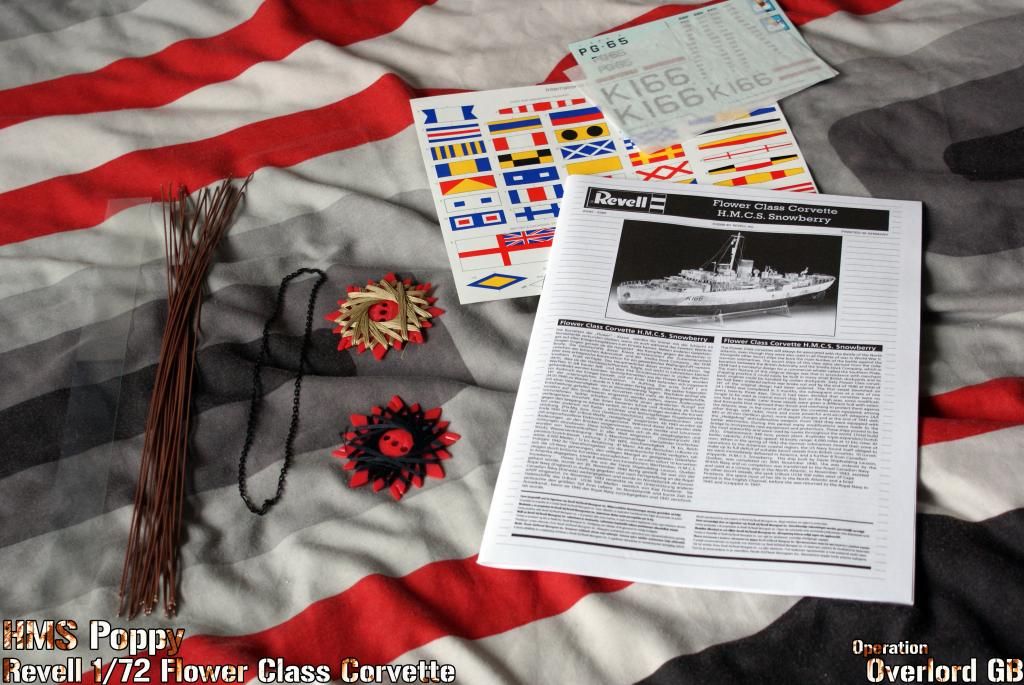 The thickest instruction booklet I've ever seen, along with the (redundant) Decals for HMCS Snowberry and USS Saucy (?!), plus the rigging/rope/cable, some clear acetate, plastic rods for the railings, metal anchor chain, and of course the flags. 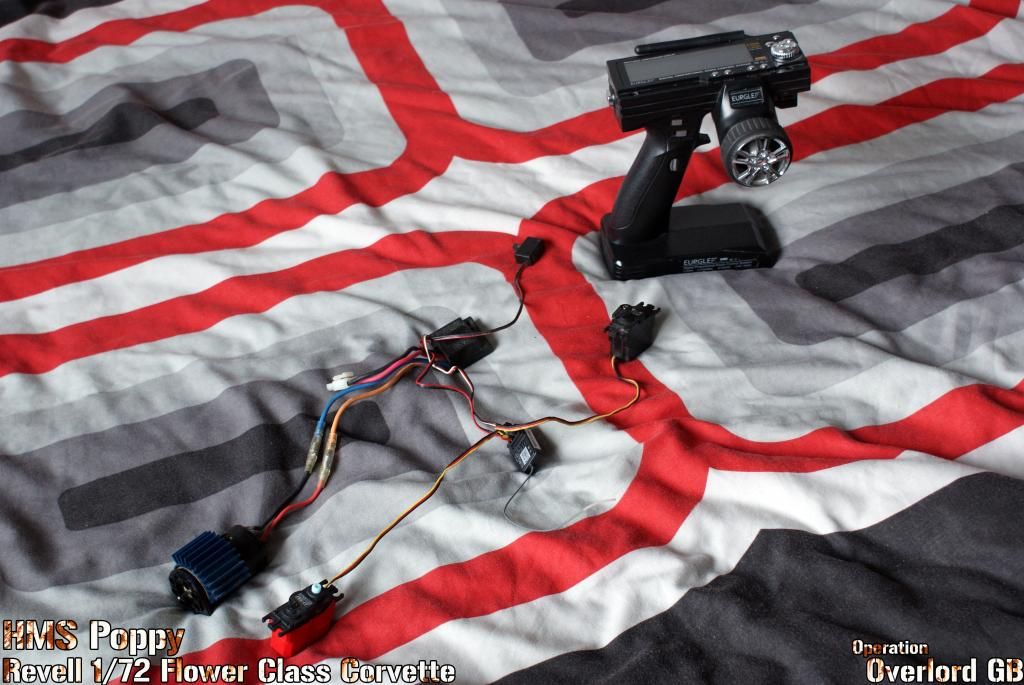 The hardware! All commandeered from my Tamiya TT-01. The sport tuned motor may be a little overkill but the transmitter allows me to limit the power. Nothing wrong with having a little extra speed in case a U-Boat comes along... or some children in a pedalo. There's also 2 servos, one for the rudder and one for the front 4 pounder Currently on order I also have: The correct brass 3 bladed prop, Brass prop shaft, Micro rudder around which I will sandwich the kit rudder with some epoxy, Universal joint to connect the prop shaft and motor, Some ball joints for the rudder linkage, Some plasticard; I'm predicting a fair bit of mild scratchbuilding, LEDs and battery box, yep I'm gonna be lighting her up! I'm also looking at perhaps getting a few aftermarket bits. I specifically didn't want to pay twice the price for the Platinum Edition of this kit as I didn't see the point in covering it with PE bits just for them to end up being pinged off getting it in and out of the water. I have in mind a Sirmar replacement armament set as the kit stuff is tosh, maybe a few crew, and possibly some railings. The kit railings are again, codswallop, but at the same time I don't want to be buying replacement sets if they're going to broken on semi-regular intervals. I will be having a think, and any suggestions would be much appreciated, bearing in mind I'm trying to keep to a budget. HMS POPPY: So, onto the ship herself. It took me a while to decide on which Corvette to base my build on. I didn't want to be doing any total conversions so I was trying to find one that was structurally similar to Snowberry, plus I was trying to find some of the less camp names, whoever decided it was a good idea to name warships after flowers?! With that in mind I came up with Poppy. Perhaps less camp than say, HMS Geranium, and certainly better than Candytuft... There are also a few good reference shots and a beautiful side elevation showing the camo scheme. There is plenty of history behind her too. Built by Alexander Hall of Aberdeen in March 1942, she was part of the escort of the ill-fated Convoy PQ17, took part in Operations Husky and Torch, and was of course present during the Normandy Landings. Her D-Day diary was fairly uneventful as far as it goes but the following is what she got up to during June 1944: Preparations for operation Neptune - convoy of pre-loaded coasters to Portsmouth - narrowly avoided collision with merchant ship at Spithead. June 6th : D-Day - Neptune Sheerness to Southend for convoy conference - sailed pm. Keyed up for action - uneventful trip as far as Dungeness - ordered to return to reinforce escort of later convoy. Sailed from Southend D+2 Sword beach: D+3 - returned with empty LSTs - regular routine to Sword, Juno and Gold beaches with coasters, LSTs and old ships for Mulberry harbour. MODIFICATIONS: So, onto the modifications I will be doing, aside from fitting all the R/C gear of course. The main difference between Poppy and Snowberry was the addition of 4 extra 20mm Oerlikon guns which were added on top of the engine room housing for Operation Torch in October '42, 3 of these can clearly be seen in this pic, the 4th being somewhere slightly out of the bottom of the shot as far as I can gather: 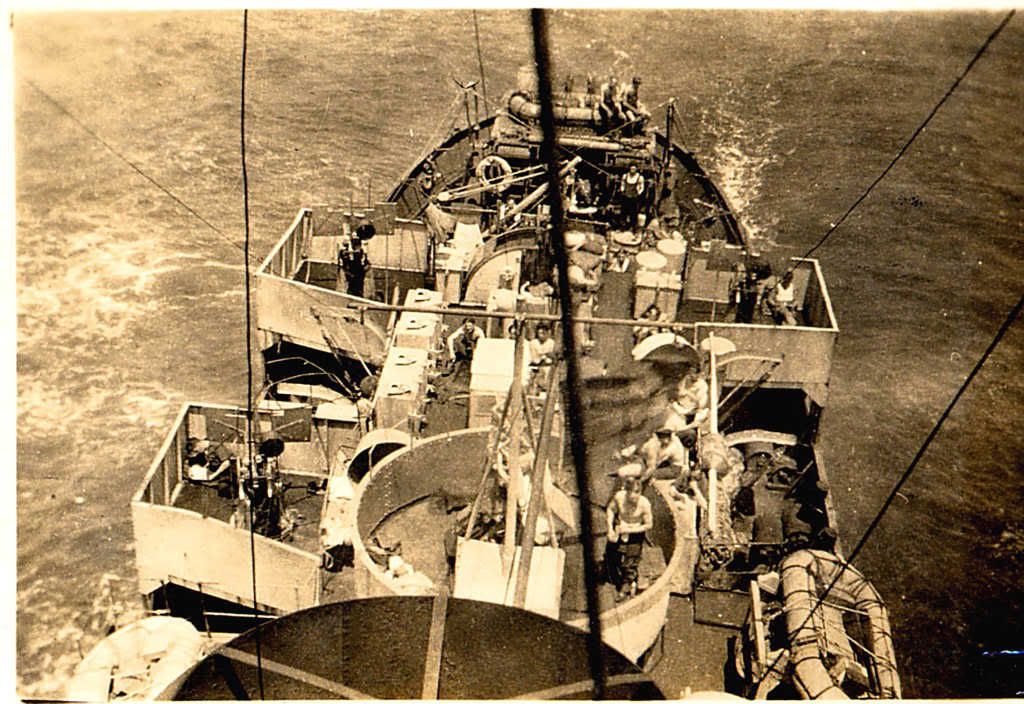 They shouldn't pose any problem to add, just a bit of plasticard for the platforms. The main thing will be the guns as, at £3.99 each for the Unimodel ones, it could start getting a little expensive. Plus I don't want to add all these superdetailed guns at the back when the rest are all rubbish, so I think it will be a case of replacing the lot. As I mentioned earlier, Sirmar do a replacement set which includes the front 4 pounder, the rear 2 pounder 'Pom Pom', along with the Oerlikons and I think a few Lewis guns and stuff, which I think is my best bet. Other than that, the wheelhouse will recieve a little bit of detail as I intend to stick some lights in there, the aerial thingamajig on top of the ASDIC hut is also a different shape but that will be an easy replacement, plus the flag locker is absolutely nothing like the real thing, so as it's such a glaringly obvious thing that will be replaced by a lovely PE one I found. So I think that's about it. I'm incredibly excited lol, I just hope I get it finished in time for November [The Group Build Deadline is November 23rd! Not long to go!] TBC...
__________________
Alex Don't judge a ship by the number of it's guns, but by the skill of it's crew. Last edited by ajrimmer42; 10-31-14 at 05:08 AM. |

|

|
 10-31-14, 04:38 AM
|
#2 |
|
Royal Kinotropist
Join Date: Mar 2007
Location: Sheffield, UK
Posts: 987
Downloads: 18
Uploads: 0
|
[20/07/2014]
UPDATE 1: 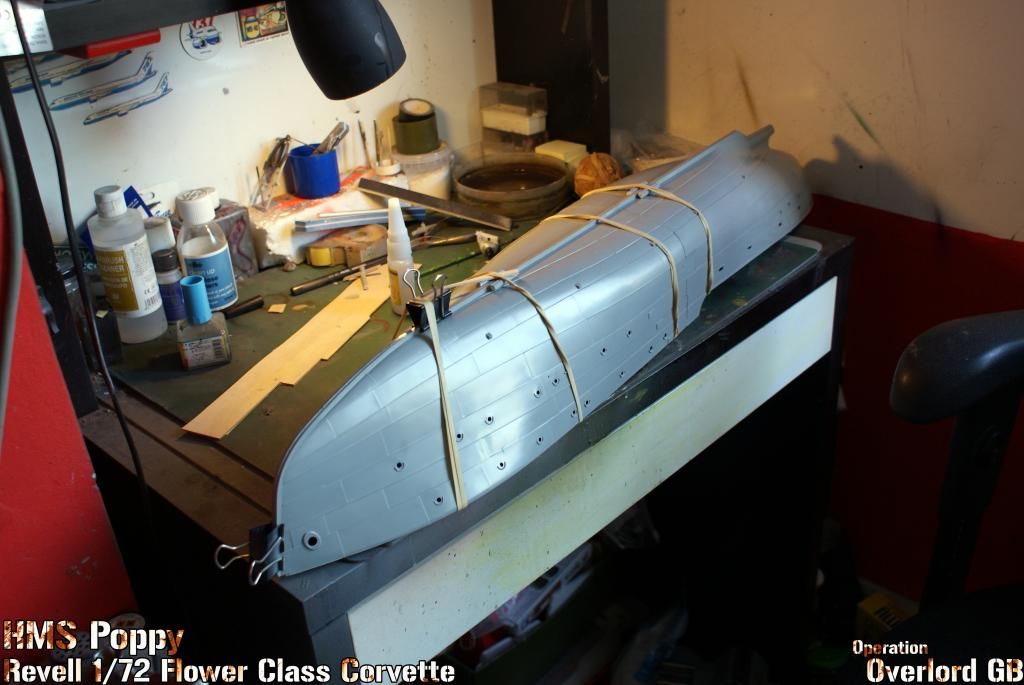 We're gonna need a bigger desk! First things first, the hull. The fit isn't brilliant on mine, I decided to glue the sides together first, then glue the 2 halves together. I'm not sure if this was the best way, I've seen people do both and say it worked for them so I guess it's personal preference. The sides themselves fit ok after a little sanding but bringing the halves together was a bit of a pain. The stern was just alright but the bow was totally out of shape, I had to start at the back, gluing and bulldog clipping along. Luckily bulldog clips fit perfectly on the keel. Still had a large gap in the middle though, but not a problem as the second job was to seal it all up with epoxy. I'm aware of the inaccuracy of the keel however I've made the decision to keep it as is, and just sand down where it will be seen like the bow. I figured the keel would add a bit more strength to the whole thing and maybe some stability in the water, although I think any effect would likely be negligible. A quick tip is to place the bracing spars in at this time too. I actually sandwiched mine between to balsa planks which really stiffened them up! This also allows rubber bands to be put around the hull without the upper part just caving in. 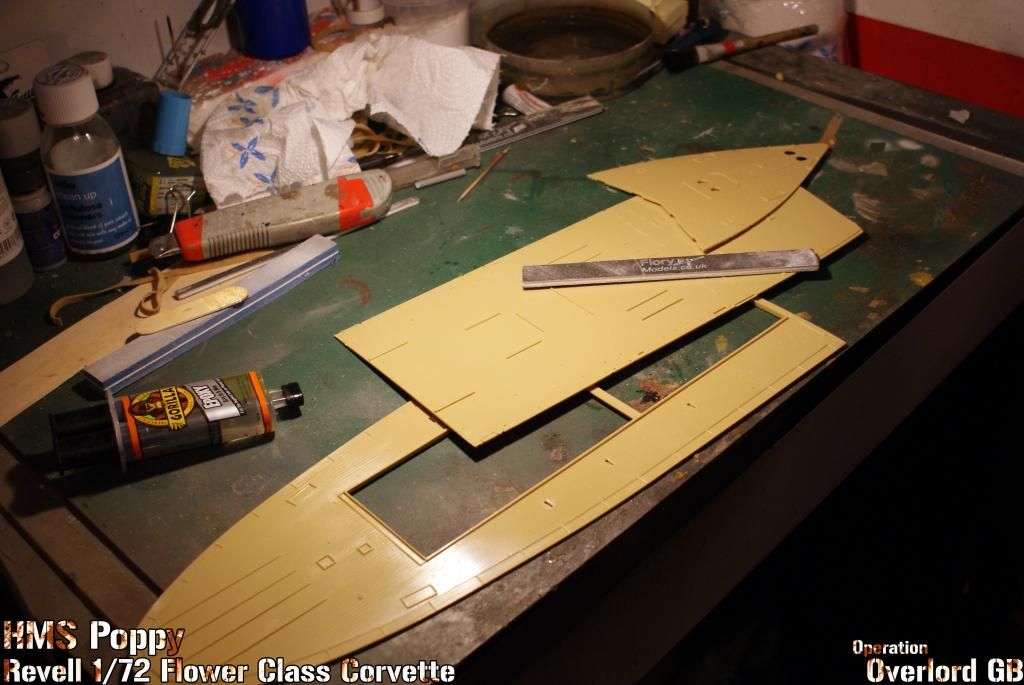 While the epoxy is drying I moved onto the other mammoth task of sanding the wood off the decks. It is raised detail however so isn't as difficult as it could be. 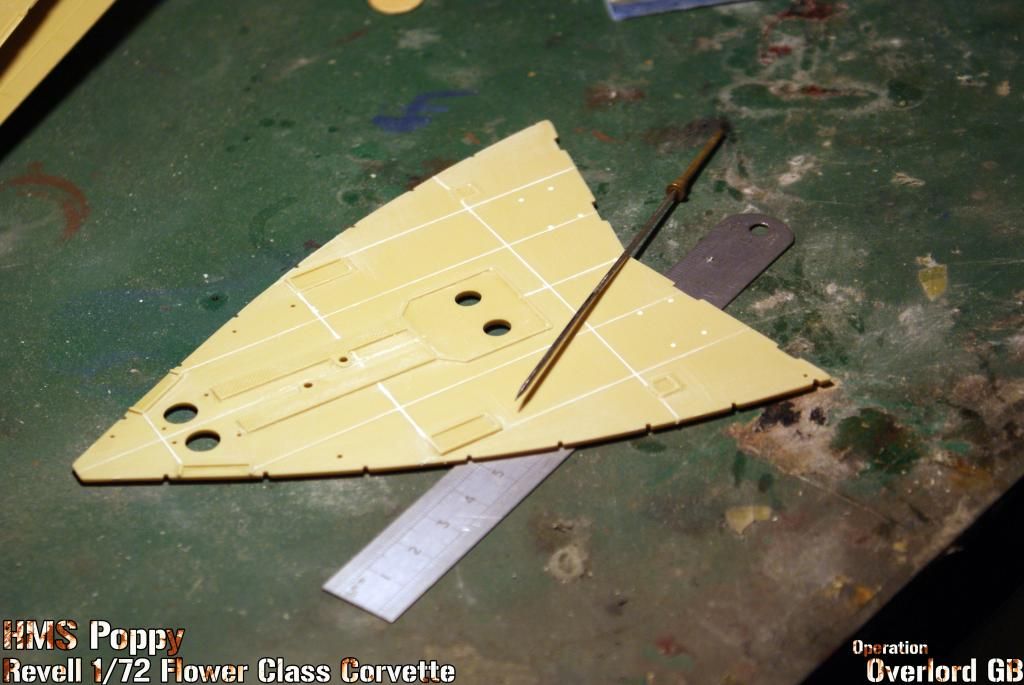 I zipped over it with the end of the metal rule which just takes the top bits off, making it a bit easier to then go in with various sanding and skinny sticks. Finally I measured and scribed out some metal plates. That little scriber doohickey I actually found on the pavement outside my house the other day, dunno what it is or where it came from but it was absolutely perfect for this. 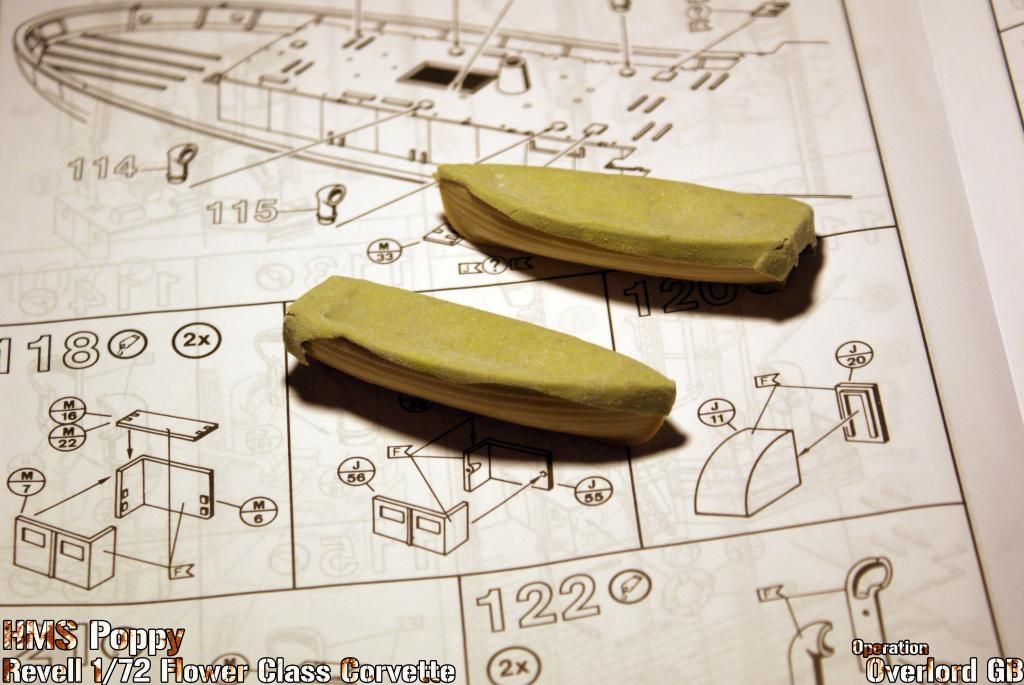 I got as far as the middle deck then decided I needed a break before the stern deck, so I threw the boats together and made up some tarps from milliput. I think the boats would most likely be covered over when out at sea. I'm also going have them swung out on their davits as from what I've read they were a bit of a faff to get off the deck so most of the time they were left hanging. 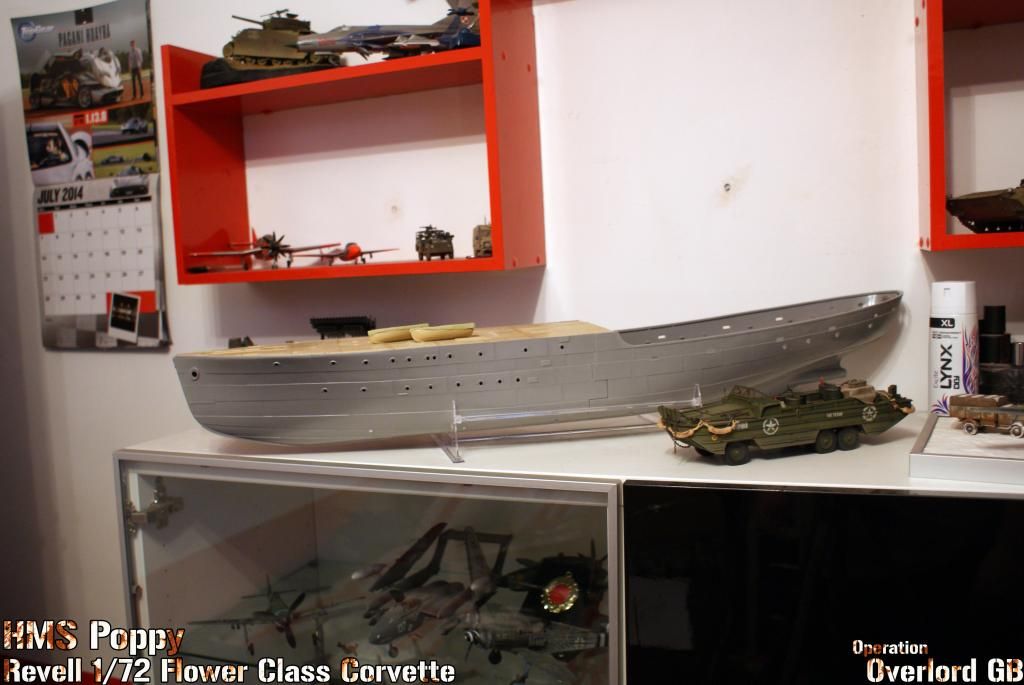 And there she if for the moment, completely dwarfing my DUKW! 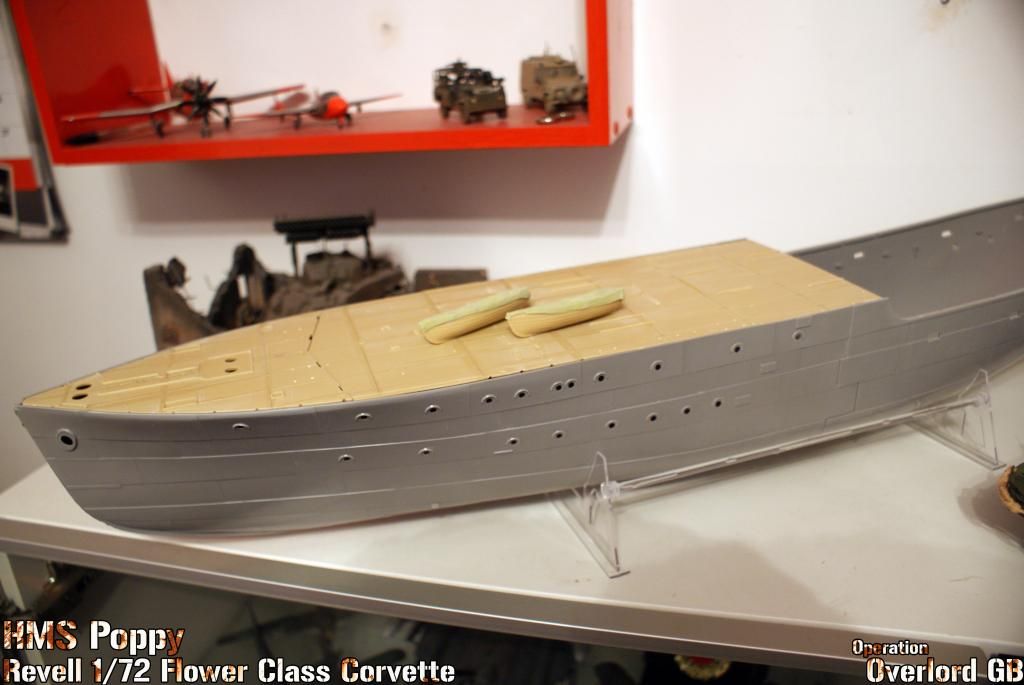 I still haven't decided exactly what to do with the whole removable deck situation, obviously ideally the more decks I have permanently affixed and watertight the better. So that's where she is after day 1. Once the epoxy is dried tomorrow I'll get the hull cleaned up properly, not much more I can do to the hull then until I get all my brass bits and bobs. TBC...
__________________
Alex Don't judge a ship by the number of it's guns, but by the skill of it's crew. |

|

|
 10-31-14, 04:40 AM
|
#3 |
|
Royal Kinotropist
Join Date: Mar 2007
Location: Sheffield, UK
Posts: 987
Downloads: 18
Uploads: 0
|
[27/07/2014]
Bit slow going at the moment unfortunately, I'm currently waiting on my prop/shaft/rudder etc being delivered, meaning not much can be done on the hull until they arrive, and also my coloured LEDs which really need to be wired into the wheelhouse roof meaning not much can be done on that either lol. Anyway, finally another update for you UPDATE 2: There really is a hell of a lot to do on this thing, and I'm finding I'm flitting between different parts, sub-assemblies etc, which makes creating coherent photographs a little tricky, so you may have to excuse me if things seem a little out of order. There's also so many little parts that I think the best course to take is to get photos of the larger sub-assemblies, rather than going in-depth into every little storage locker and porthole. 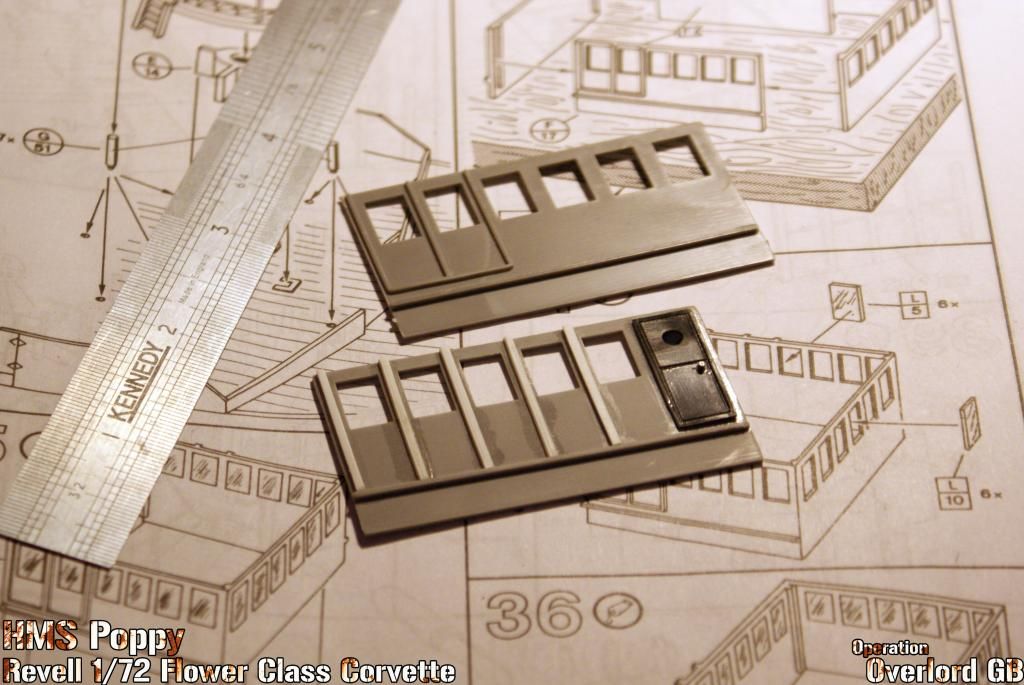 So, first up, I decided to try a little detailing on the wheel house, despite its simplicity, this is by far the most advanced scratchbuilding I've ever done lol. Quite pleased with the effect though, certainly when compared to the original part above. 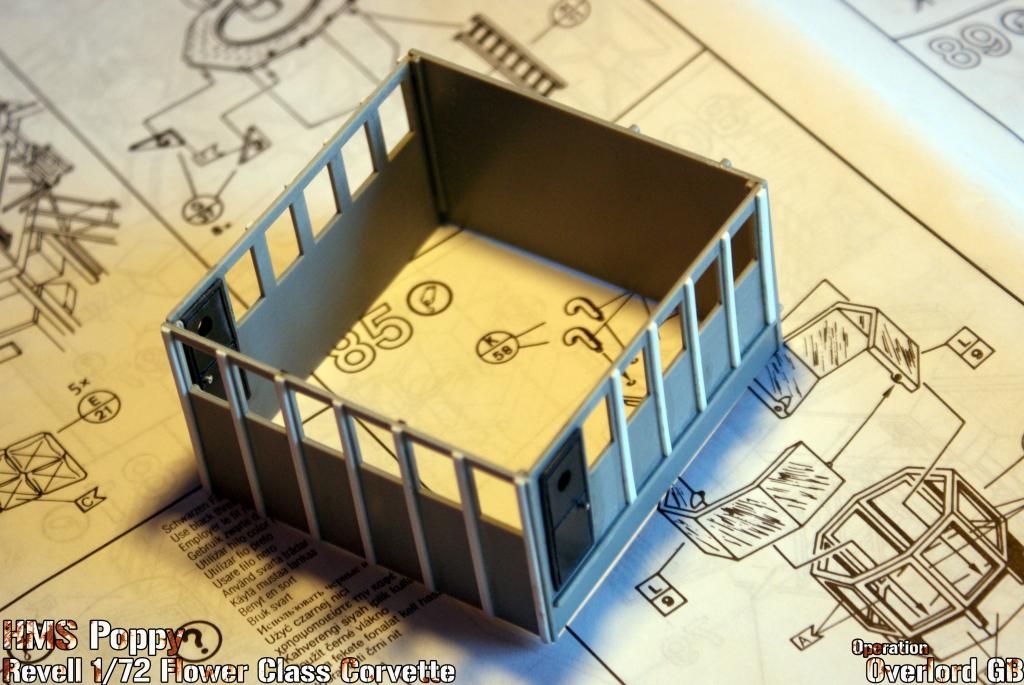 Just needs a floor knocking up, along with the telemotor, wheel etc. 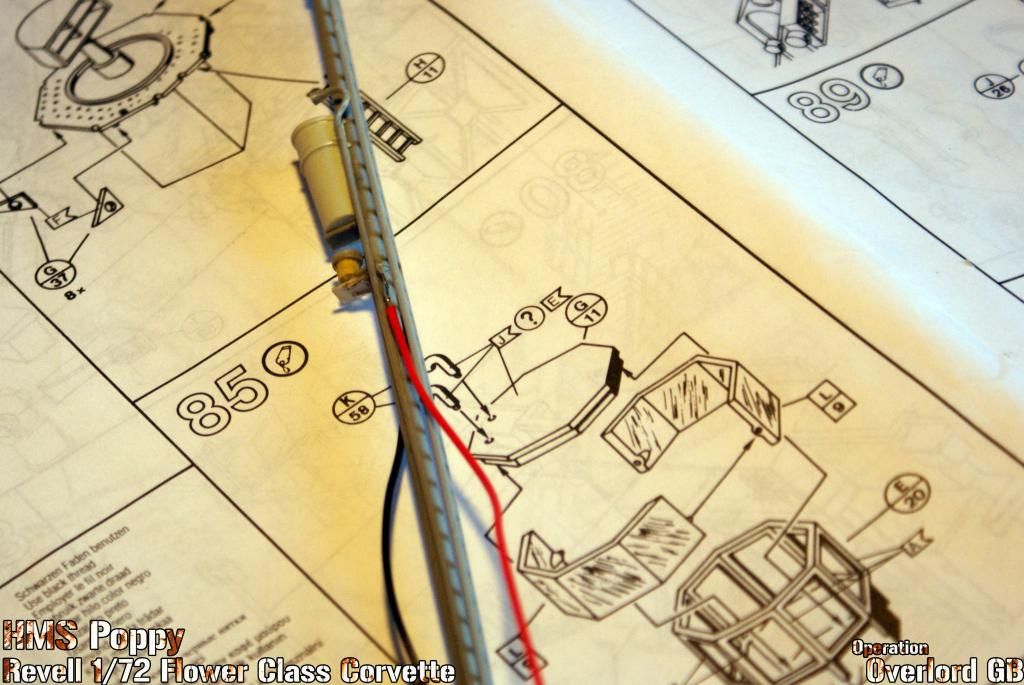 Now onto the mast. See what I mean about flitting about? lol. My warm white LEDs arrived so that meant I could get on with the mast light. I removed the kit mount and knocked a little platform up out of plasticard, passed the LED 'legs' through it and made a little cap out of some sprue. 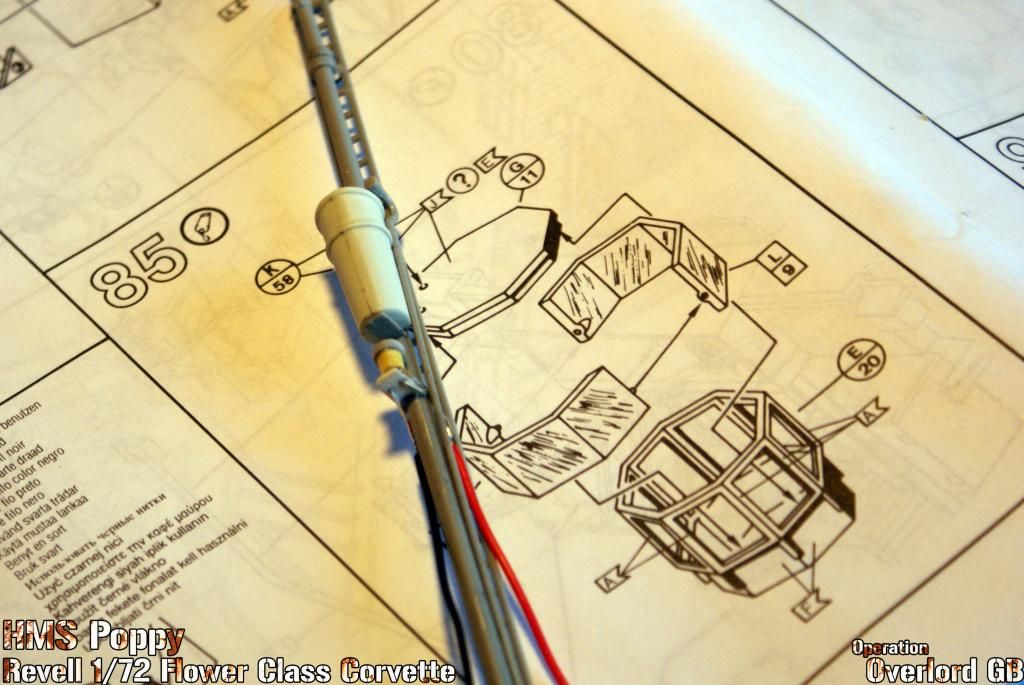 Rather pleased with the outcome 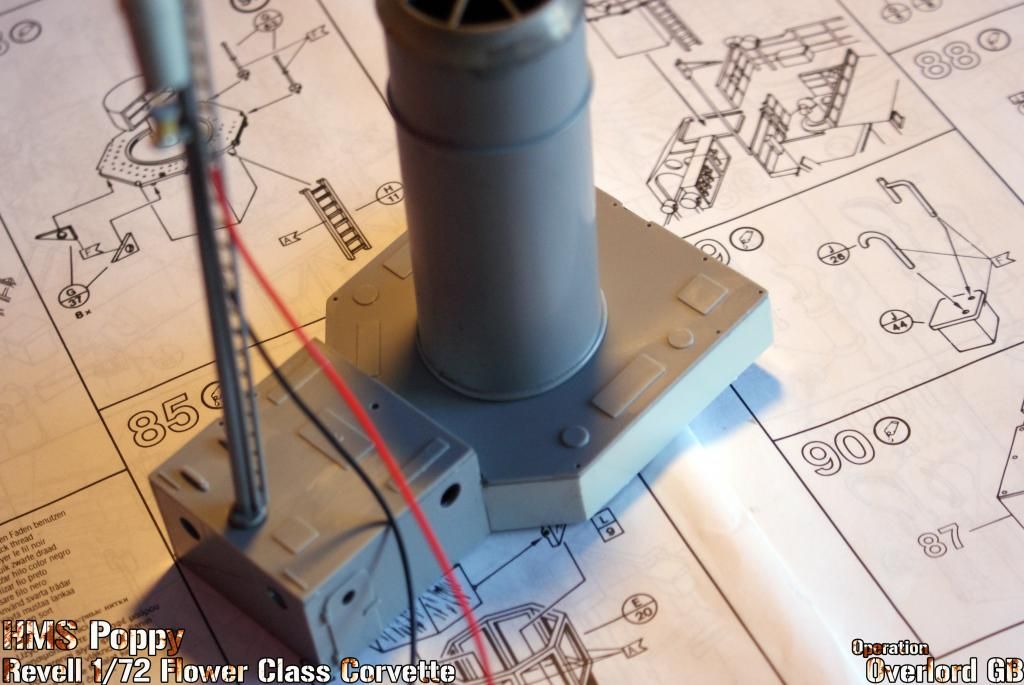 The funnel and midship cabin thingy together. All needs a little filler but nothing to worry about. The mast will be a loose fit to avoid damage in transit. 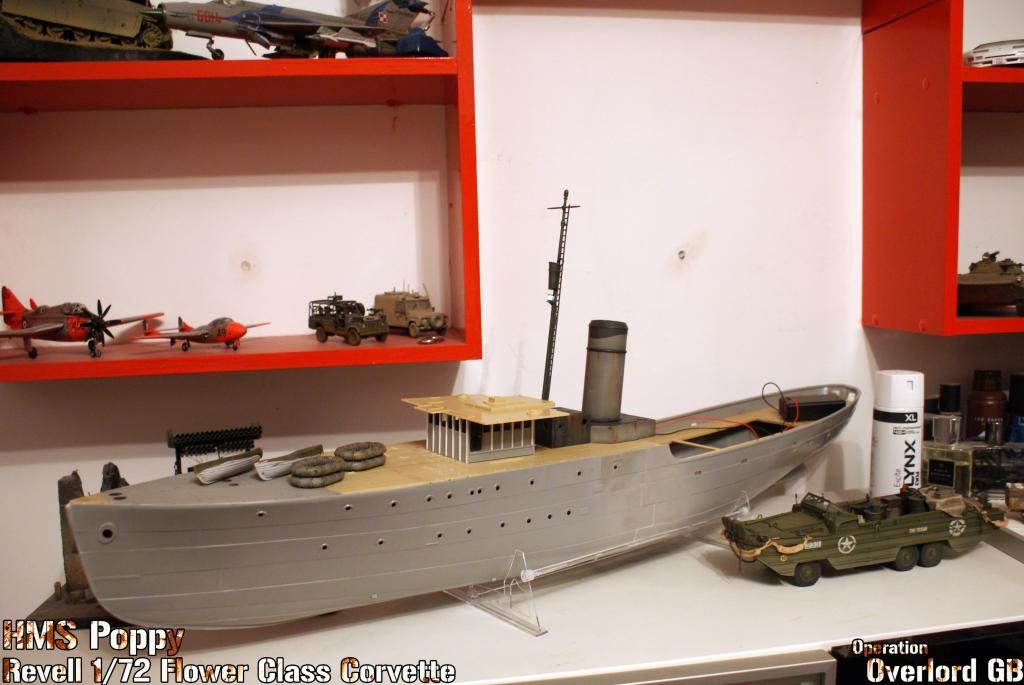 And there she is as of tonight. Painted up the funnel and stuff, used a custom mix of Tamiya paints to get the different greys. 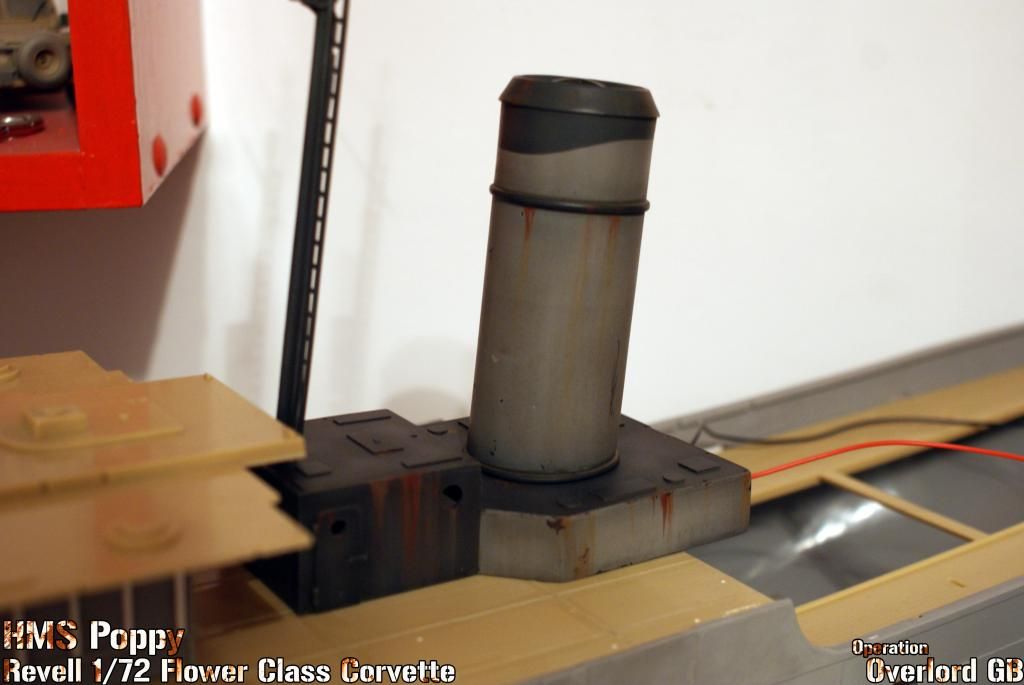 The rust was done using Railmatch acrylic BR Bauxite (the best colour I had to hand), followed by some Tamiya Desert Yellow streaking. Everything then got a matt coat, a thinned Dark Dirt wash, and a final matt coat after the wash had been streaked with a wet brush. 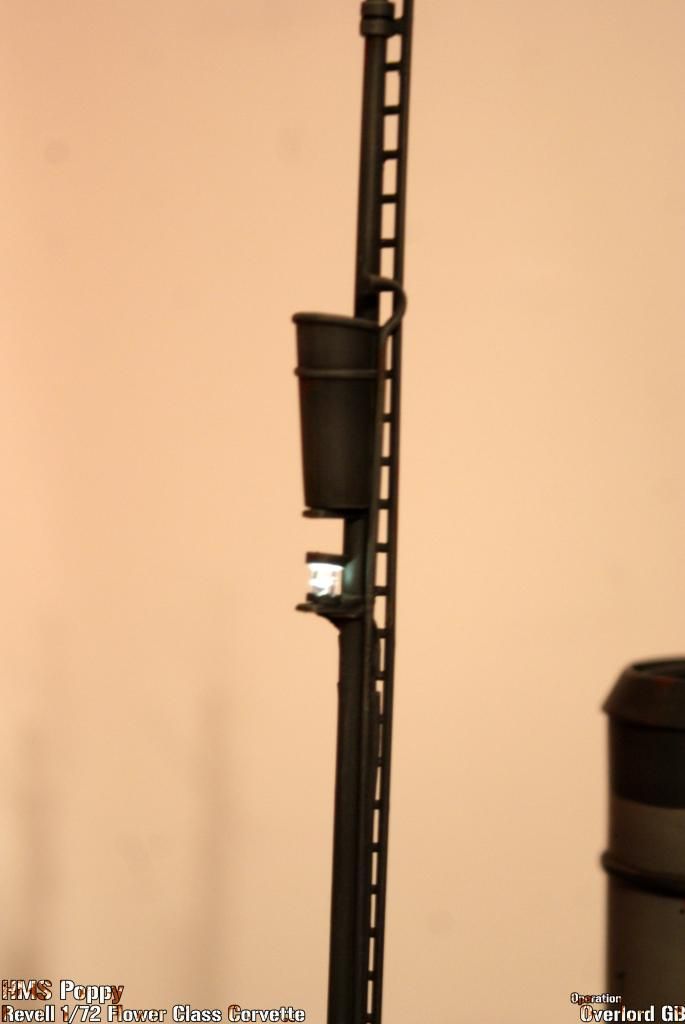 Light on 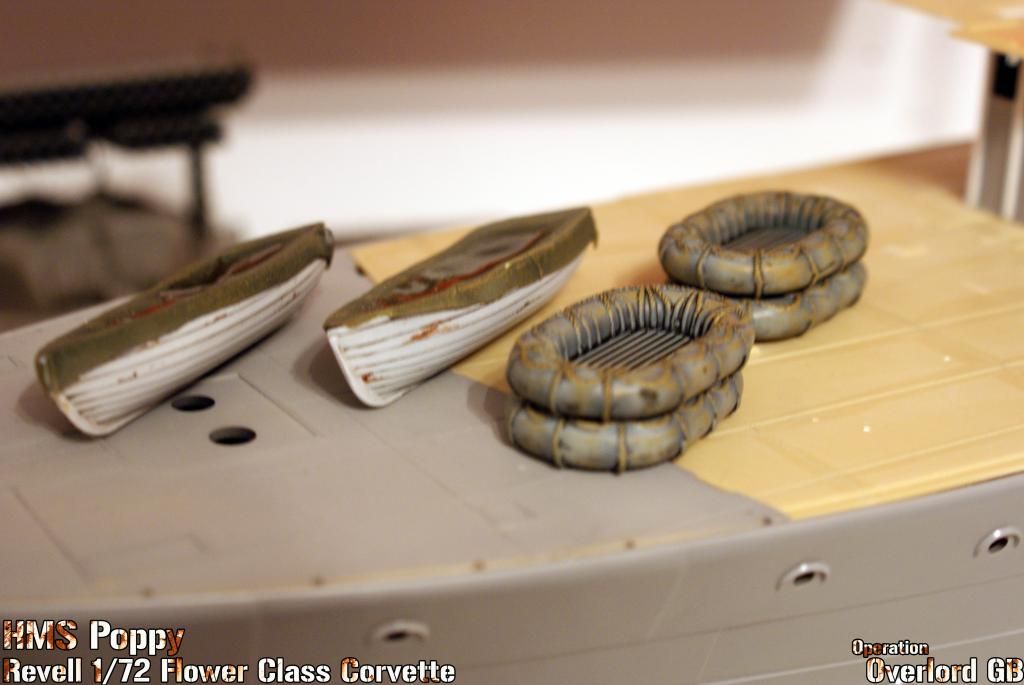 Also got the Carley Floats done, not great but they will do. 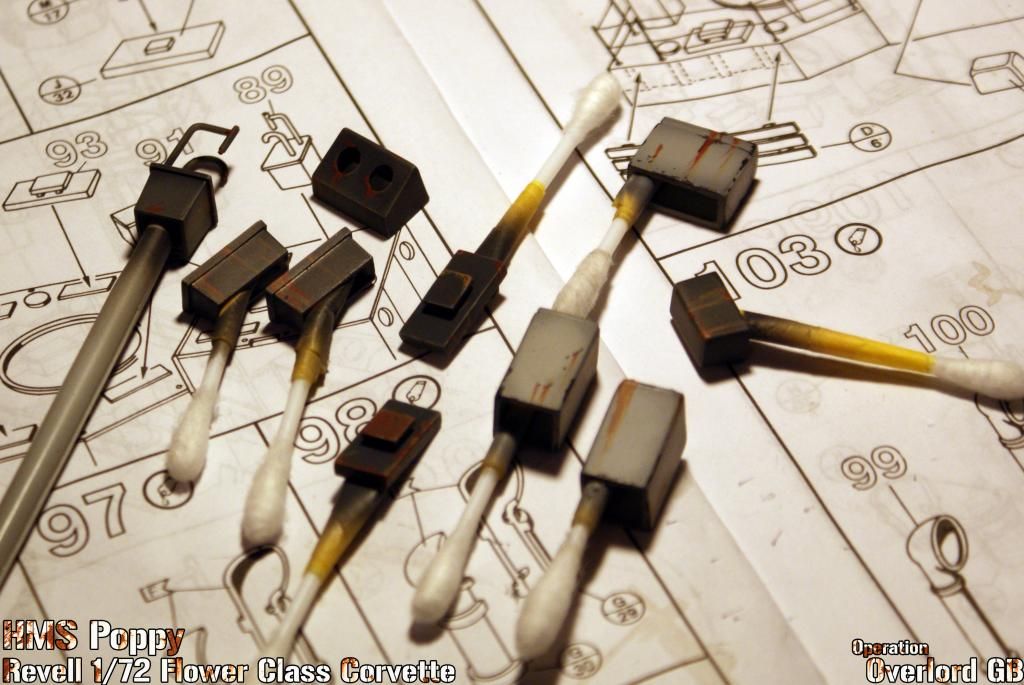 And finally all the little storage lockers and stuff to go alongside the mast & funnel. These are still awaiting a wash. TBC...
__________________
Alex Don't judge a ship by the number of it's guns, but by the skill of it's crew. |

|

|
 10-31-14, 04:41 AM
|
#4 |
|
Royal Kinotropist
Join Date: Mar 2007
Location: Sheffield, UK
Posts: 987
Downloads: 18
Uploads: 0
|
[31/07/2014]
UPDATE 3: 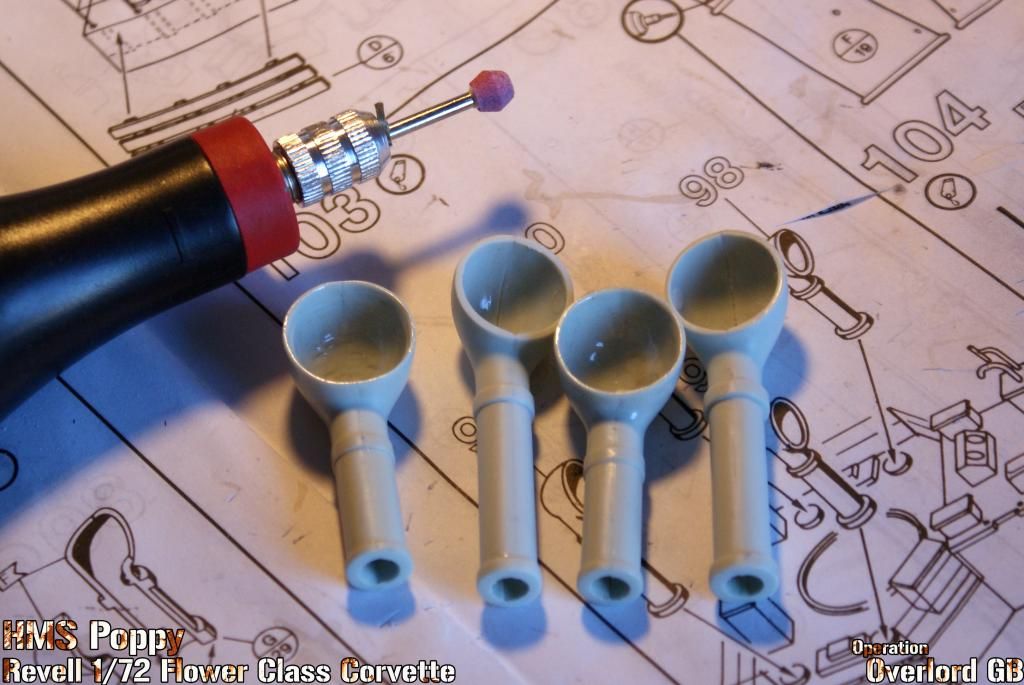 Got the Midship vents sorted. I dremelled the inner sides out which dramatically improved the look of them, then went around the inside with a cotton bud soaked in cellulose thinners. The short ones have been dremelled out and the longer, bigger ones are still stock so the difference can easily be seen. 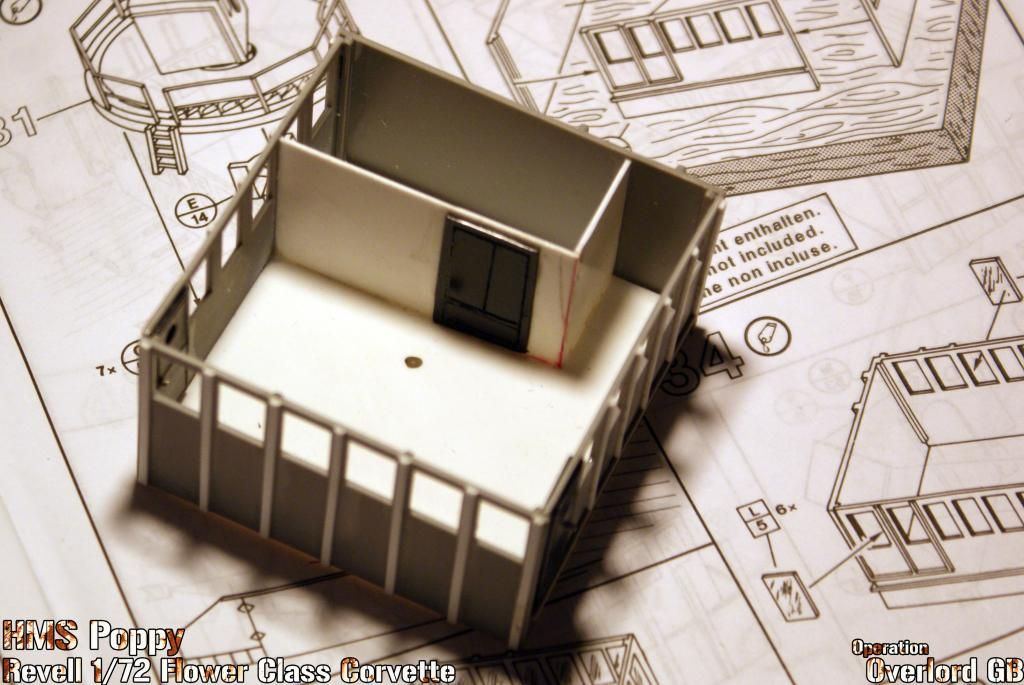 Managed to get the wheelhouse mostly done too. I fitted a false floor as the deck level is far too low. The partition wall is mainly artistic license using pics of HMCS Sackville's wheelhouse as rough reference, I believe it would have been a radio room or something of the sort. 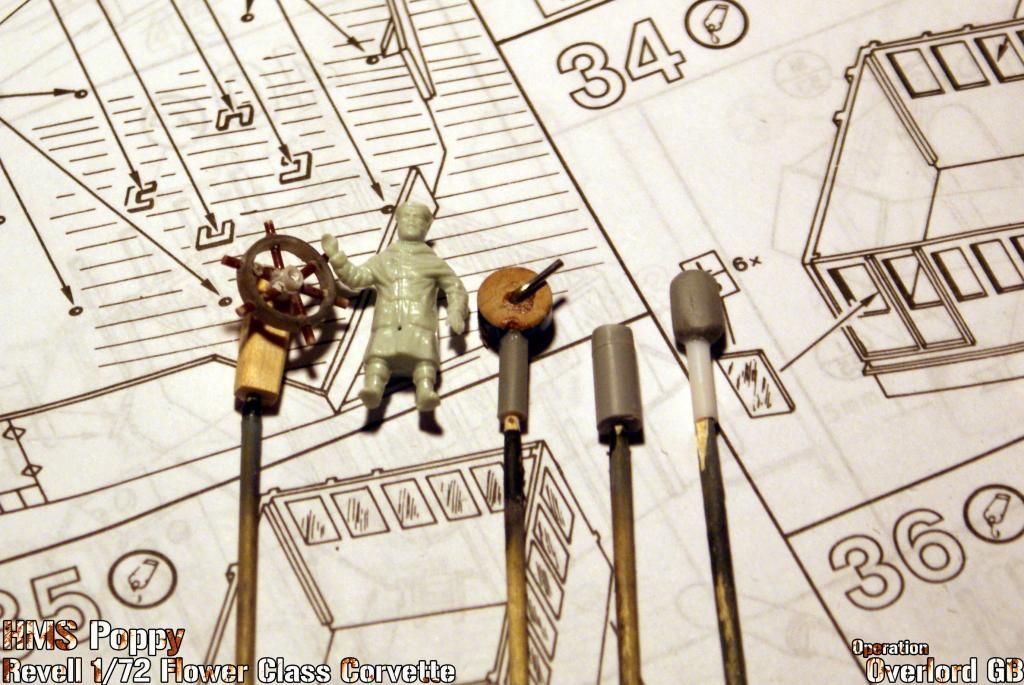 I then knocked up some furniture from various bits and bobs. The wheel came out far better than I expected, I just used a slice out of an old outer barrel from a plastic airsoft gun that bit the dust long ago, and used the plastic railings you get with the kit as the spokes, or whatever the technical term is! You can also see the rather nasty sinkmark in the Coxswain's coat lol, unfortunately a few are like this, which is a shame as the sculpting is actually really nice. I think some aftermarket crew will be on the cards though 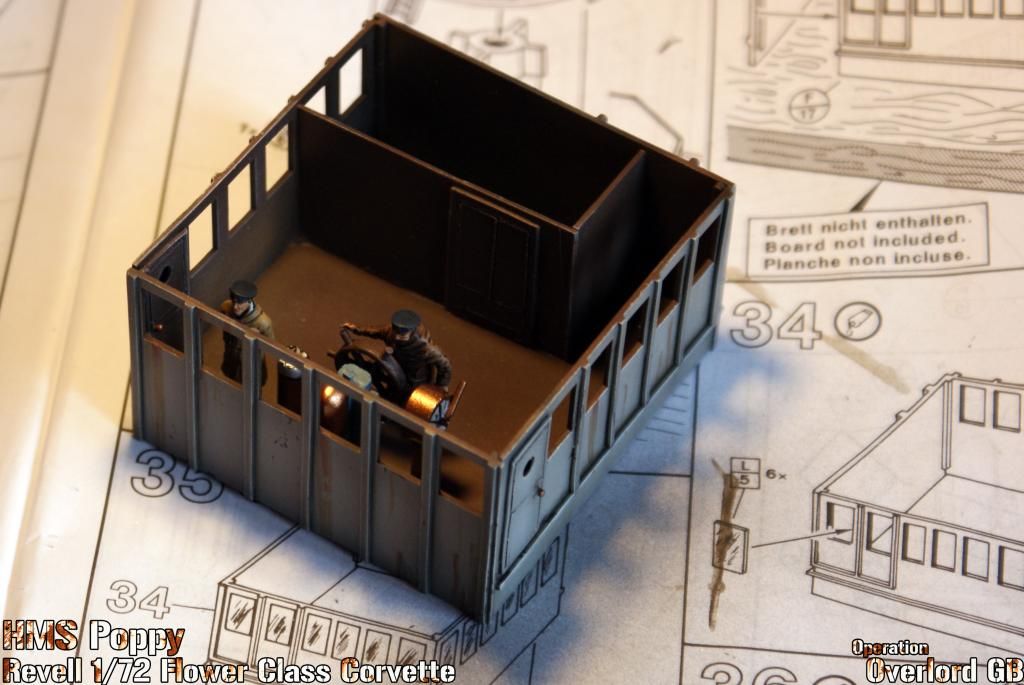 Turned out rather well methinks, the interior was just sprayed with Tamiya Brown. 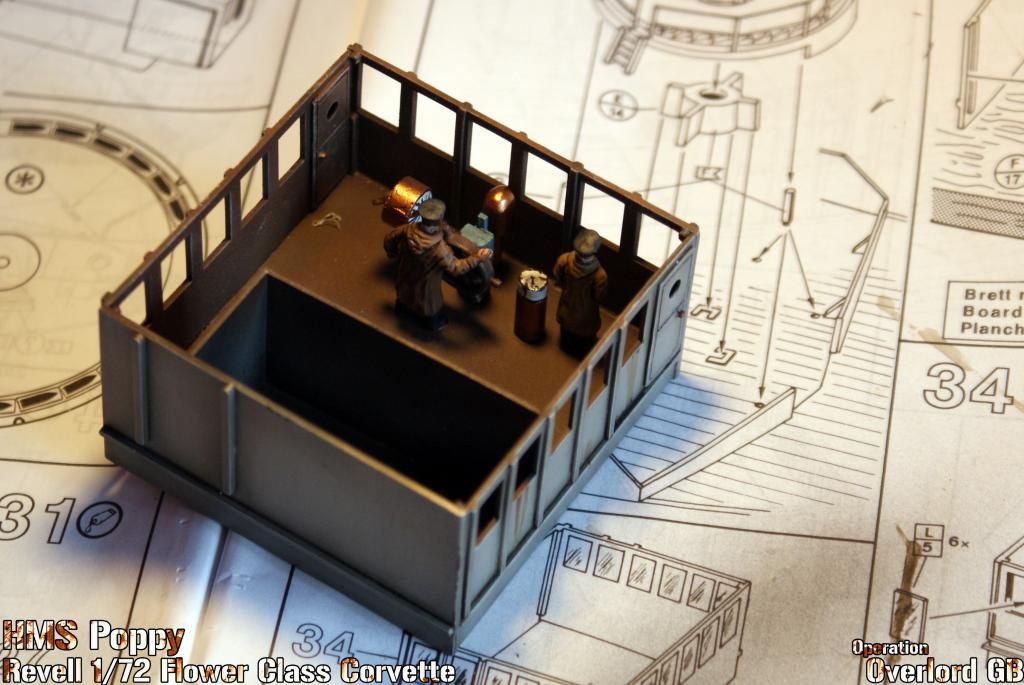 It looks very sparse but once the roof is on you can hardly see any of it, it actually gives a nice effect. 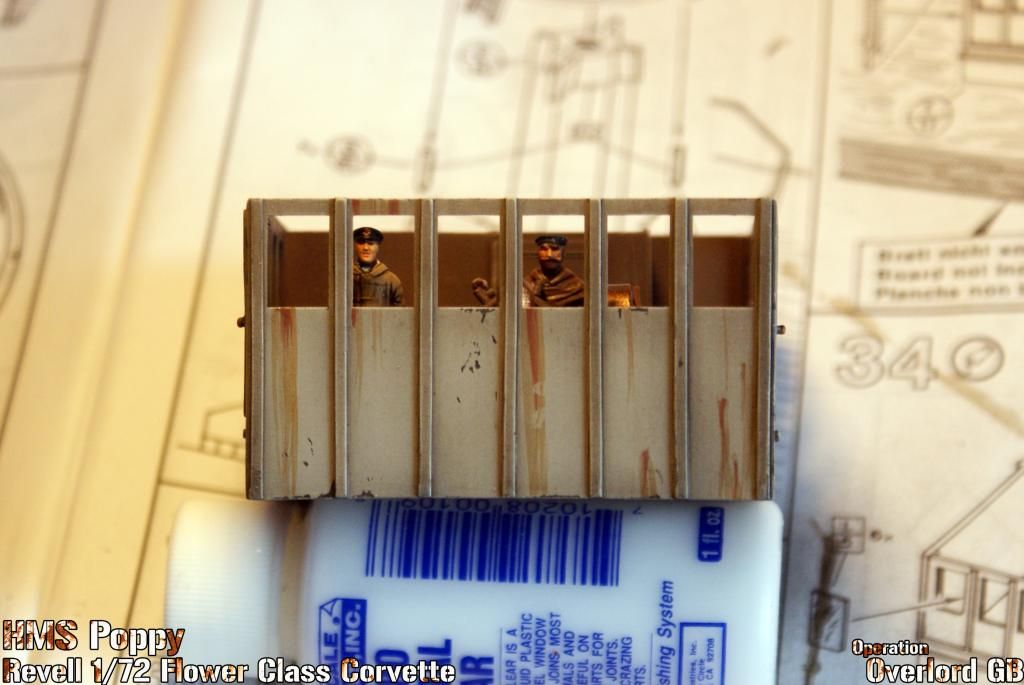 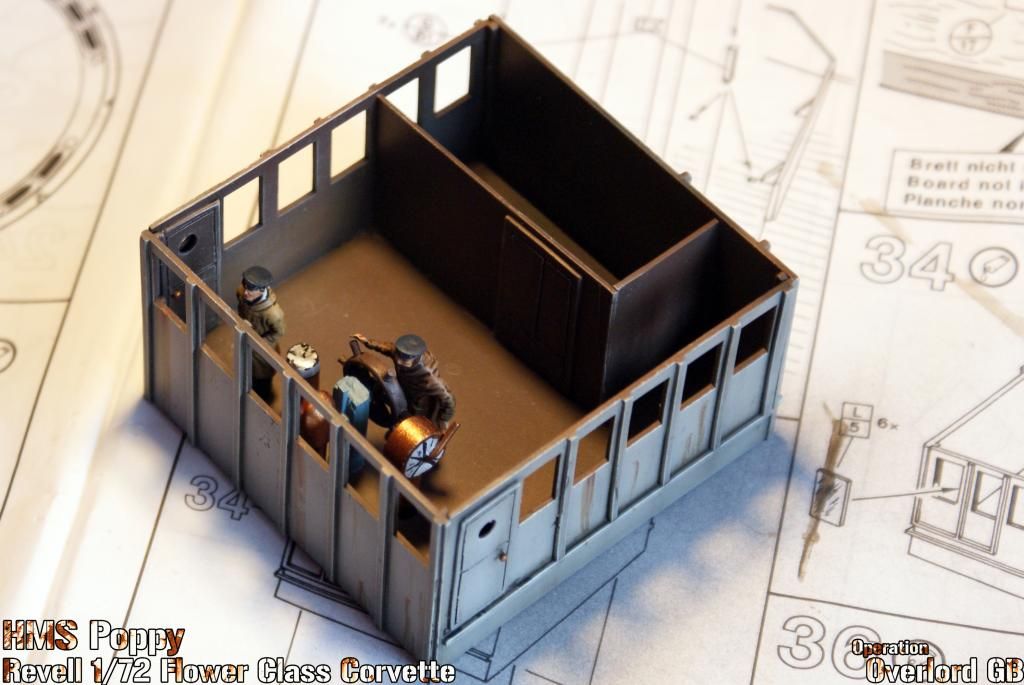 I think the next thing will be wiring up all the lights to the roof/bridge above. TBC...
__________________
Alex Don't judge a ship by the number of it's guns, but by the skill of it's crew. |

|

|
 10-31-14, 04:46 AM
|
#5 |
|
Royal Kinotropist
Join Date: Mar 2007
Location: Sheffield, UK
Posts: 987
Downloads: 18
Uploads: 0
|
[At this point I'd been waiting for my props, shafts etc for around 3 weeks! Had sent numerous emails with no reply. I finally sent the shop a message on Facebook and it turns out that my order had been placed on someone's desk for them to give me a call as the prop I had ordered was out of stock, then it was promptly buried lol]
[07/08/2014] UPDATE 4: So, I finally received my stuff from Westbourne on Tuesday, and to be fair they sent it out on Monday night via UPS next day, so I guess they have redeemed themselves somewhat! 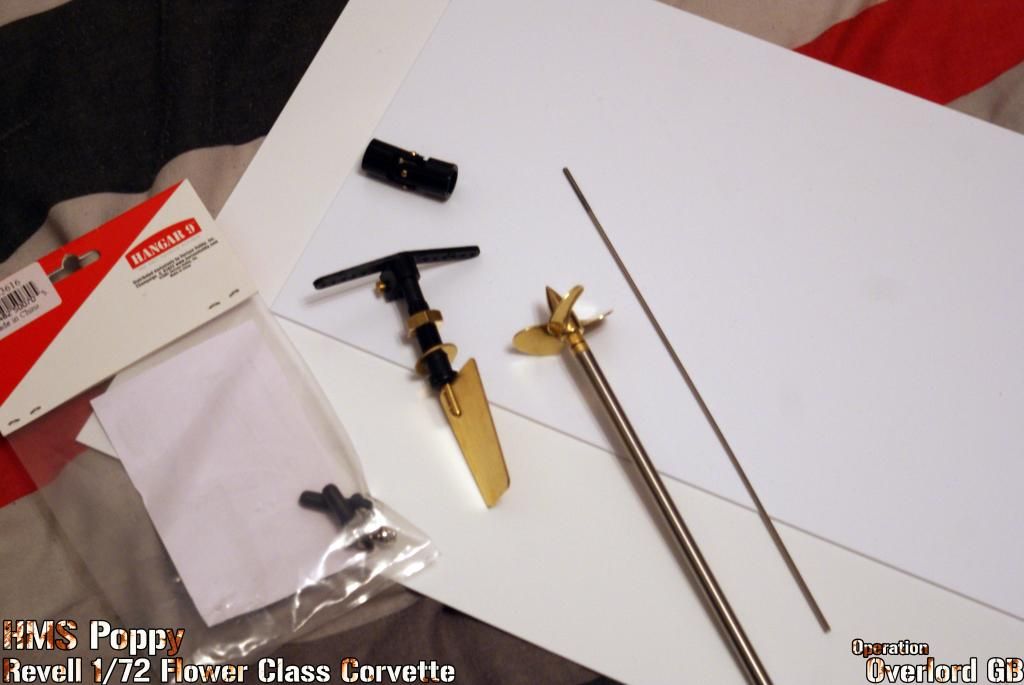 The prop and shaft are fantastic, unfortunately the ball joints and Universal Joint are utter tosh, very low quality. The UJ is also a different size to what I needed so I won't be using it anyway, totally my fault, although there wasn't much info on the site about it [I've since realised you actually need an insert for each end which I actually now have on order  ]. The bolts and metal parts in the Ball Joints are great but the plastic is very crudely moulded with bits of flash and sprue gates, meaning they don't move very well, still usable though. The 'threaded rod' I bought is also not what I expected, it's far smaller diameter than the ball joint fittings and is only threaded about an inch at one end. ]. The bolts and metal parts in the Ball Joints are great but the plastic is very crudely moulded with bits of flash and sprue gates, meaning they don't move very well, still usable though. The 'threaded rod' I bought is also not what I expected, it's far smaller diameter than the ball joint fittings and is only threaded about an inch at one end.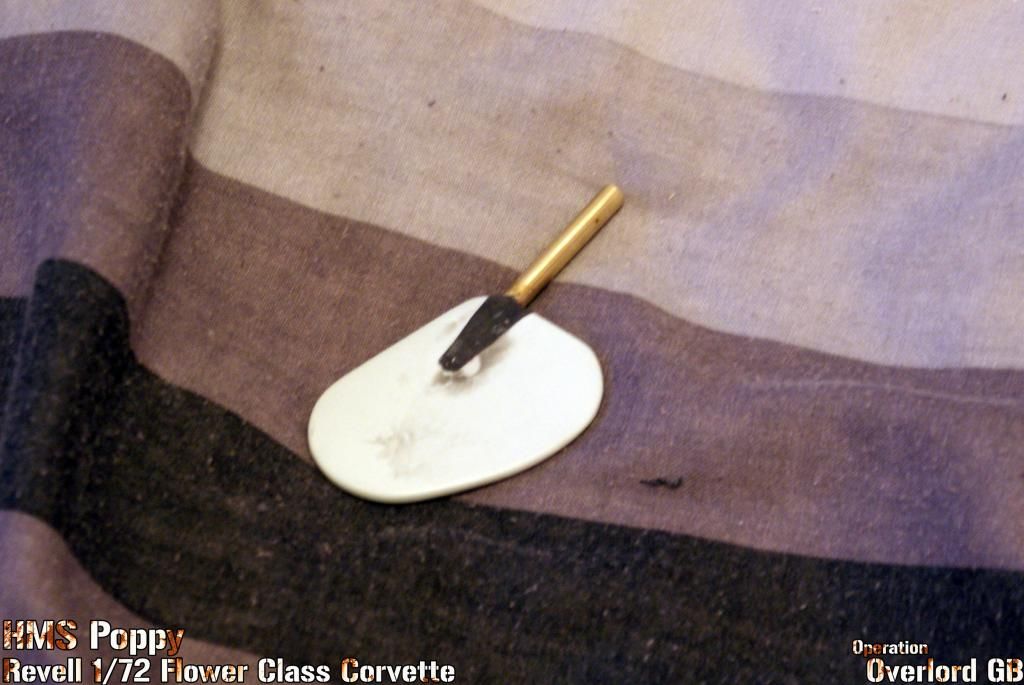 I decided to sandwich the brass micro-rudder I bought between the kit parts to get the correct shape. I trimmed the brass down slightly to get it to fit, then sanded out the inside of the plastic, and had to cut out some bits on the side for the shaft. This was then epoxied in, and teh gaps were filled with some metal epoxy putty I totally forgot I had (the dark grey stuff in the pic) It's easy to use and dries rock hard in minutes meaning it's ideal for this. 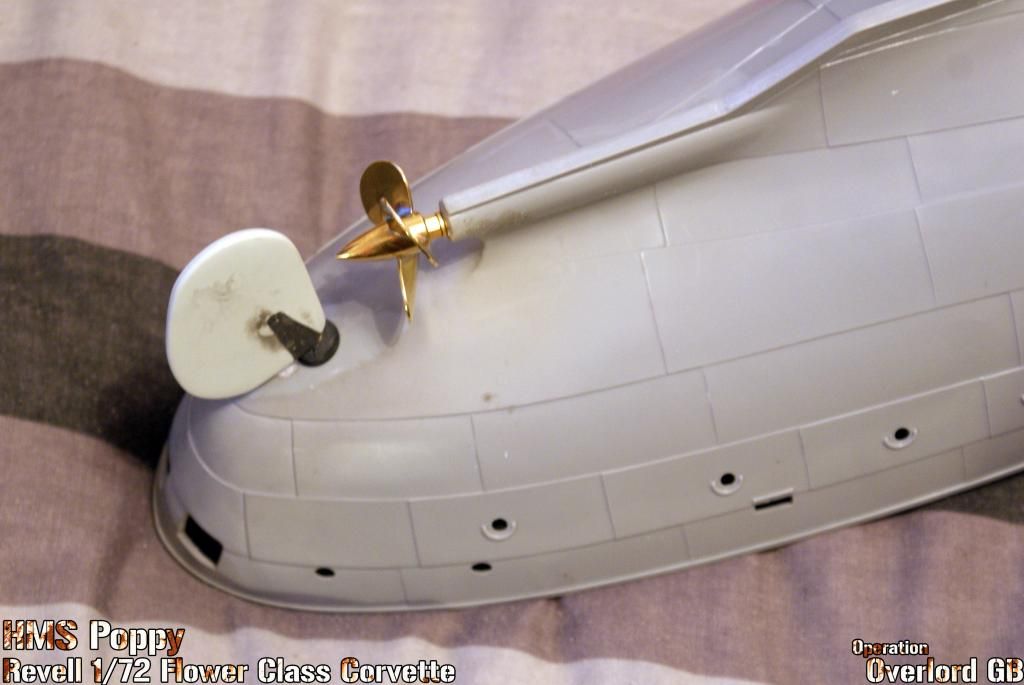 The prop shaft was just inserted into the hull and epoxied in place, I found a drill bit that made it a nice tight fit. Still needs lubricating but that will be done after painting. 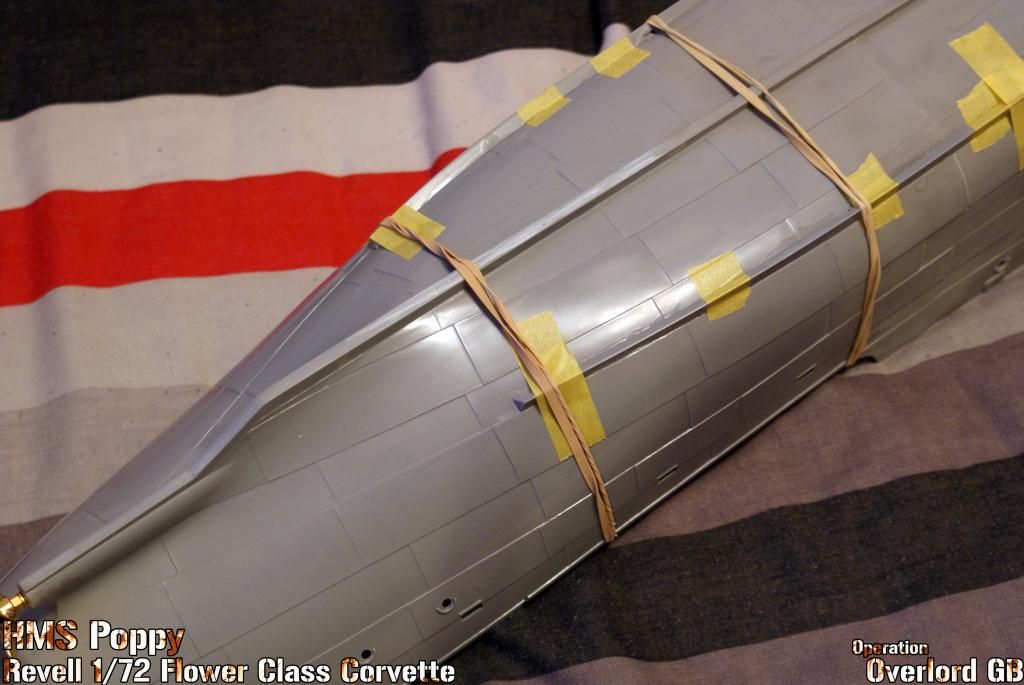 Also got the keels on. A bit of a task as they come straight meaning you have to tightly tape or clamp them to the sides while gluing. Look good in the end though. 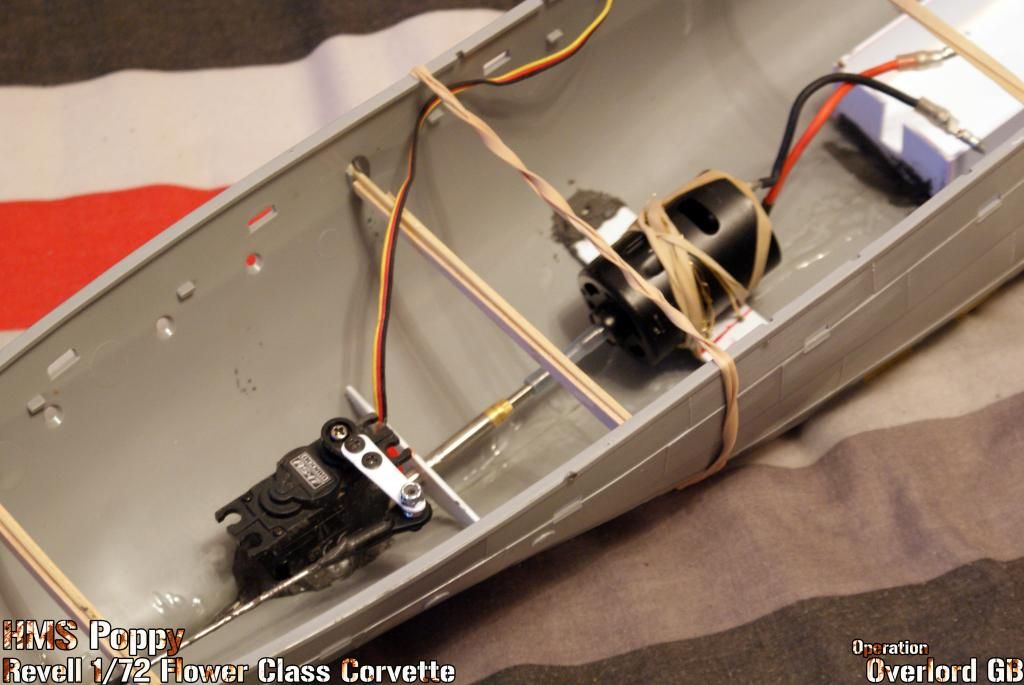 So after about 3 hours of trying to make a motor mount I eventually scrapped everything and simply laid it on a plasticard plank and secured it in place with some picture wire and a laggy band. This means it's secure enough not to fall off but still has some give/vibration damping and means I can easily remove it if needs be. The shaft connector is simply a small piece of silicon fuel line from an old nitro RC car, it just happened to be the correct diameter to fit tightly over both shafts. Works like a dream, it's flexible, has plenty of give, and means that if anything ever snagged on the prop, that would spin/break first, protecting everything else! I also made a simple battery box which you can just see off to the right of the pic. All the plasticard bits were superglued, extra-thinned and epoxy puttied down. Really don't want a rogue battery sliding off to one side causing it to capsize! 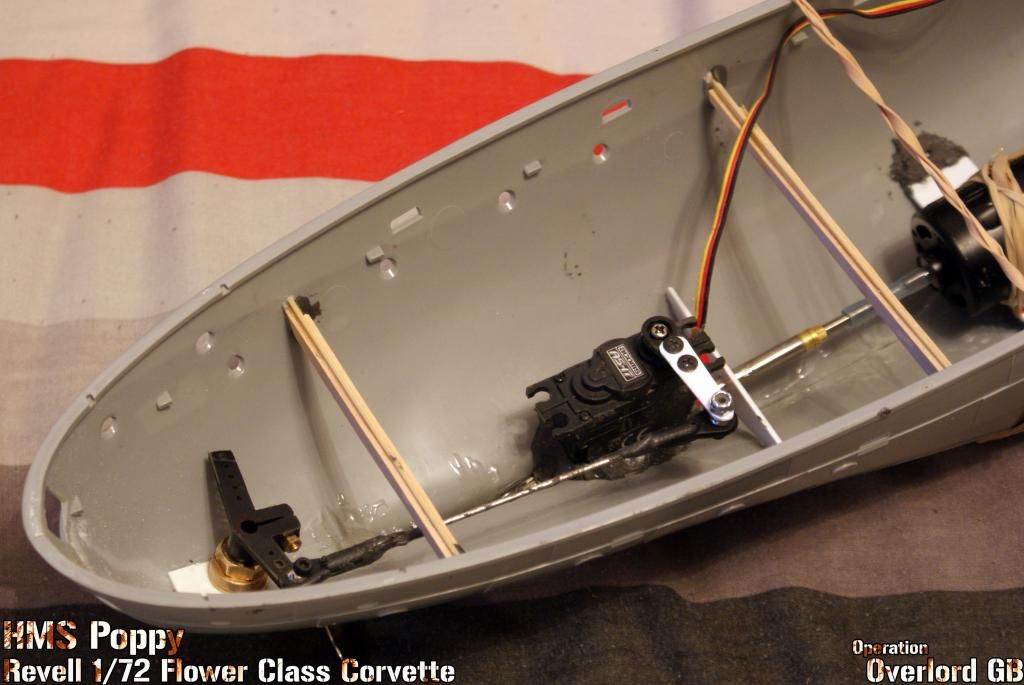 The steering! Not too bad actually, with a little trimming and adjusting I managed to get a linkage setup which worked nicely, the rod was just epoxied into the ball joints, and the servo was pressed into a large blob of the epoxy putty lol. actually very strong, and works really well. So that's the important bits finally sorted! I can now get on with painting the hull, then it can be ballasted before the decks are glued in place. TBC...
__________________
Alex Don't judge a ship by the number of it's guns, but by the skill of it's crew. |

|

|
 10-31-14, 04:48 AM
|
#6 |
|
Royal Kinotropist
Join Date: Mar 2007
Location: Sheffield, UK
Posts: 987
Downloads: 18
Uploads: 0
|
[13/08/2014]
UPDATE 5: 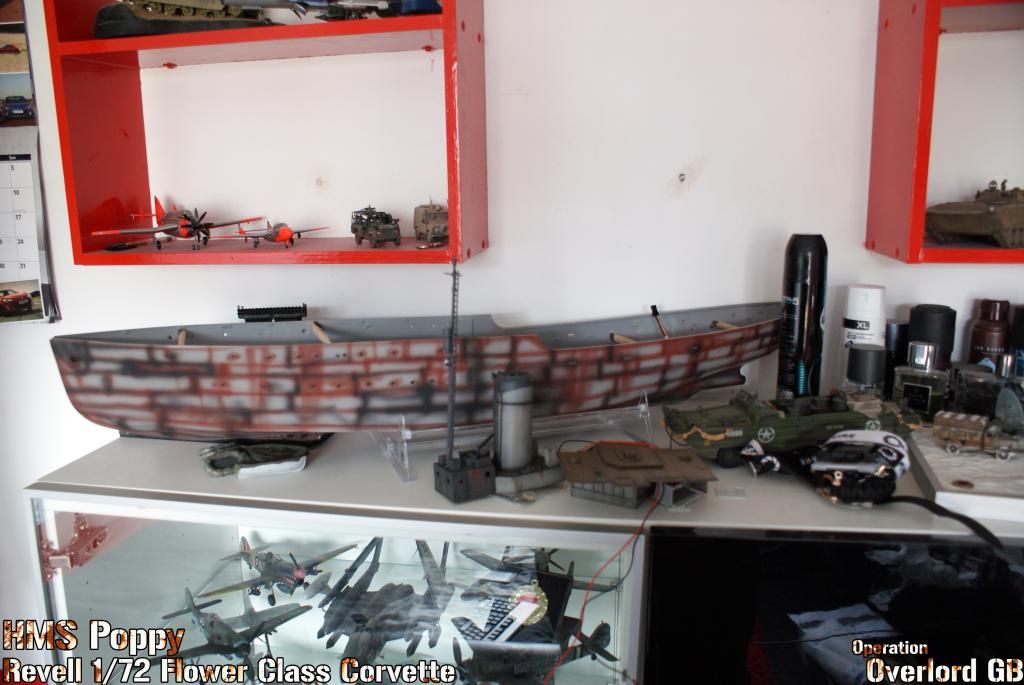 The hull undercoated in XF-19, with some Railmatch BR Bauxite and Tamiya Rubber Black preshading. 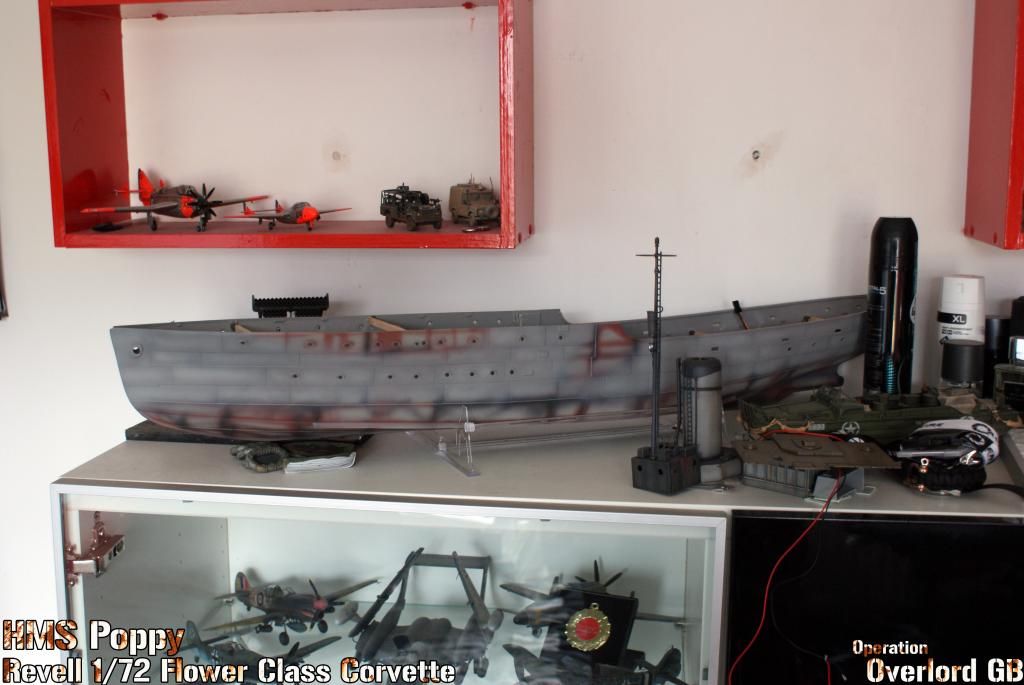 First light grey camo on, ended up using XF-19 again, then post shaded with a lighter mix. 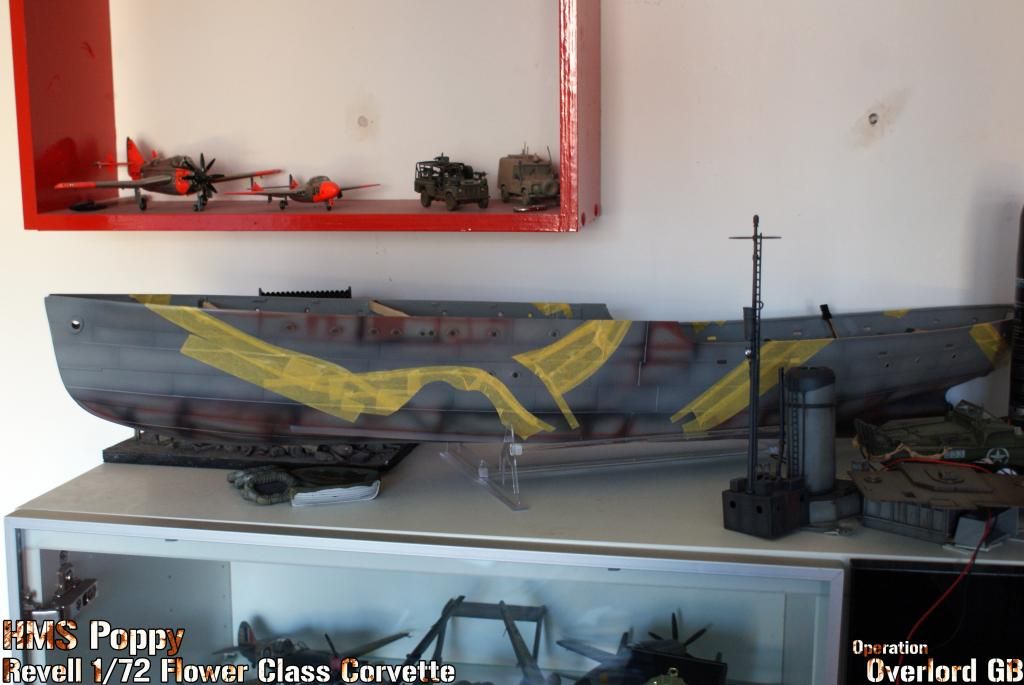 All masked up ready for the dark grey! The camo pattern was surprisingly hard to get right as there aren't many good reference points on the hull aside from portholes, and a few plate intersection, though these are difficult to pinpoint from the picture in order to translate onto the hull and vice versa. [13/08/2014] UPDATE 6: 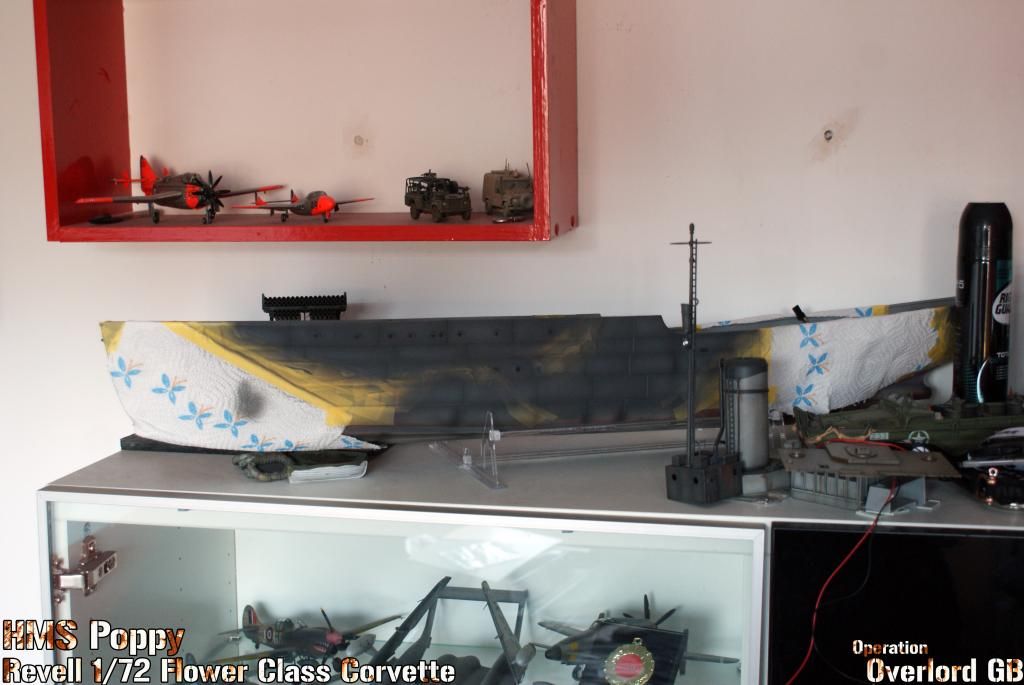 Dark grey camo on, postshaded with lighter mix. 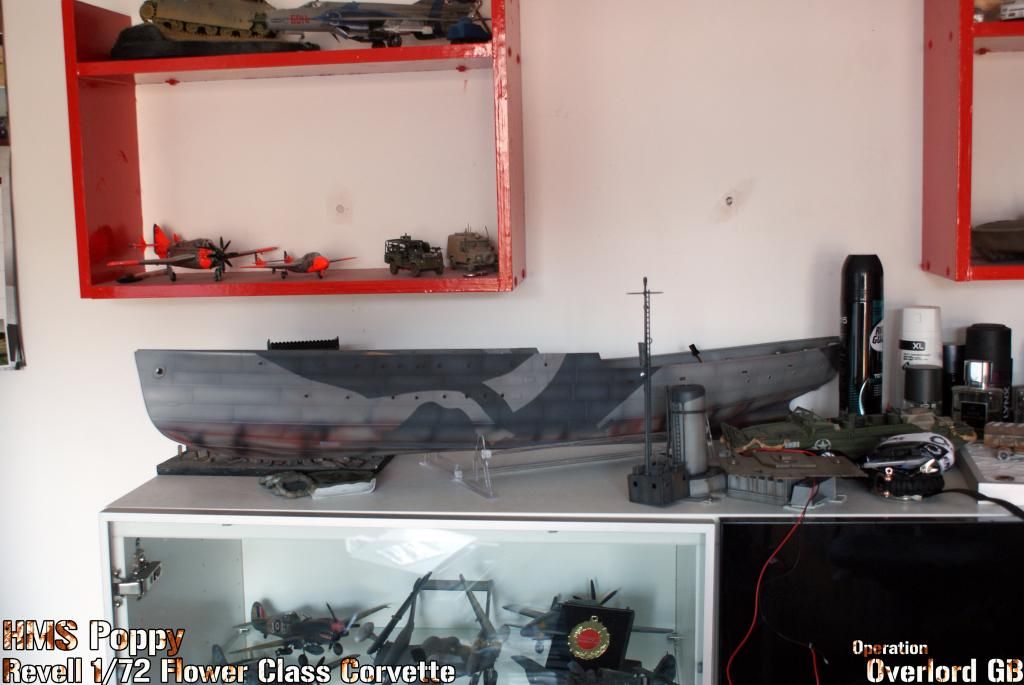 Not looking bad! 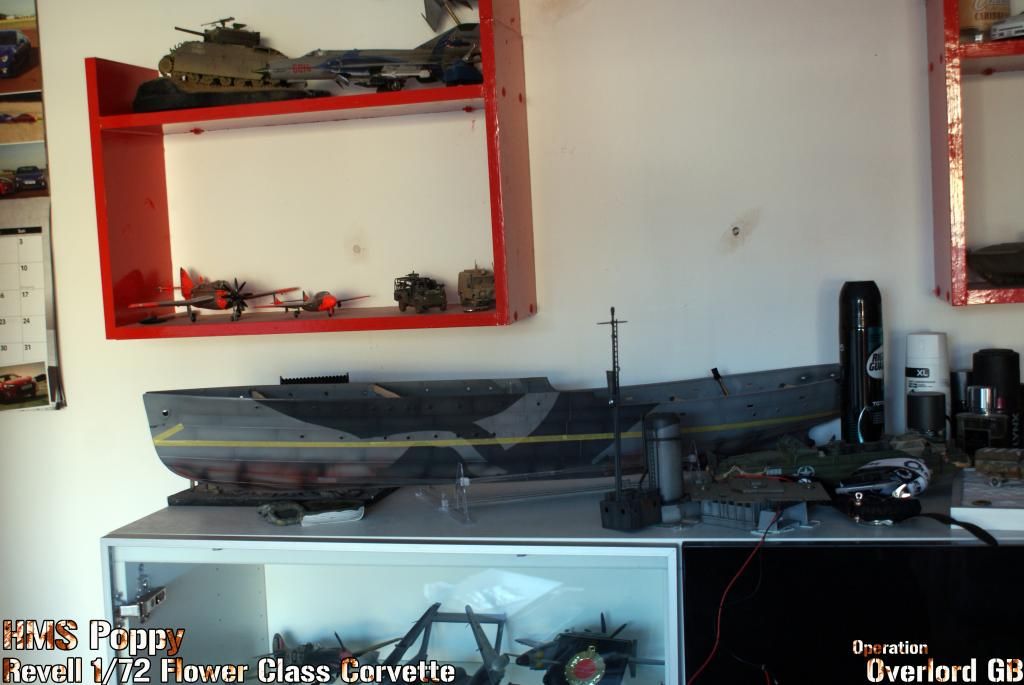 Getting the waterline masked up. I was mildly dreading getting the waterline straight but tbh it ended up being a piece of cake, I just got a long bit of tamiya tape and stretched it right across. 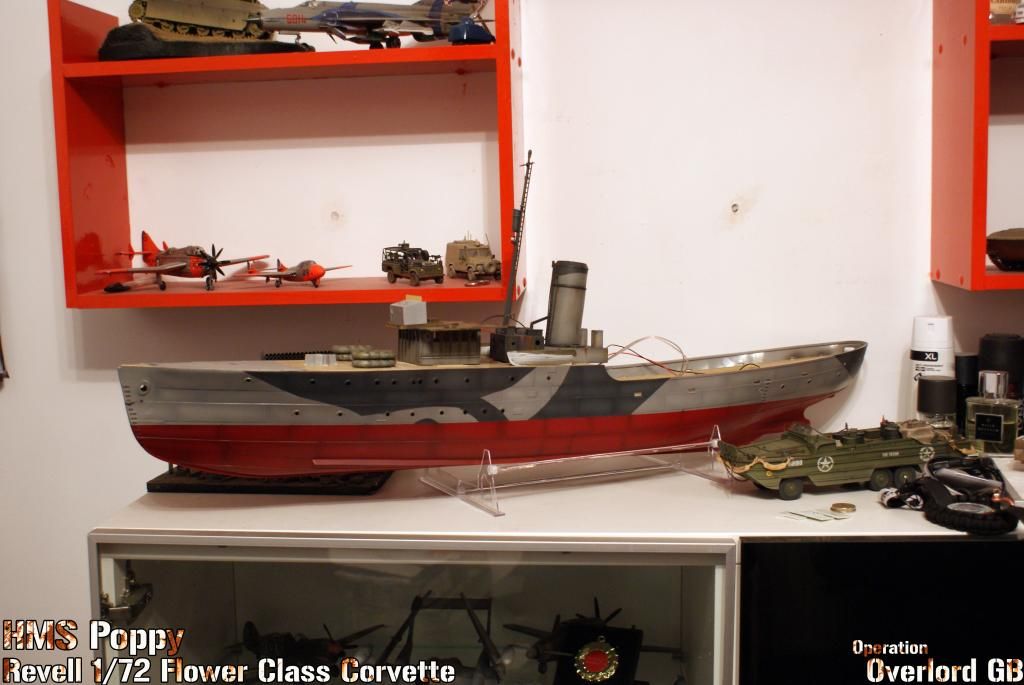 And there she is! I used Railmatch Enamel British Rail Crimson for the antifoul red, actually a good match to the colour drawing I have, bearing in mind the photo lightens it up quite a bit, it's not as bright irl, I think it looks rather nice. 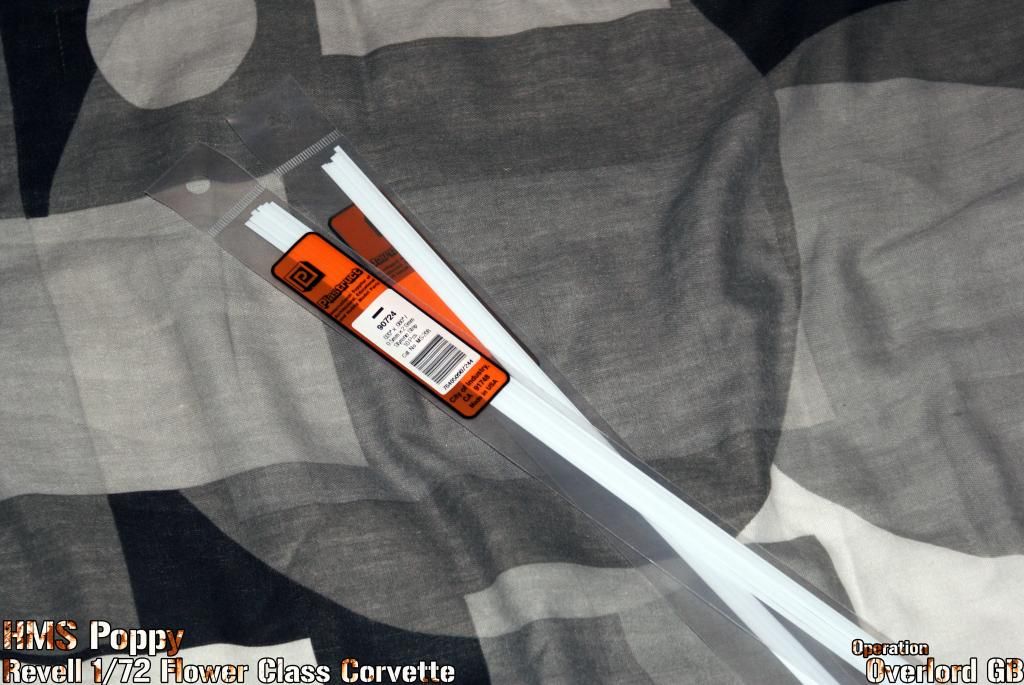 I also got some Plastruct 0.5mm x 2mm strip for the deck planking. Finally feels like I'm getting somewhere with this beasty. Next job will be masking the K213 lettering on the bow, something else I'm not looking forward to lol. After that I'll get some rust on the hull and a dark dirt wash. Then I think it might be time to get her all wet  TBC...
__________________
Alex Don't judge a ship by the number of it's guns, but by the skill of it's crew. |

|

|
 10-31-14, 04:51 AM
|
#7 |
|
Royal Kinotropist
Join Date: Mar 2007
Location: Sheffield, UK
Posts: 987
Downloads: 18
Uploads: 0
|
[14/08/2014]
UPDATE 7: 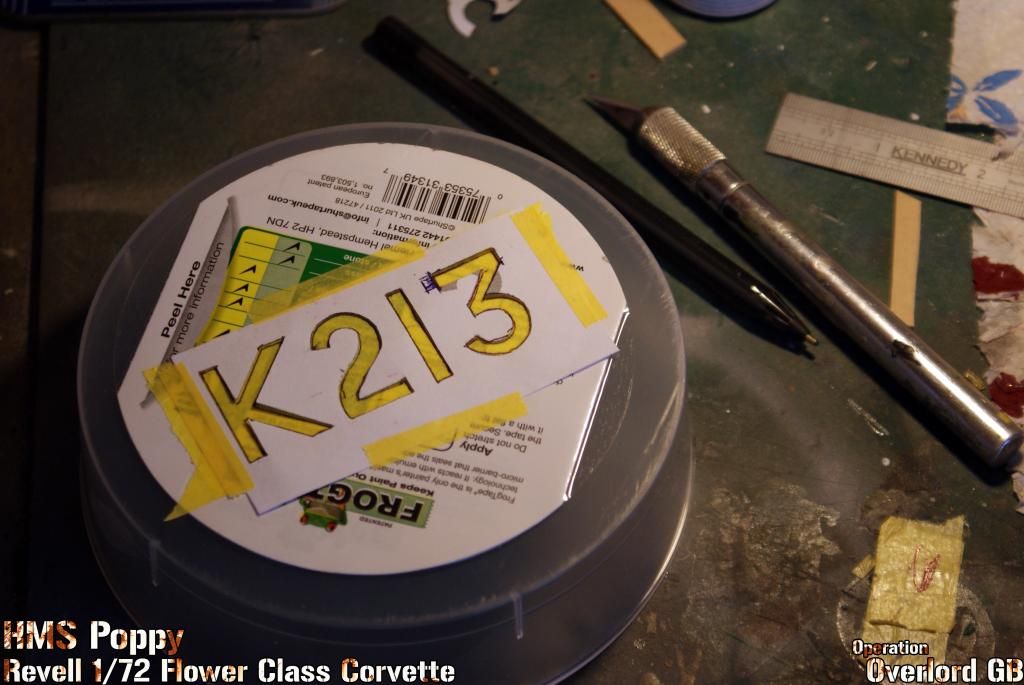 Starting work on the Pennant Number. I began by typing it out on Photoshop to the correct dimensions. It took a while to find a suitable font, this ended up being the closest, though I had to add the flat top to the '3' myself. I then printed it out, and cut the letters out to make a template which I then transferred onto a double layer of Frog Tape, and carefully cut out. 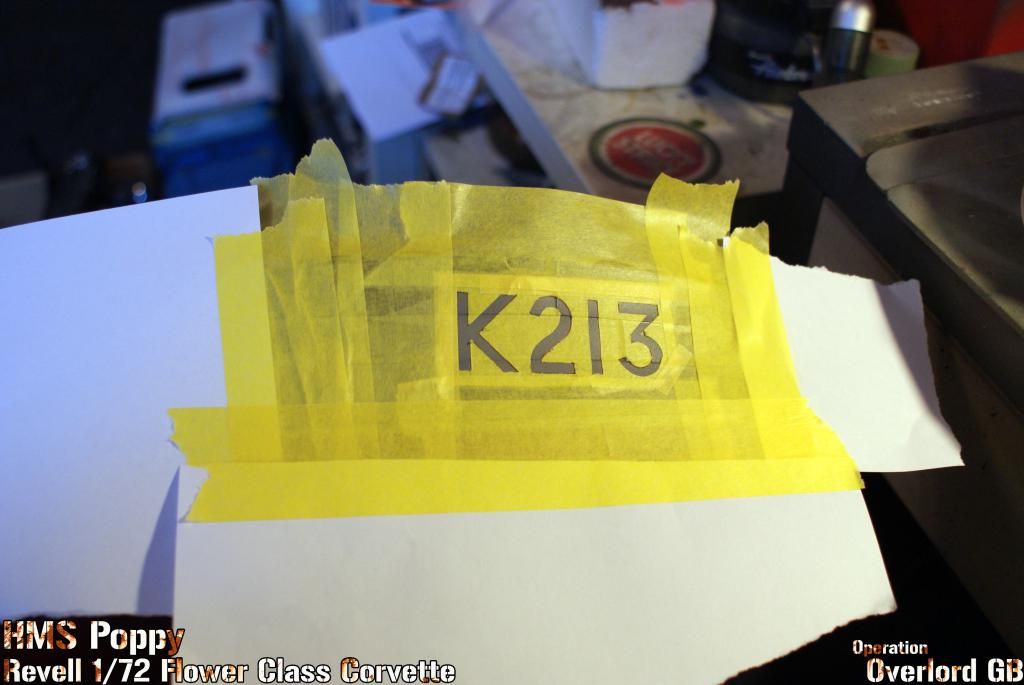 This was then carefully peeled up and placed on the model. 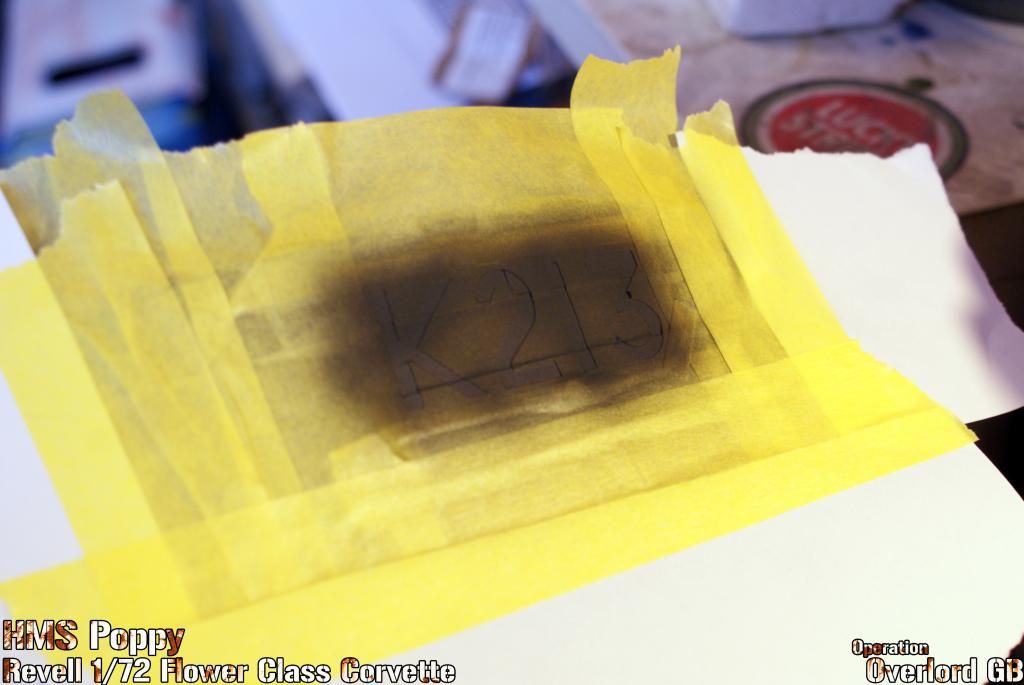 Then given a coat of neat Rubber Black to minimise bleeding. 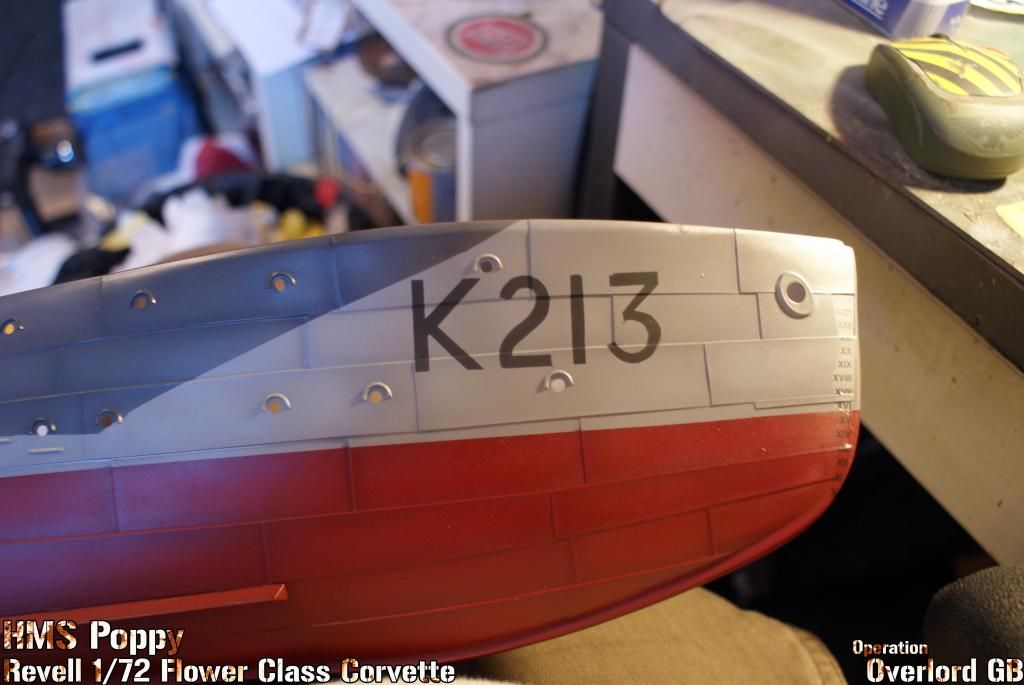 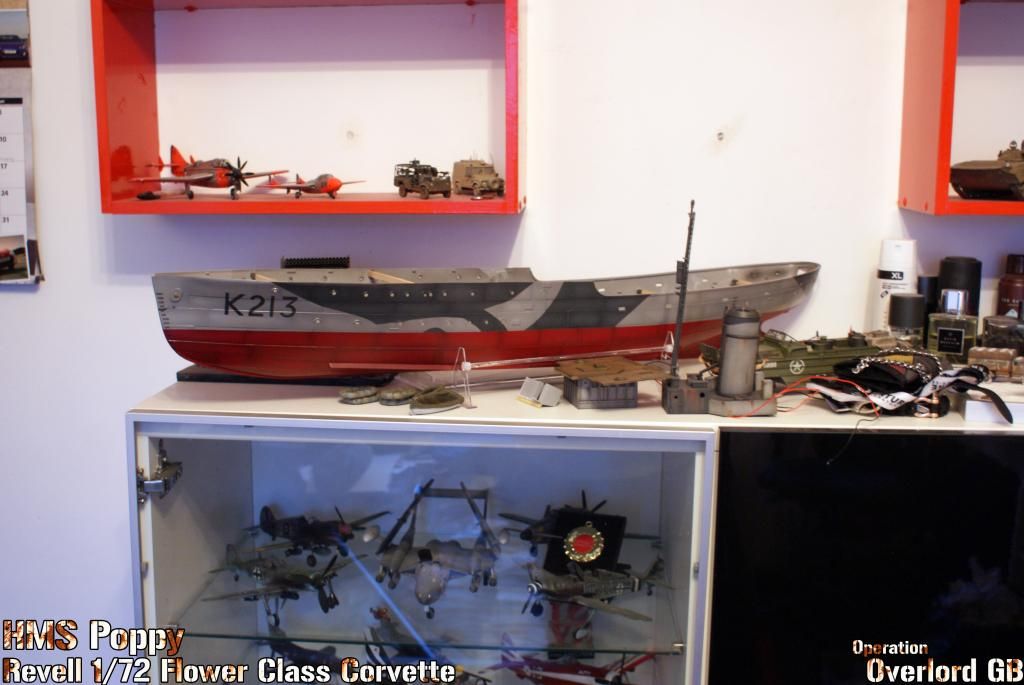 Turned out better than I could have hoped tbh! Just needed a little touching up. 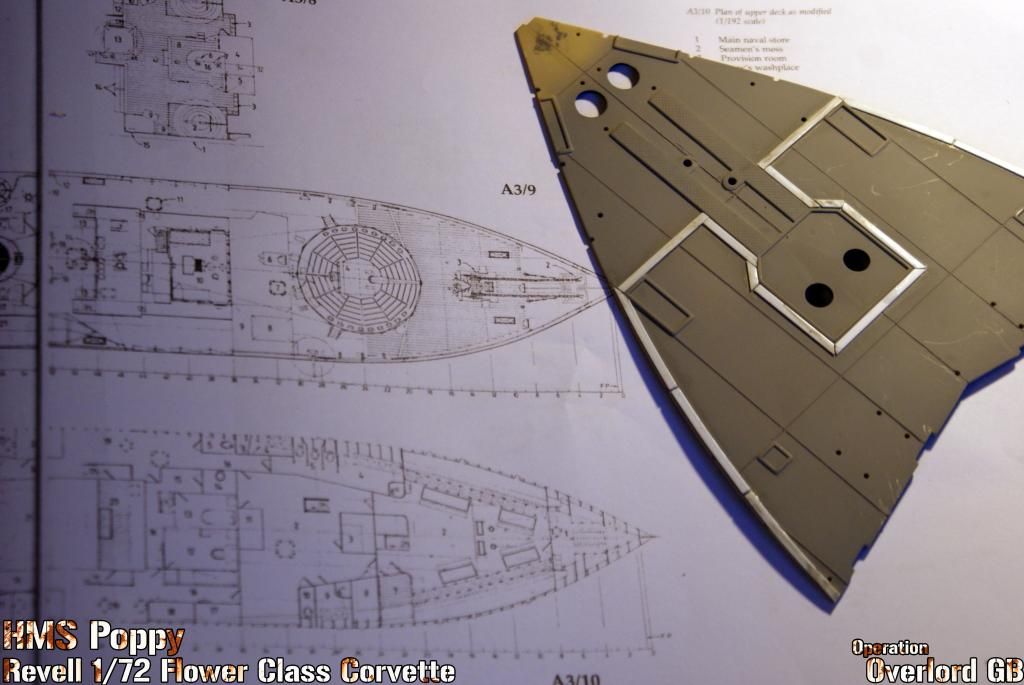 While the Klear on the hull ready for weathering was drying I turned my attention to the wooden decks. I began by cutting the Plastruct strip into 3cm lengths and creating a border around where the planking will be. 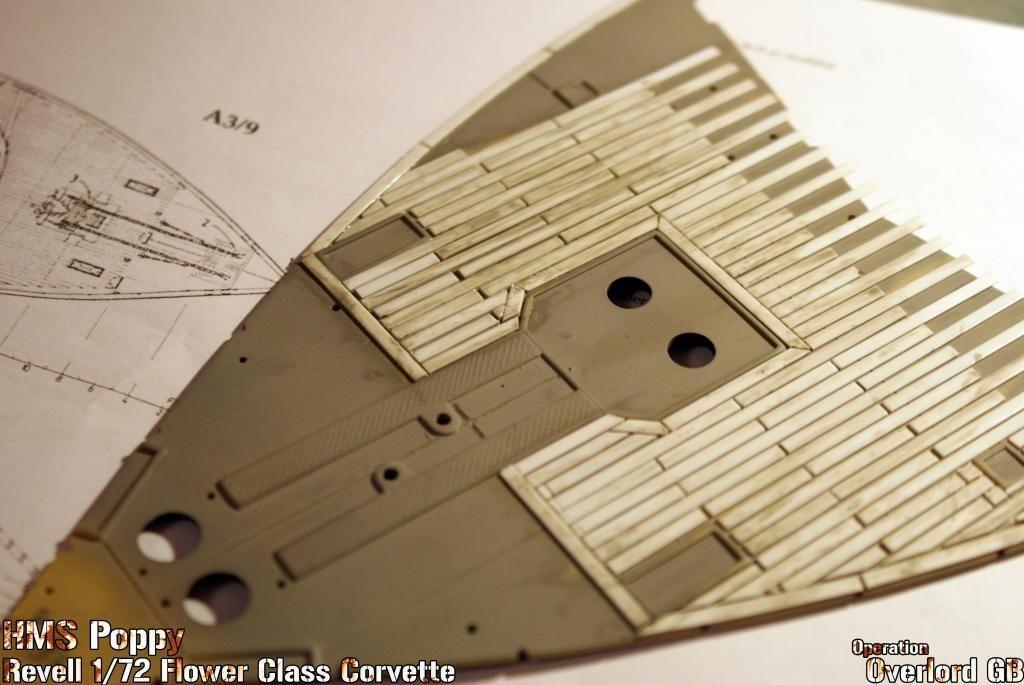 This was as far as I could manage to get tonight before losing my sanity. Quite pleased with it though. 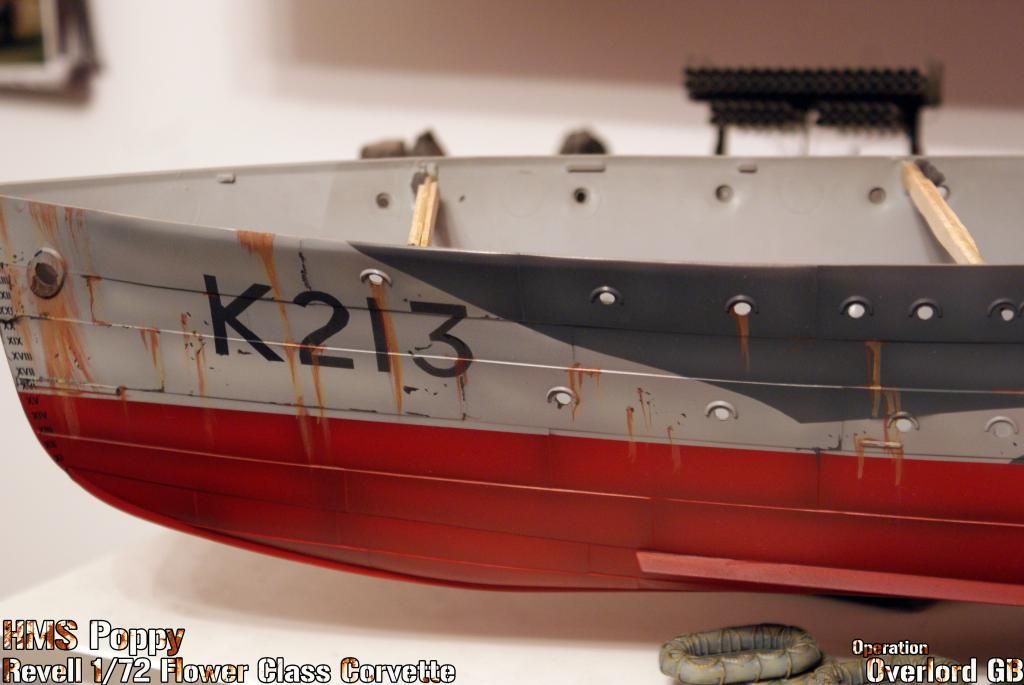 I then weathered the hull in the same manner as the rest of the ship. Bear in mind the photos make it look a LOT more pronounced than it actually is, plus it still needs a coat of Dark dirt which will tone everything down. 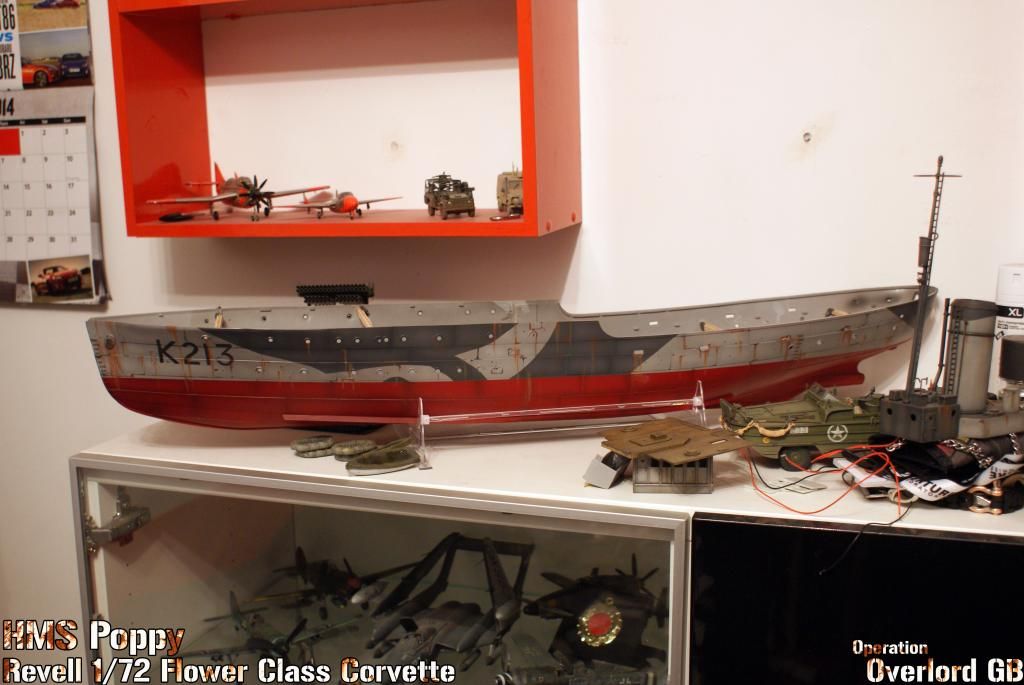 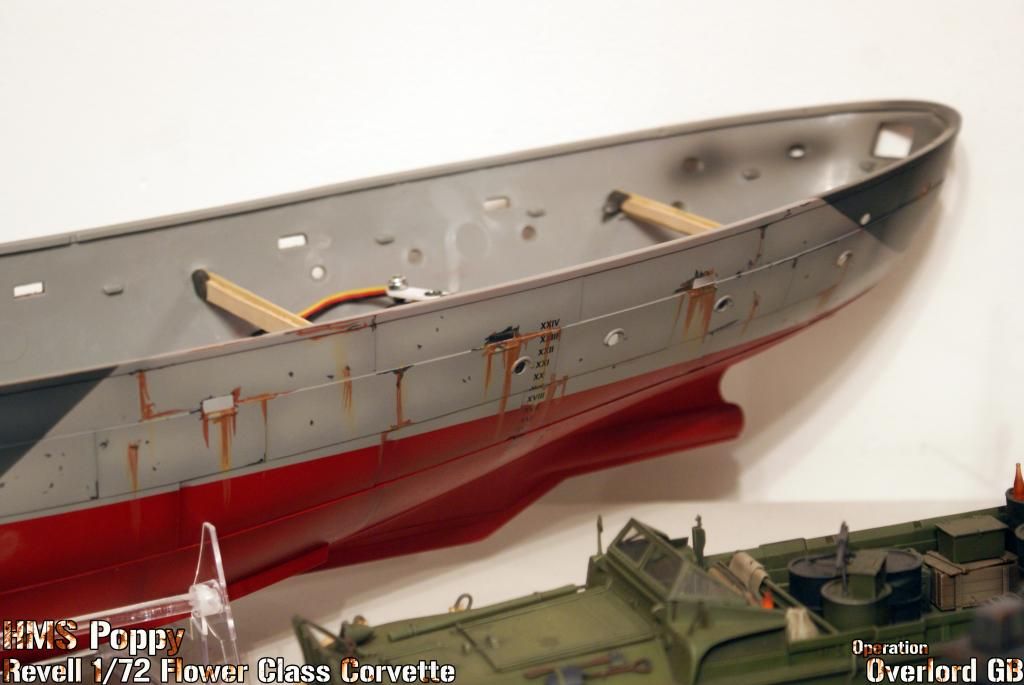 So, as I say, next job will be a wash on the hull and some streaking, then I need to start getting the ballast sorted. I bought some £3 rebar from B&Q today which I'm hoping will be a good start after I lop it in half with an angle grinder. then I can add some lead and stuff. [17/08/2014] UPDATE 8: 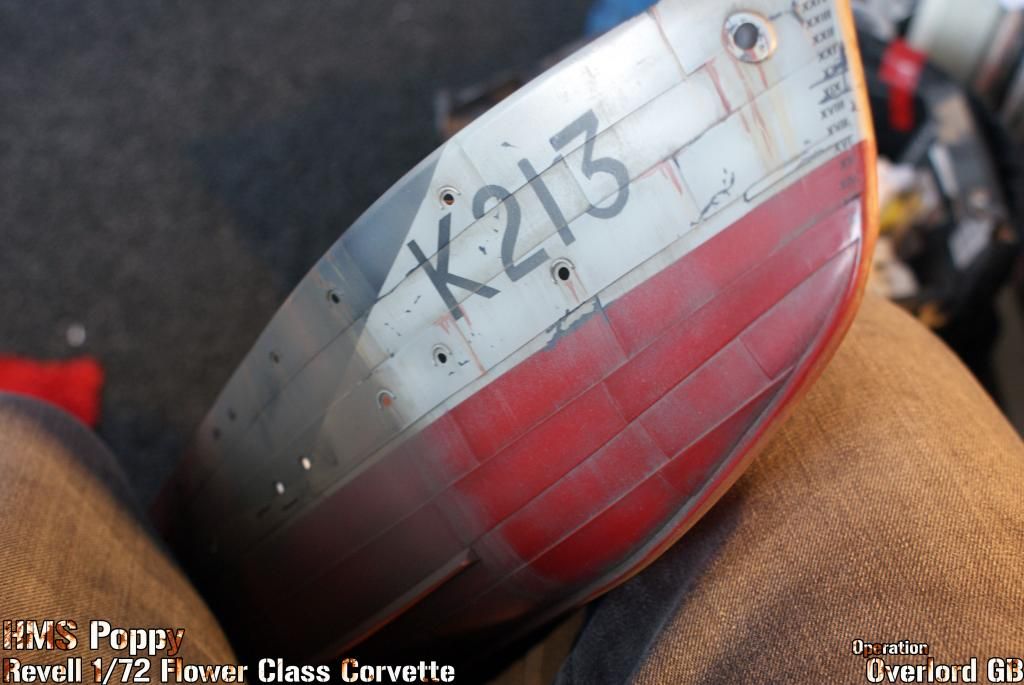 Carrying on with the weathering, I gave the hull a coat of matt then sprayed down a coat of slightly thinned Flory Models Dark Dirt wash, plus a few patches of Mud Brown. I then got a large wet brush and streaked the wash downwards, aiming to take most of it off. Takes a bit of time but I like the effect. 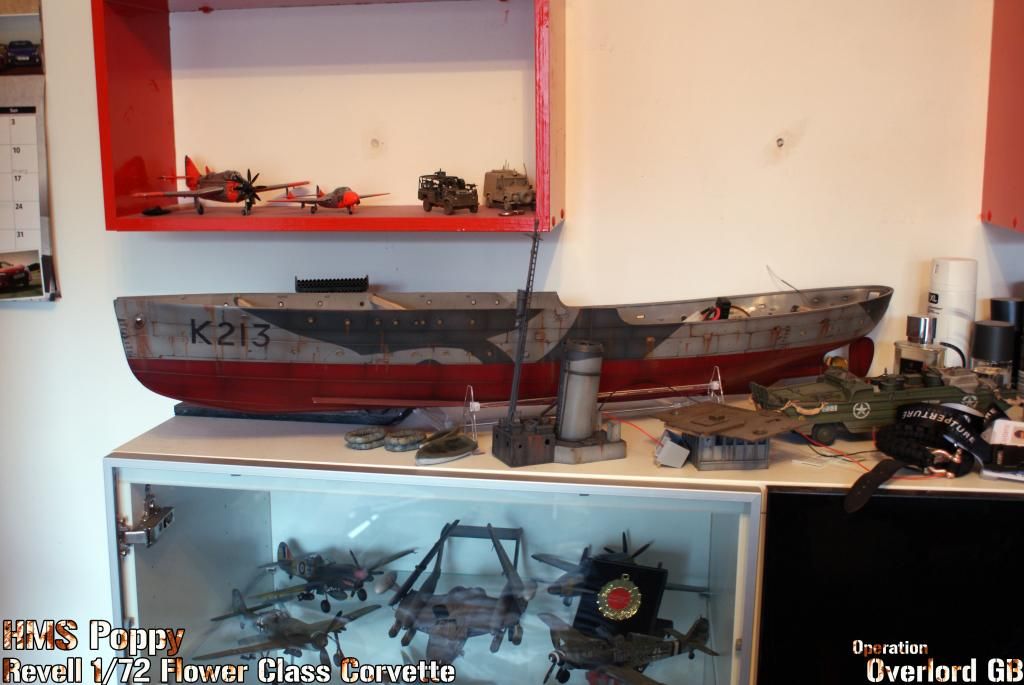 It then got a coat of Klear followed by a good final coat of Xtracrylix Matt. 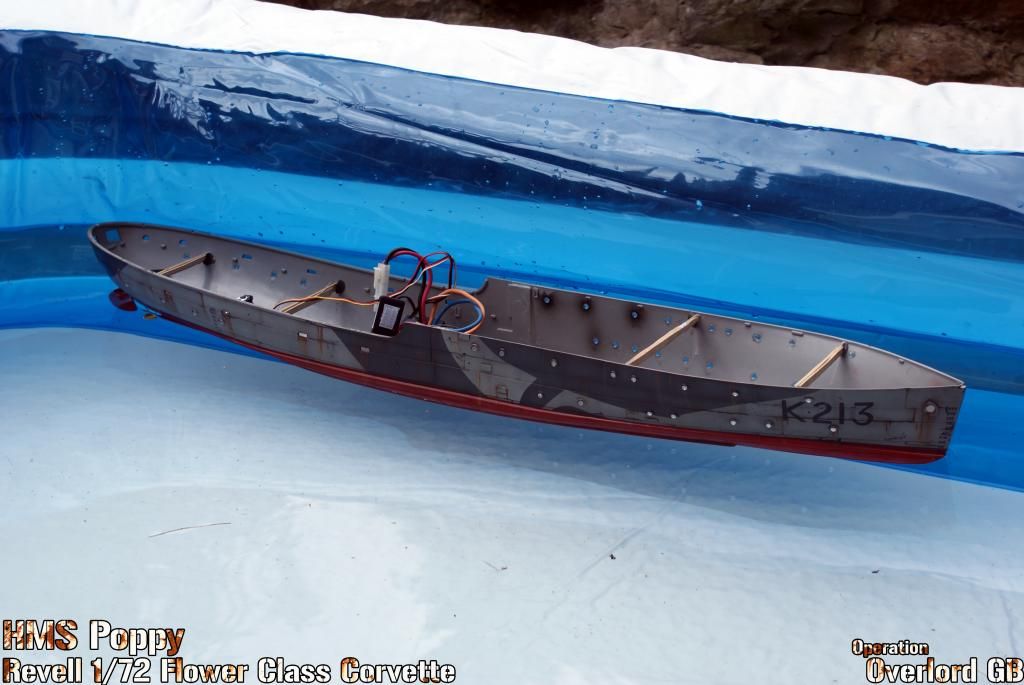 Sea trials!  She floats! She floats!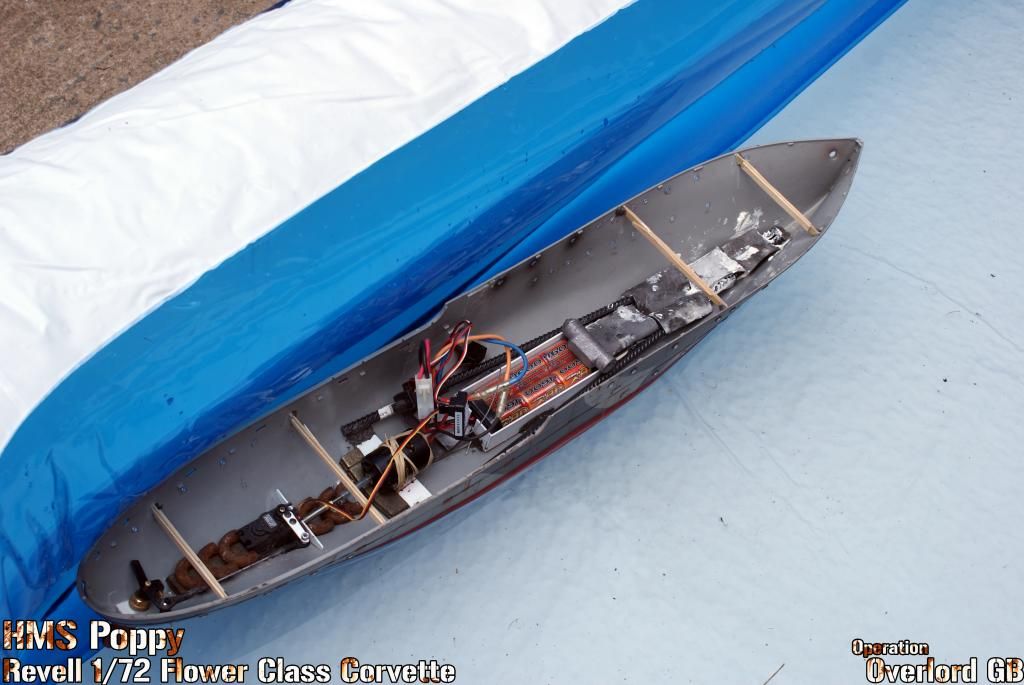 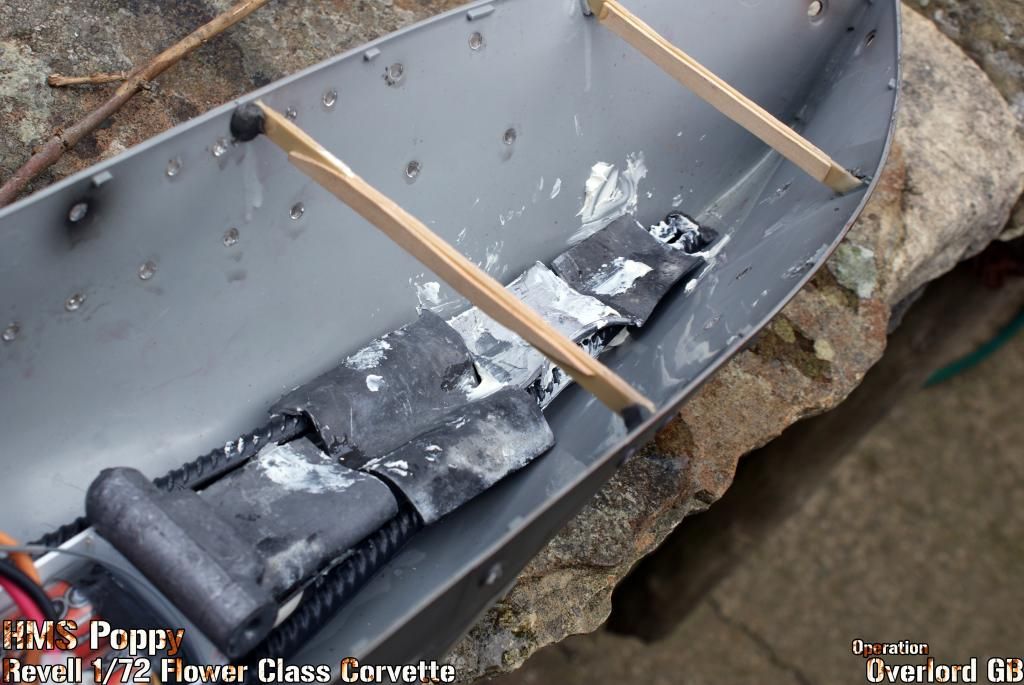 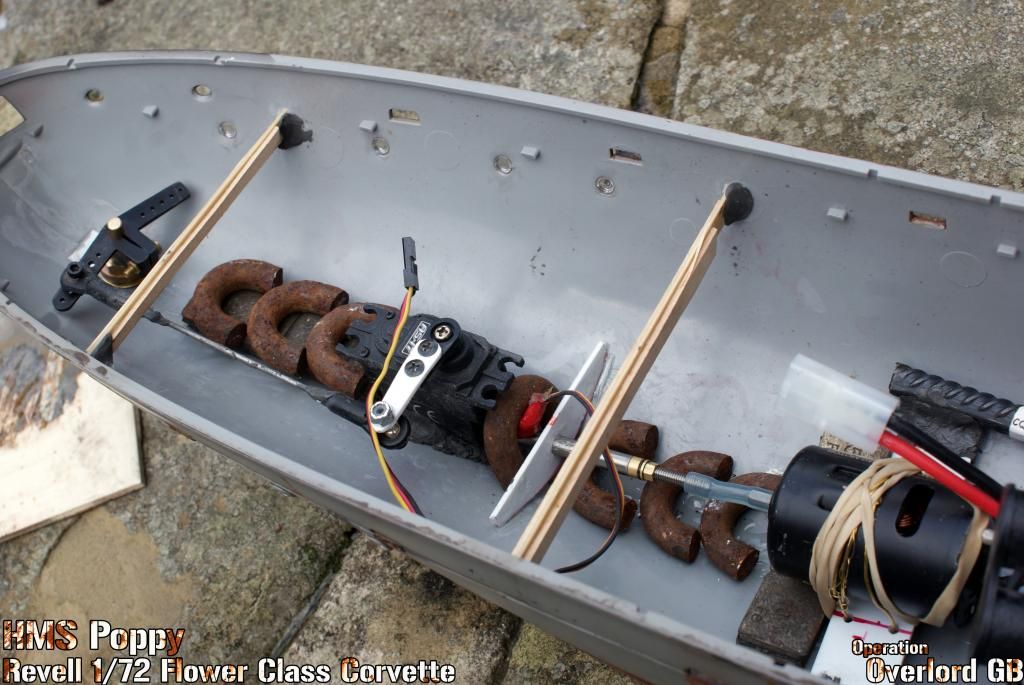 It took a meter of rebar, about a foot square of lead sheet, some wheel weights and some chain links to get her to float right, but she sits in the water nicely now  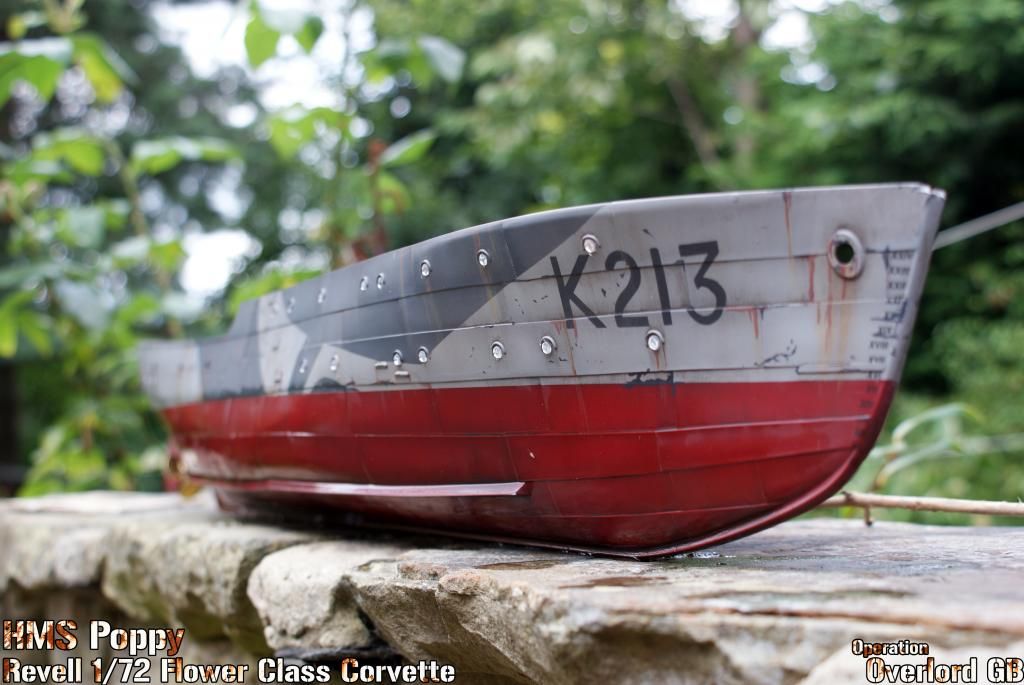 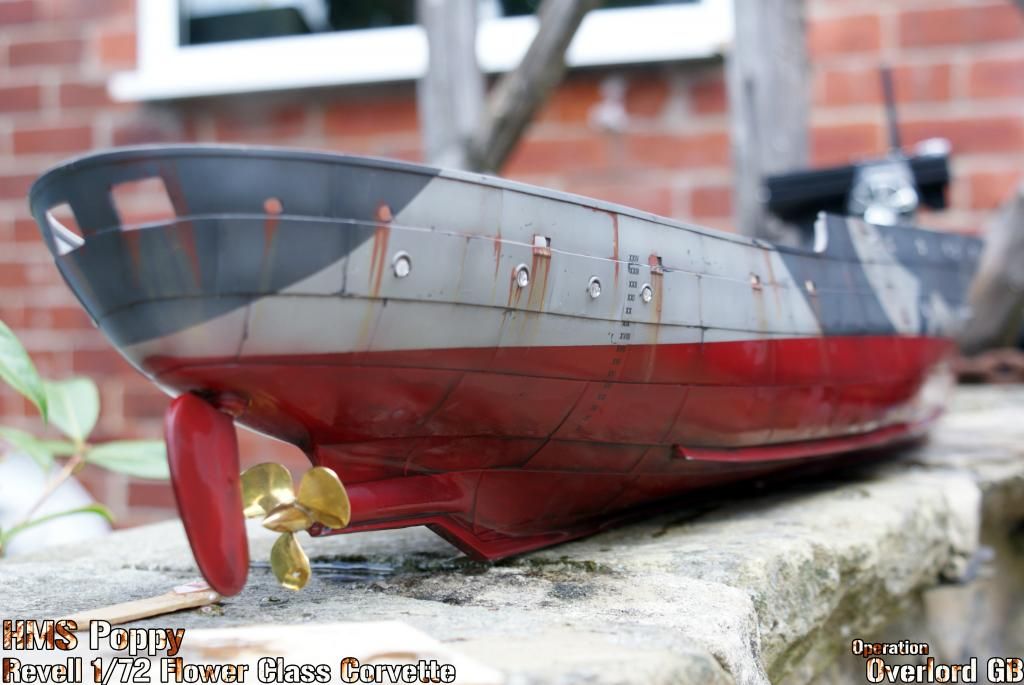 Really pleased with how it's coming on now. TBC...
__________________
Alex Don't judge a ship by the number of it's guns, but by the skill of it's crew. |

|

|
 10-31-14, 04:57 AM
|
#8 |
|
Royal Kinotropist
Join Date: Mar 2007
Location: Sheffield, UK
Posts: 987
Downloads: 18
Uploads: 0
|
[I originally wanted to get the replacement armament from Sirmar Fittings as you can get the whole set at a decent price. Unfortunately I emailed him twice with no replay so had to go down the Great Little Ships/DJ Parkins route. They are more expensive but to be fair are vastly more detailed]
[19/08/2014] 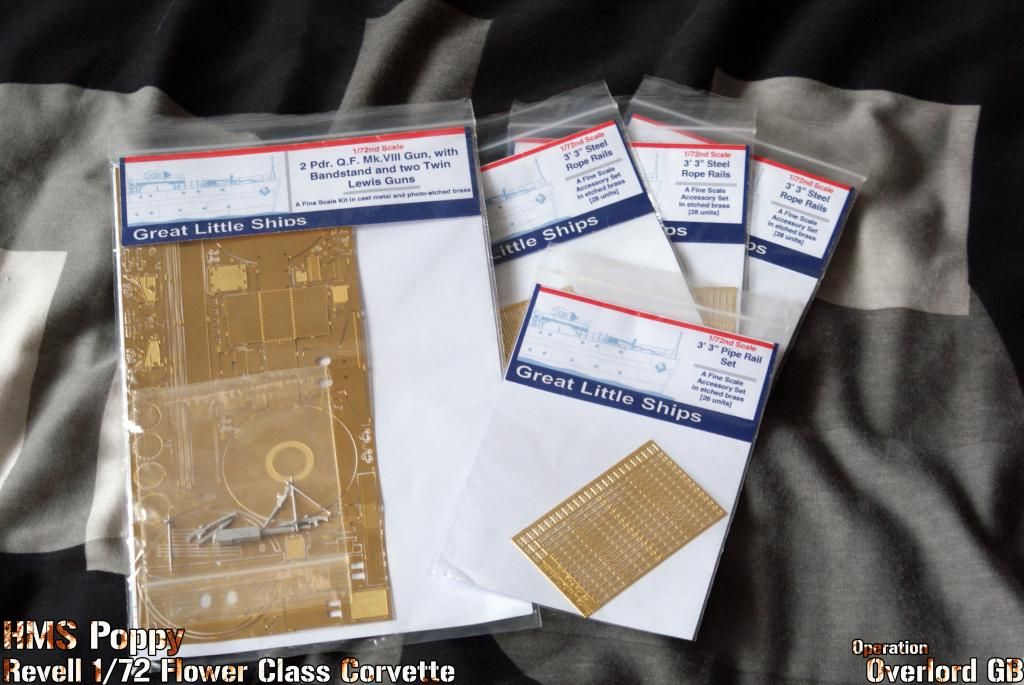 My order from DJParkins arrived today. Great service from him, ordered midnight on Friday, dispatched Monday, arrived Tuesday. Can't say fairer than that! And what sets they are! The detail in the gun set is fantastic, they are superbly etched, you even get a pair of twin Lewis Guns as a bonus! The stanchions are very nice too. I got 3 packs of the rope rails which go around the engine room, fo'c'sle etc, and 1 pack of the pipe rails which go on top of the boiler house. Just need to find some thin wire to use with them now. [28/09/2014] UPDATE 9: Just an itty bitty update 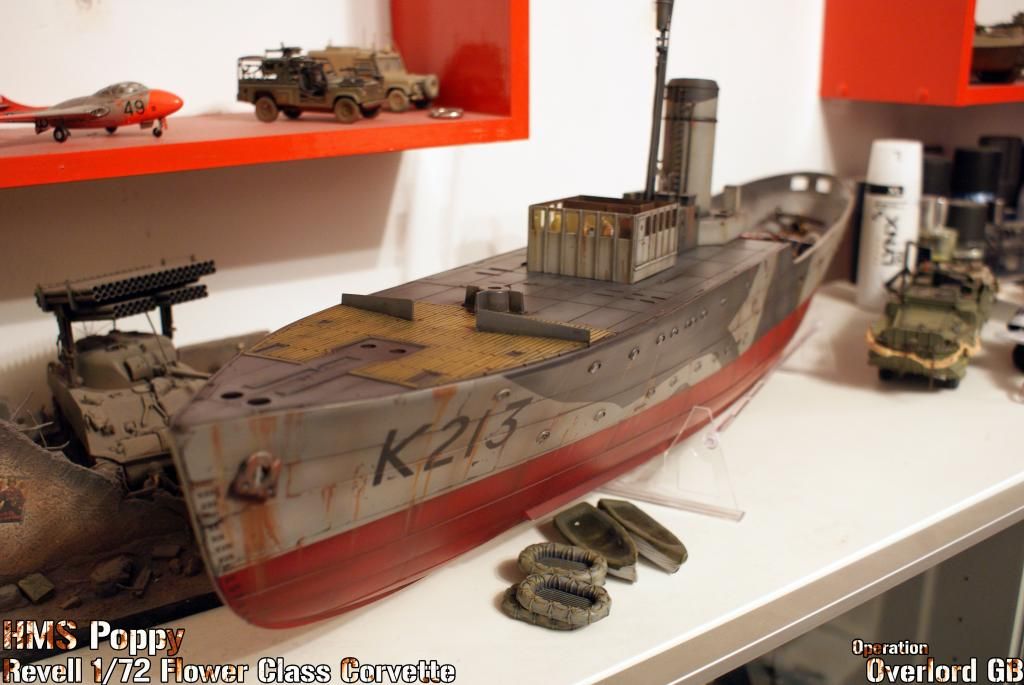 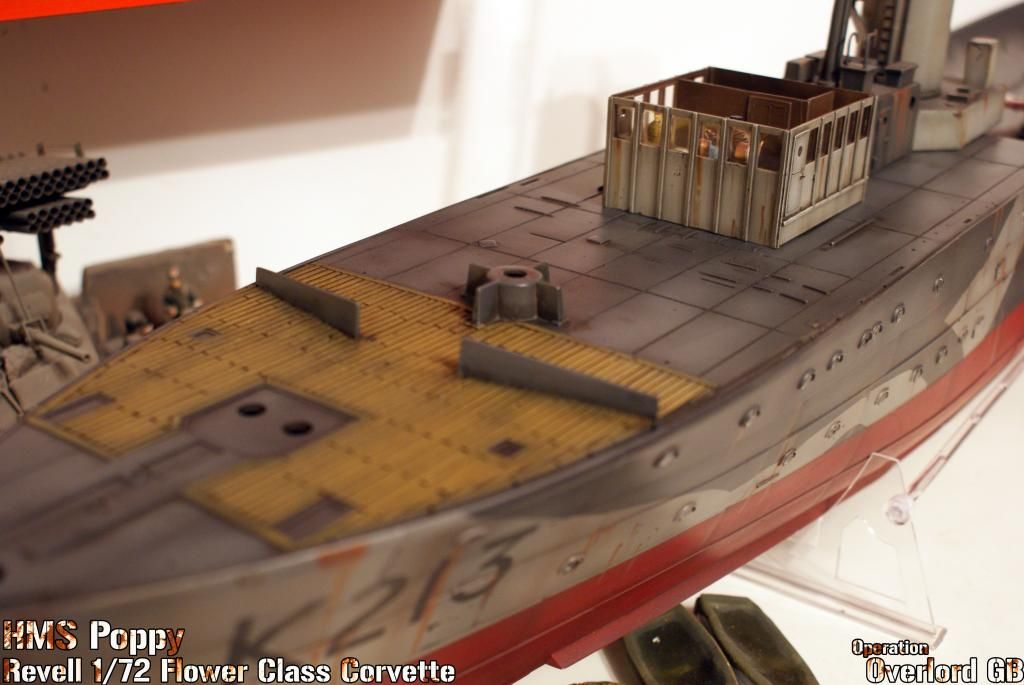 Got the Fo'c'sle installed and painted up, just gotta get the quarter deck sorted now. [30/08/2014] Another quick update, been grappling with the railings this afternoon! 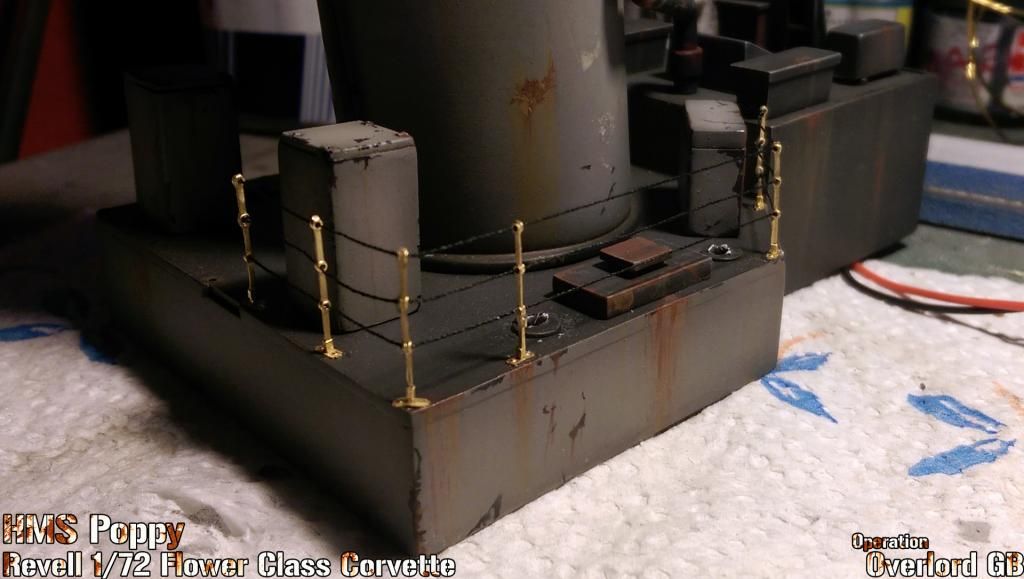 The DJP etched stanchions come as 2 halves which are folded together and glued. I searched about for some very thin wire to use but just couldn't find any so I had to make do with thread in the end, not the end of the world but technically these should be Pipe Rails AFAIK. The thread will be fine for the rest though as they are all Rope Rails. Also finally got a new phone (HTC One M8) which I've been after for ages, which apparently takes rather nice close up shots [31/08/2014] Got a little bit more done last night. 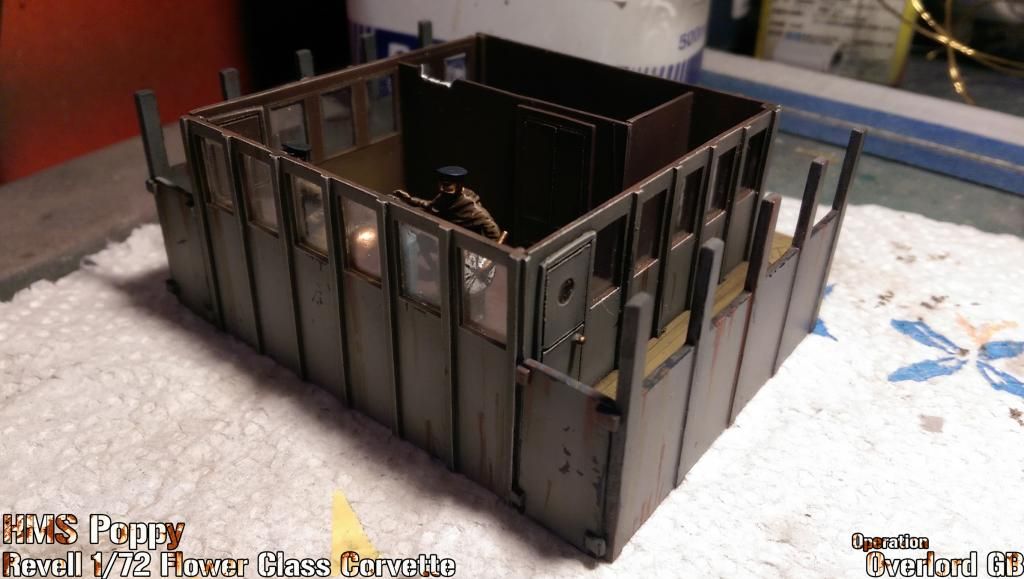 Side walkways are on the Wheelhouse, not far off done with that now. 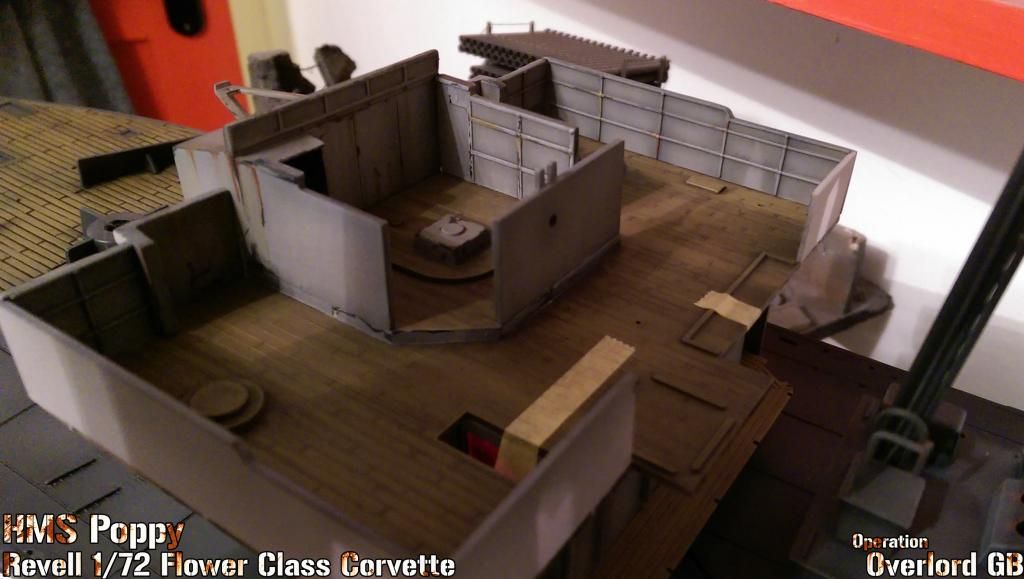 Also getting well on with the bridge. I'm aiming to get the whole bridge/rear Fo'c'sle area done before I get the quarter deck on as that's where all the wiring and lighting is located. Once this area is done I can actually get the wiring sorted and in. [04/09/2014] UPDATE 11: Managed to get on with the 2pdr Pom Pom yesterday. 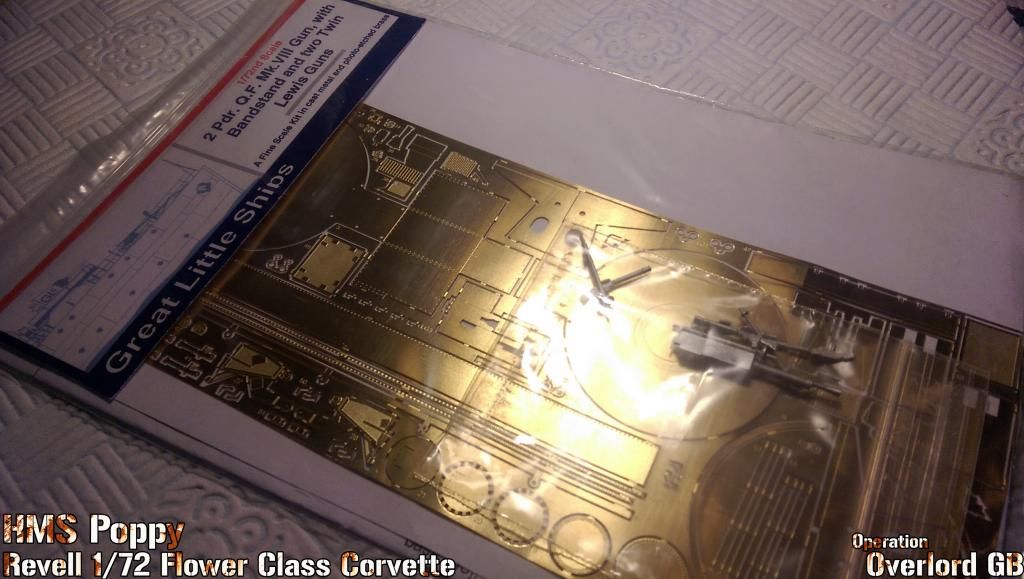 The DJP set comes flatpack with one PE brass fret and one small bag of white metal barrels. 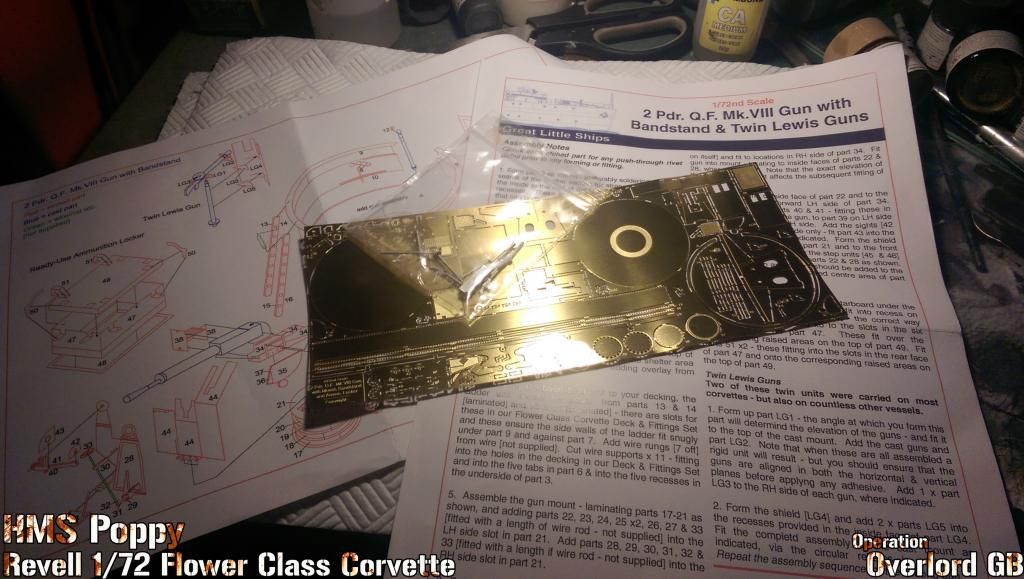 As you can see the 2 page instructions are very comprehensive. I barely read the written one tbh and just went in all guns blazing with the diagram lol. Pretty pictures and all that. 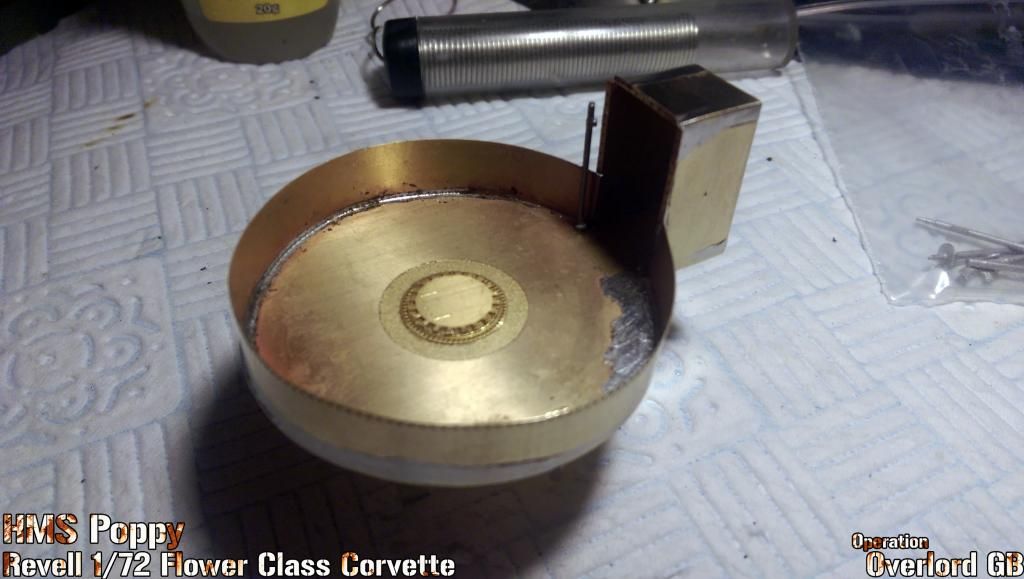 Made the bandstand up first, the circular base and the hut/enclosure fold up from one piece, then there's another circular part that fits into that, followed by the walling which needs to be rolled. Then there's just 2 parts for the stand/support. There are other little fiddly bit but I decided to leave them off. I will also use the kit ladder rather than building the PE one rung by rung I also tried my hand at soldering it together which actually didn't turn out too bad! 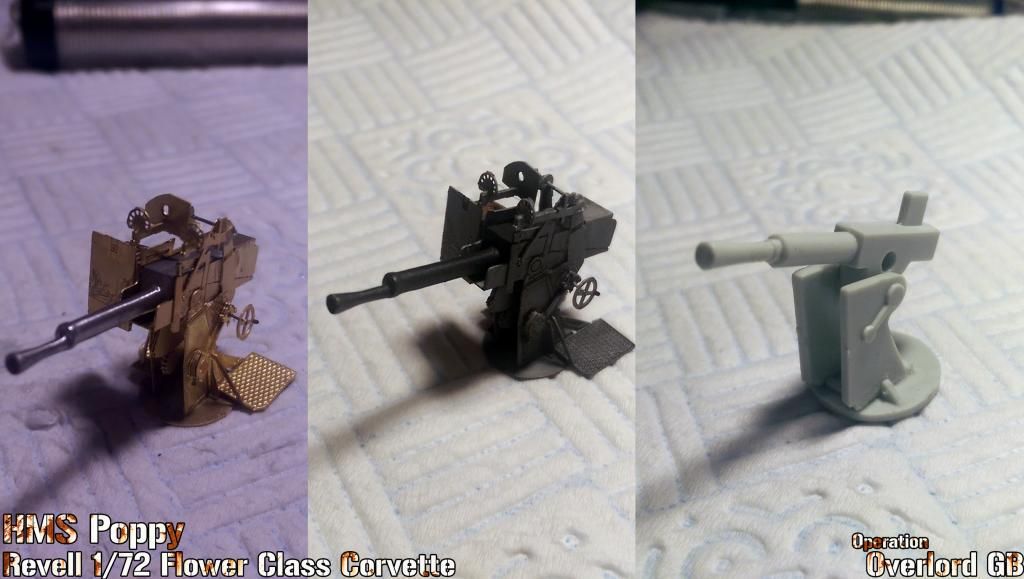 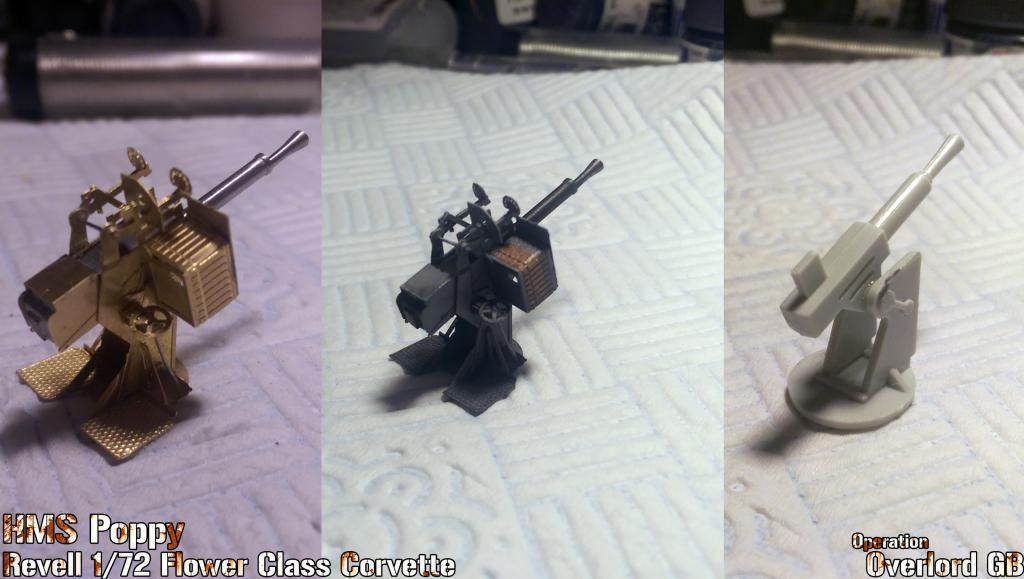 And then we have the gun. What can I say? It seems extremely daunting to begin with as you think how can all the flat little parts make up a 2pdr, but they all fit together very well. I also made the kit one up as a... um.... comparison... lol. It was painted with my custom grey mix like the rest of the ship, while the barrel was painted Mr Metal Dark Iron. It was then given a wash. Personally I think it may be a little too dark if I'm honest. You may also note that I left the shield off as Poppy didn't have one. I'd also just like to say, I genuinely had more trouble putting the 4 parts of the kit gun together than I did putting the 30 odd parts of the DJP one together haha. TBC...
__________________
Alex Don't judge a ship by the number of it's guns, but by the skill of it's crew. |

|

|
 10-31-14, 05:01 AM
|
#9 |
|
Royal Kinotropist
Join Date: Mar 2007
Location: Sheffield, UK
Posts: 987
Downloads: 18
Uploads: 0
|
[05/09/2014]
UPDATE 12: 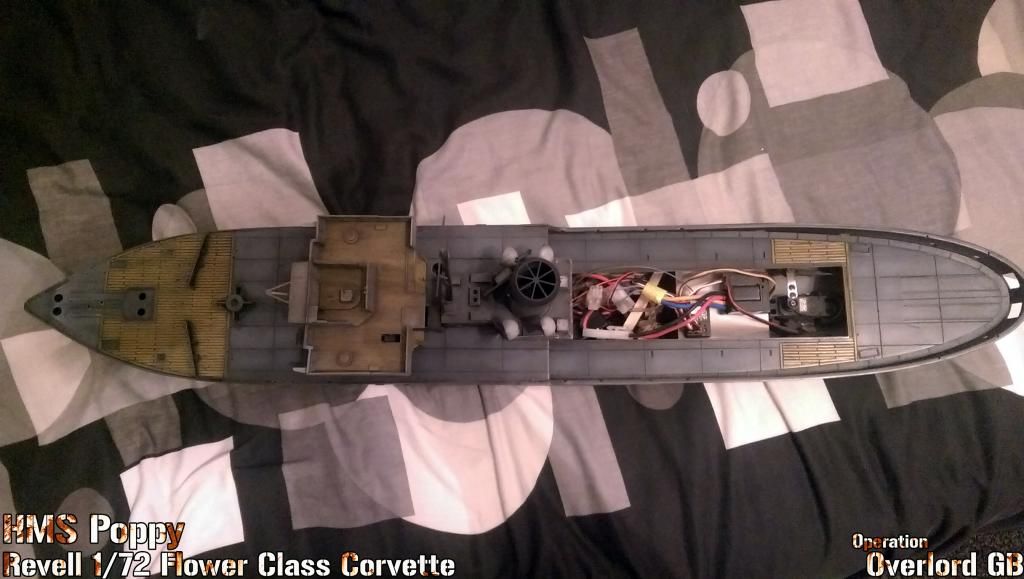 So, got the rear deck on and painted, along with the planking. 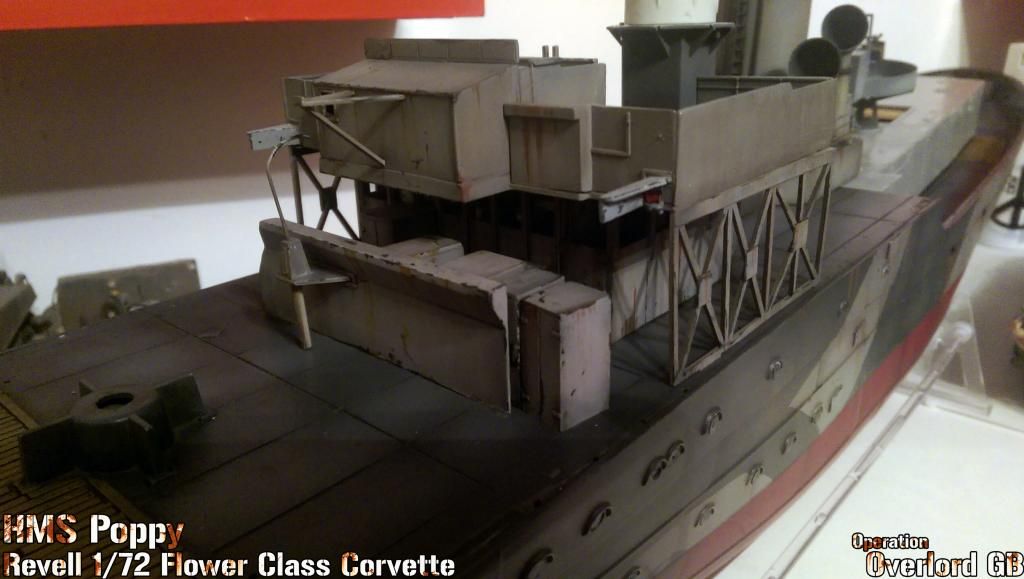 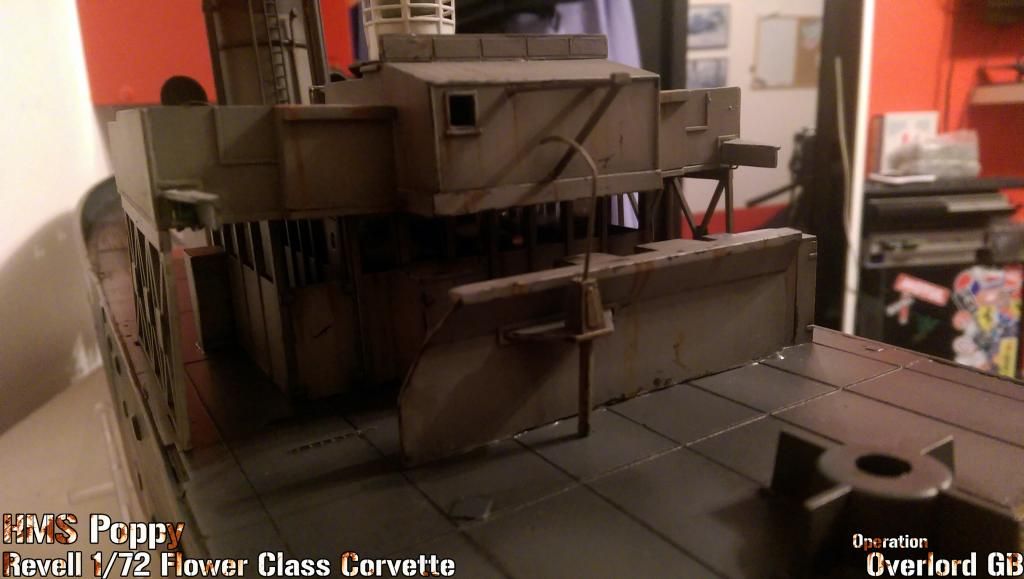 Plus a little bit more around the front of the wheelhouse. Really made a difference too, everything is starting to look nicely busy. [06/09/2014] UPDATE 13: Got plenty done today! 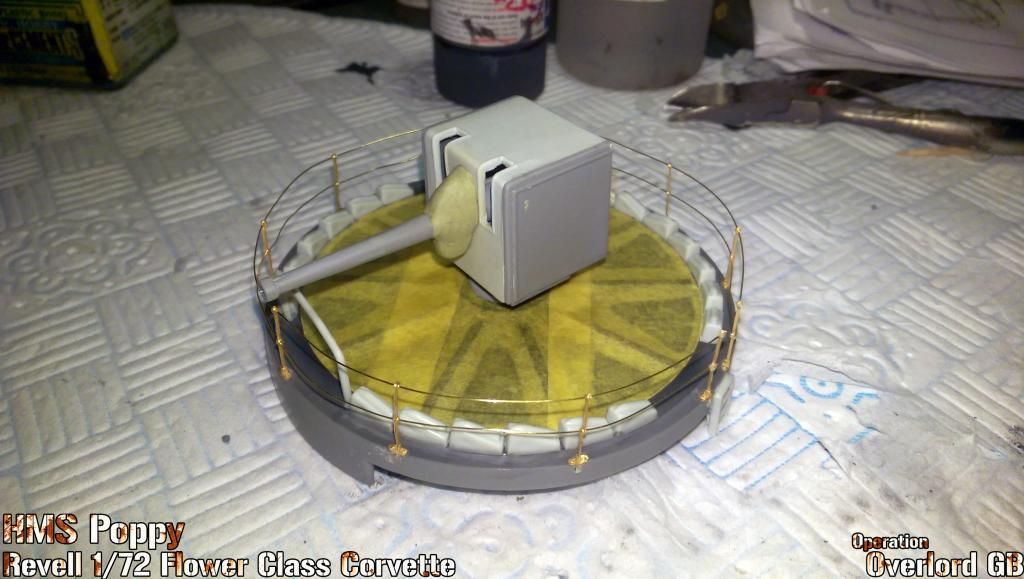 The forward bandstand and 4inch. All kit parts except the railings. Gotta be honest it's not too bad at all, even the gun is acceptable, certainly compared to the 2pdr. I also added some ribbing to the bandstand platform (under the masking tape) 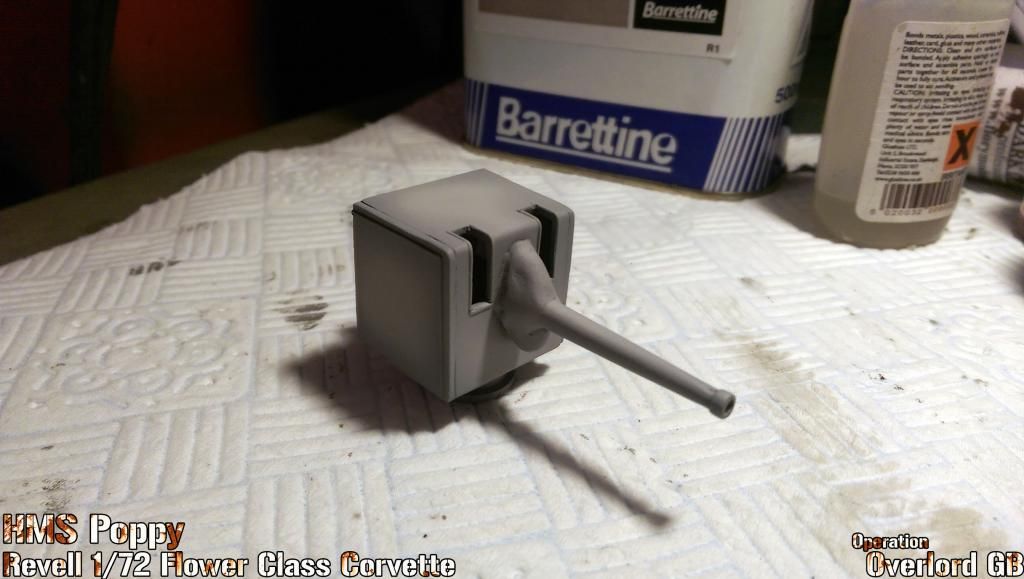 The 4 inch 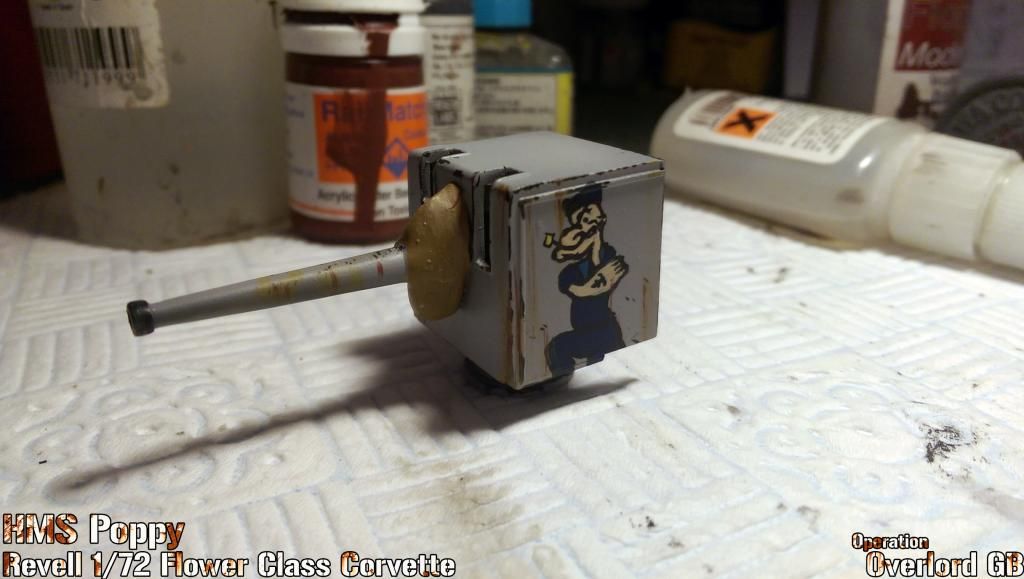 Well with a name like Poppy it's hardly surprising that her 'nose art' was Popeye lol! She also left port to the theme tune By some goddamn stroke of luck I managed to actually paint that on. The artwork is available here: http://www.cbrnp.com/RNP/Flower/ARTI...oppy/index.htm I just printed it out and carefully copied it with a fine brush. I was originally going to try printing it out then laminating it onto the side of the gun but I figured since it was such a simple picture I'd try my hand at a spot of painting. 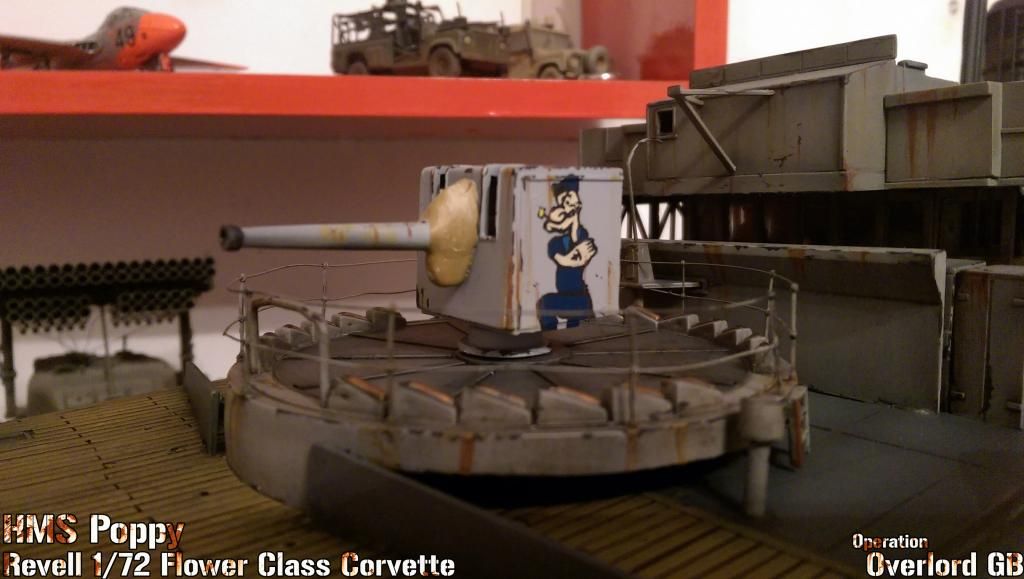 Still needs a wash hence the lighter colour. 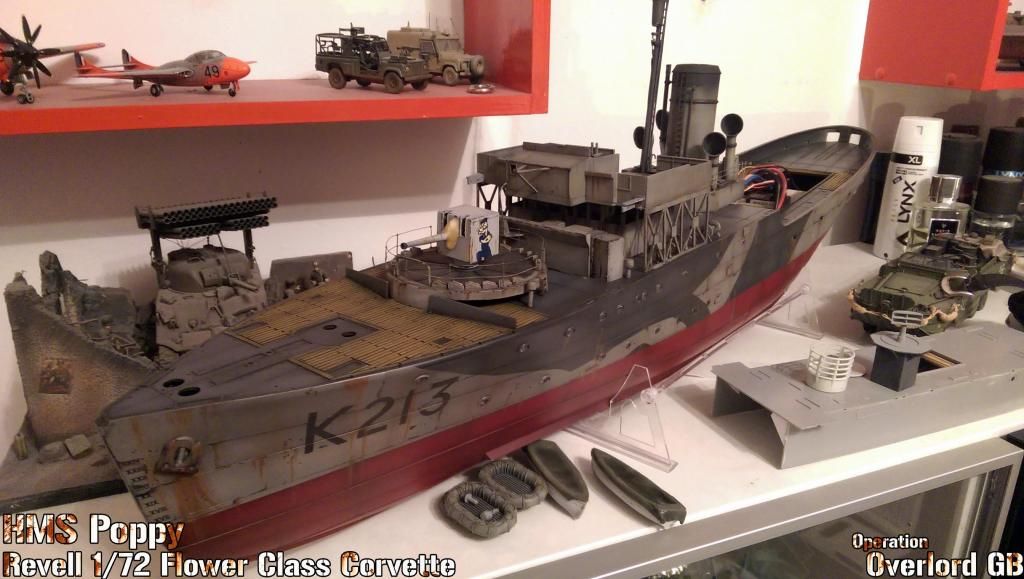 As she sits now. Not much more to go on the fo'c'sle tbh, I seem to be full ahead at the mo. Still plenty to do aft though! TBC...
__________________
Alex Don't judge a ship by the number of it's guns, but by the skill of it's crew. |

|

|
 10-31-14, 05:02 AM
|
#10 |
|
Royal Kinotropist
Join Date: Mar 2007
Location: Sheffield, UK
Posts: 987
Downloads: 18
Uploads: 0
|
[08/09/2014]
UPDATE 14: Well, I've got the Fo'c'sle pretty much finished now 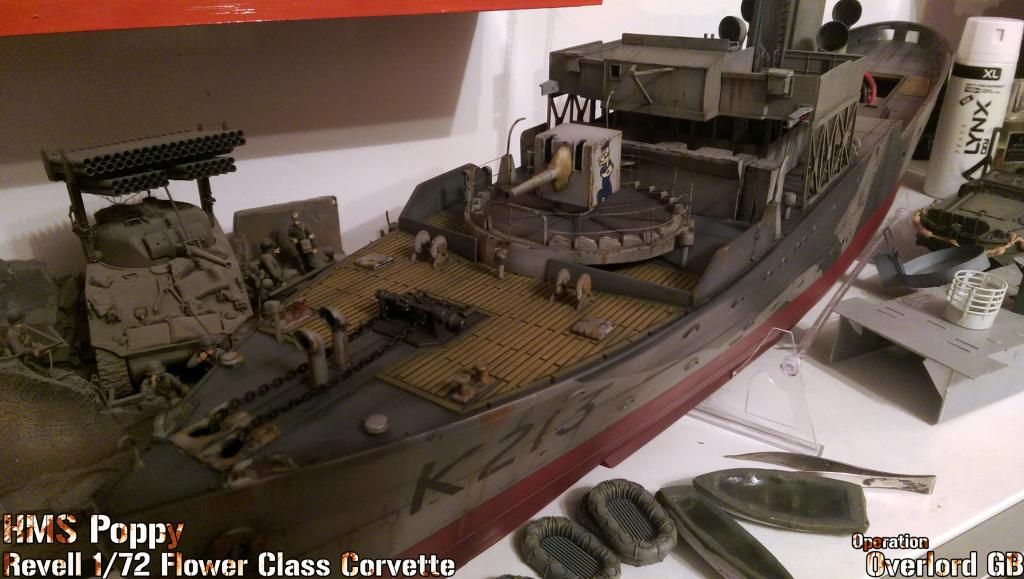 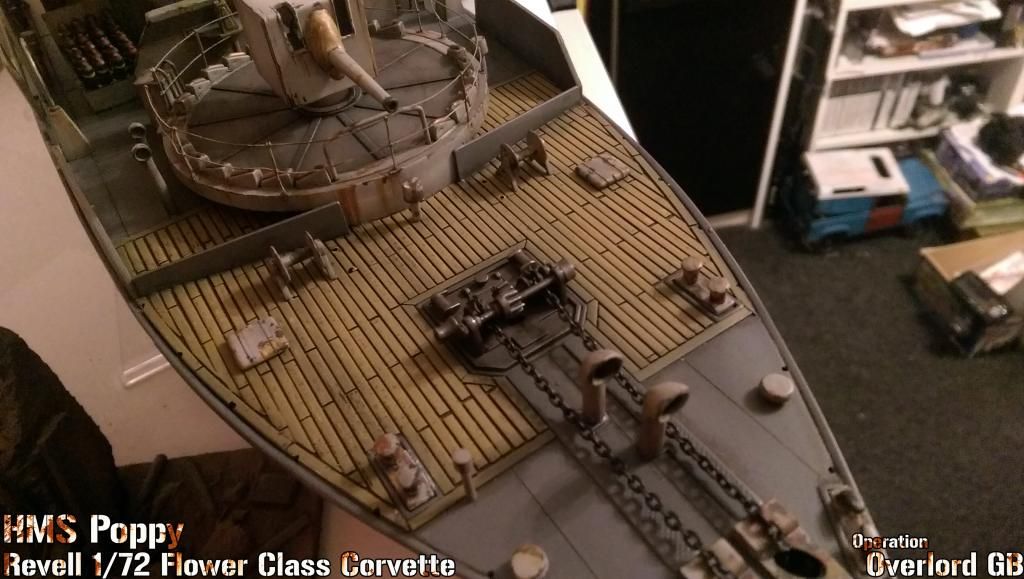 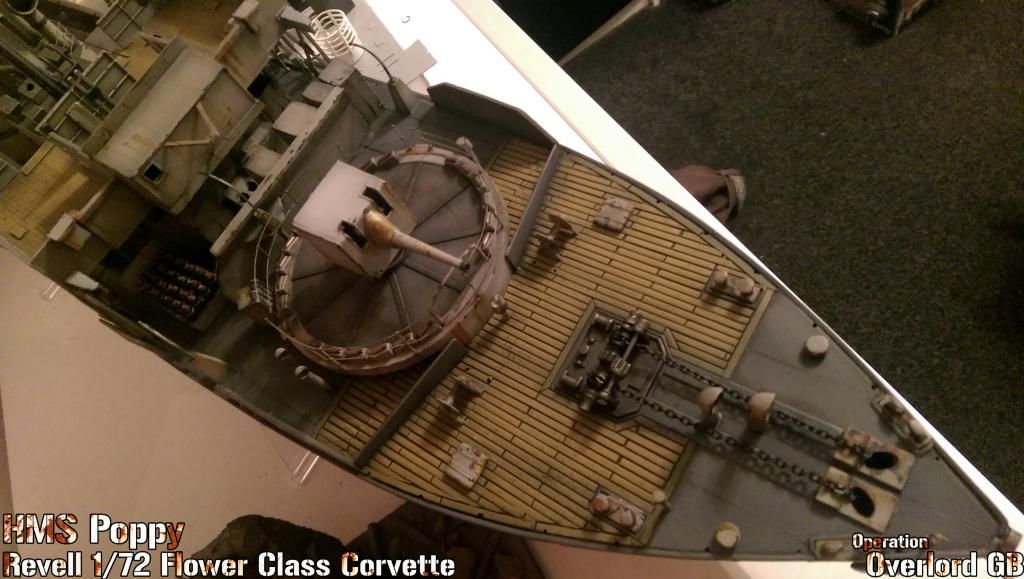 Got all the little fiddly bits on, along with the anchor and chain. The anchor winch was painted with Mr Metal Dark Iron (my new favourite colour!). That's about it apart from the railings which will go on last. Next up is the engine room casing and the scratch built Oerlikon platforms, then I can move back midships and sort the final touches on the bridge and all the Davits. [11/09/2014] UPDATE 15: Quite a large update tonight, got plenty done. Certainly moving into the 90% finished region I would say! 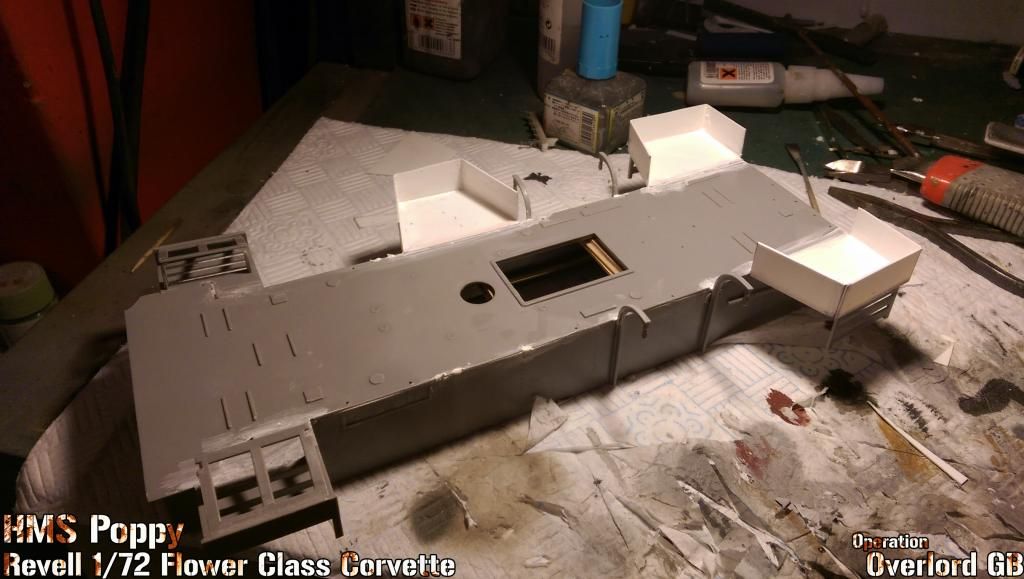 Little bit of scratch building on the engine room casing for the extra Oerlikons. 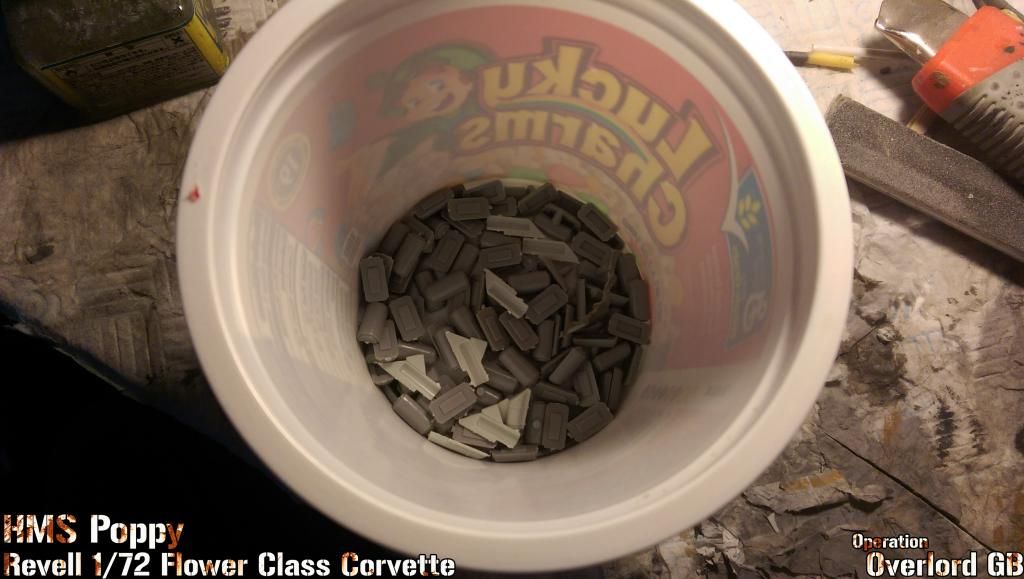 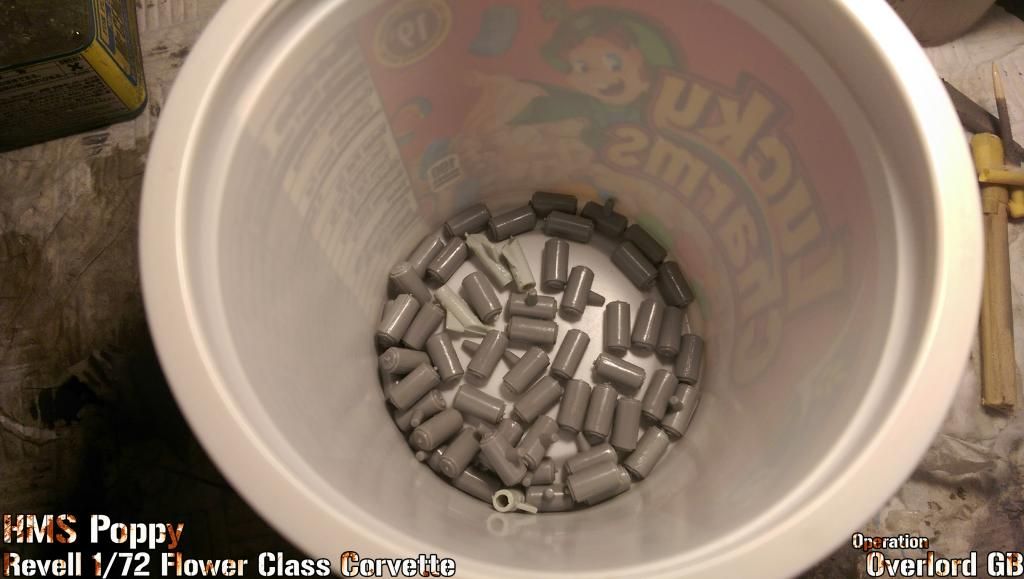 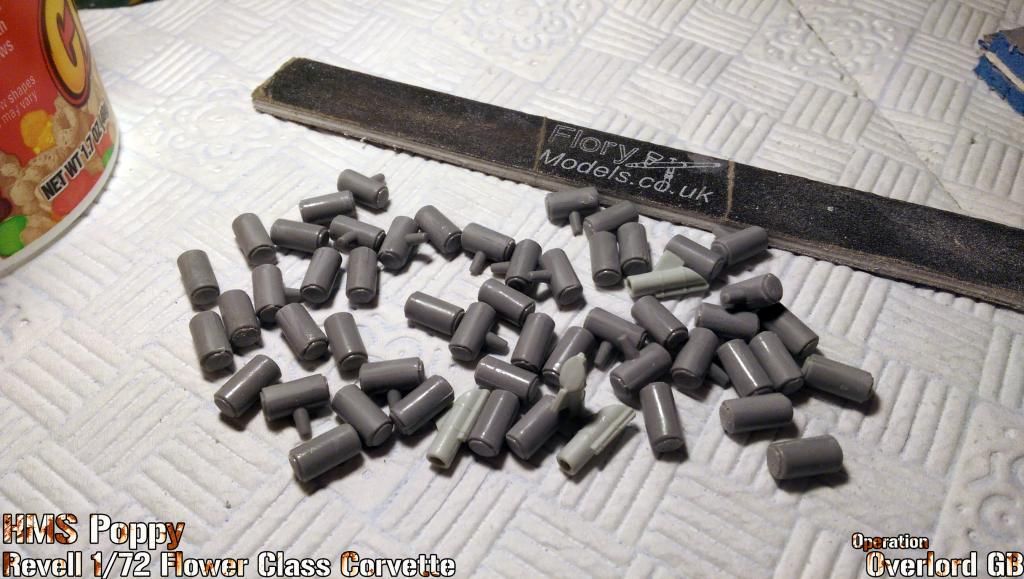 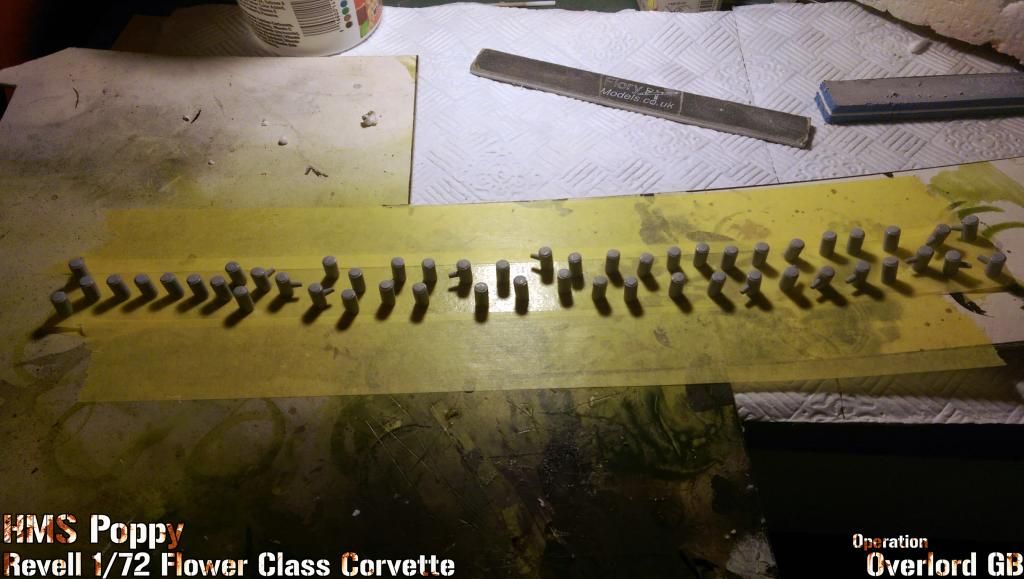 Bloody effing depth charges! Took me going up for 3 hours to get them glued together, cleaned up and painted! 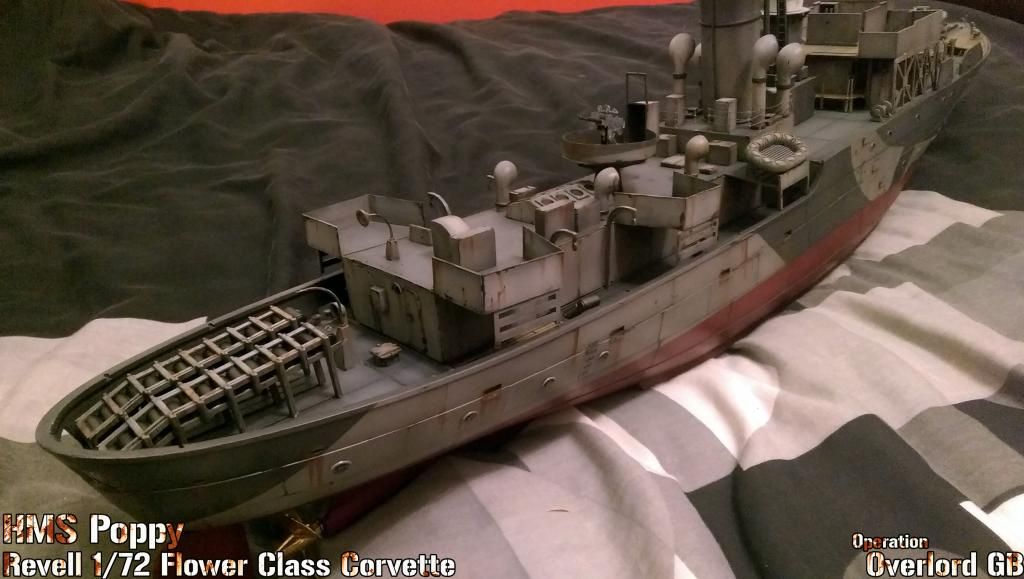 They do look the part though 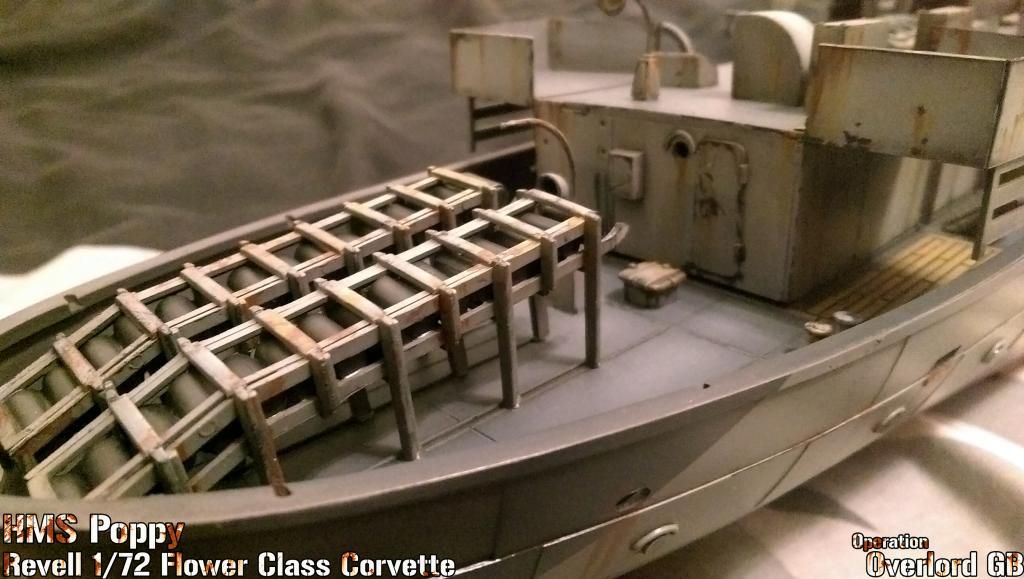 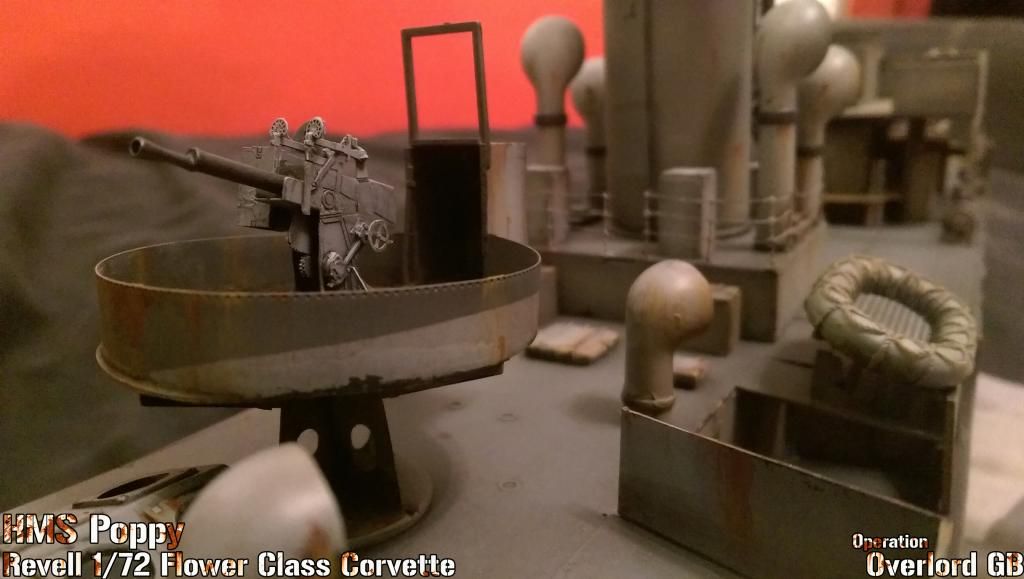 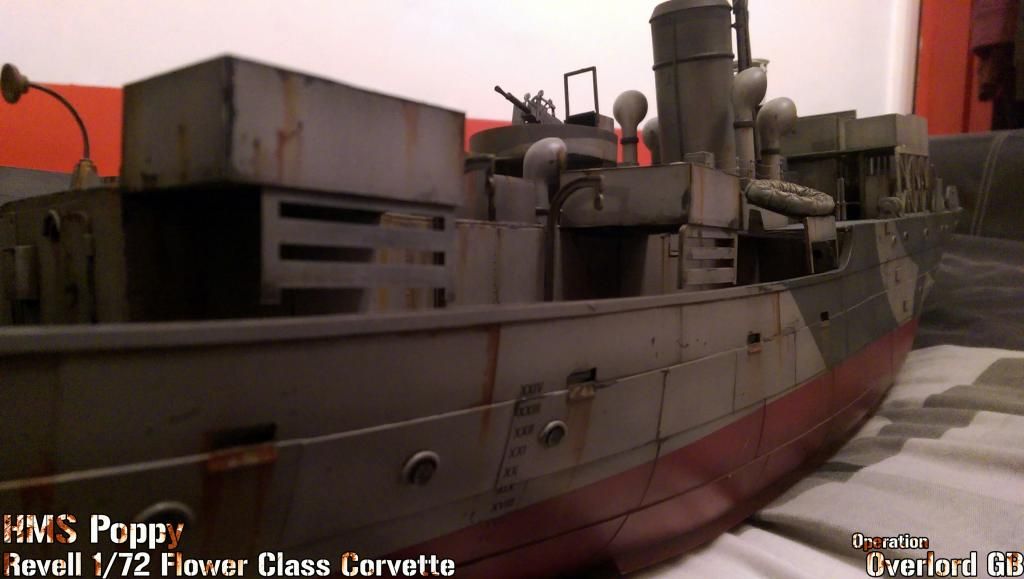 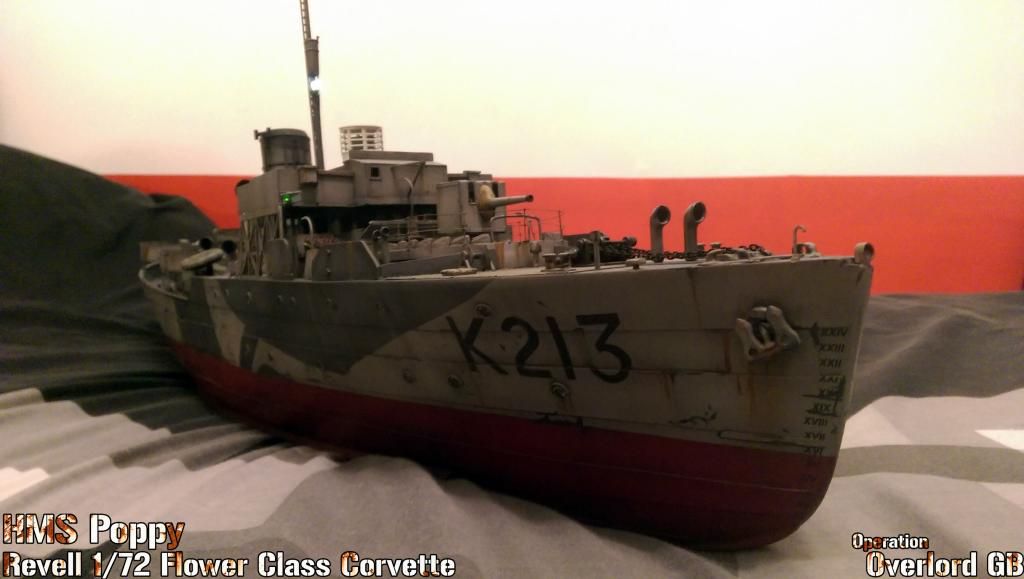 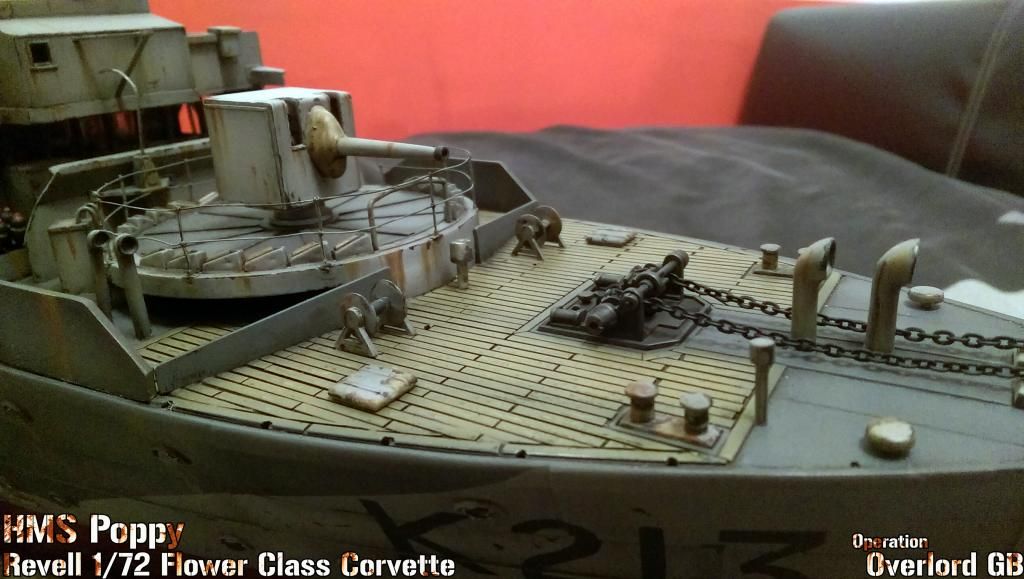 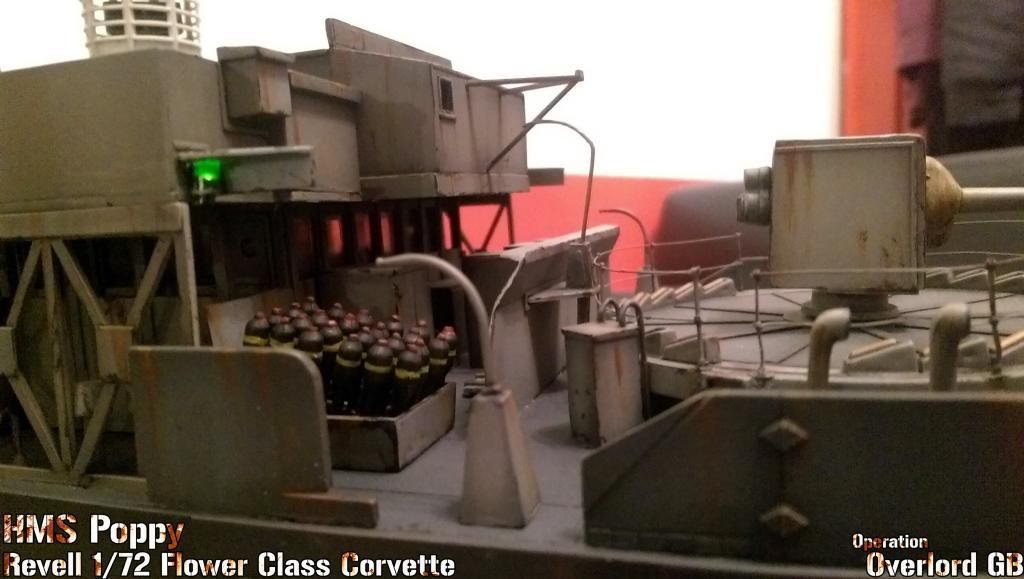 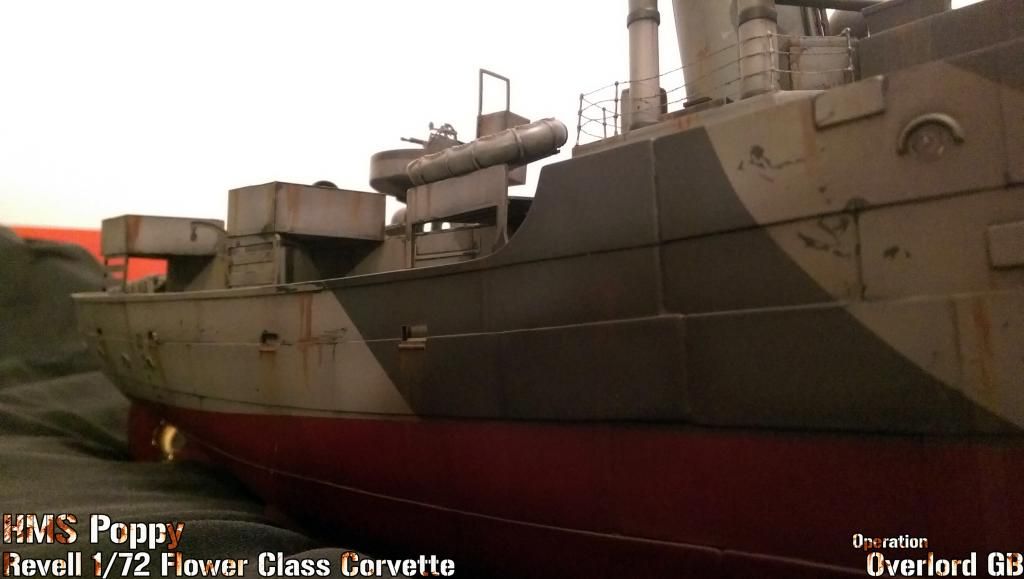 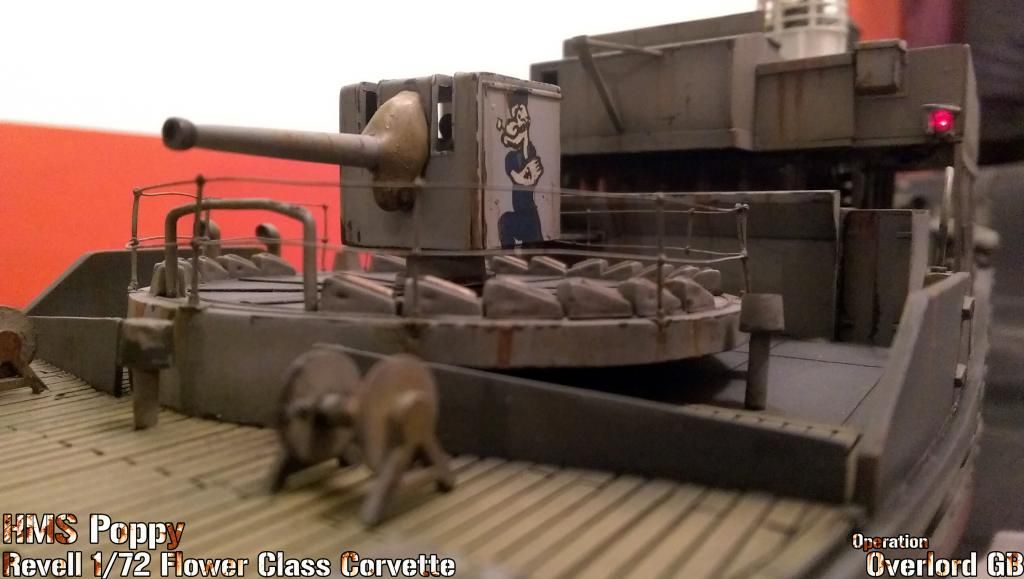 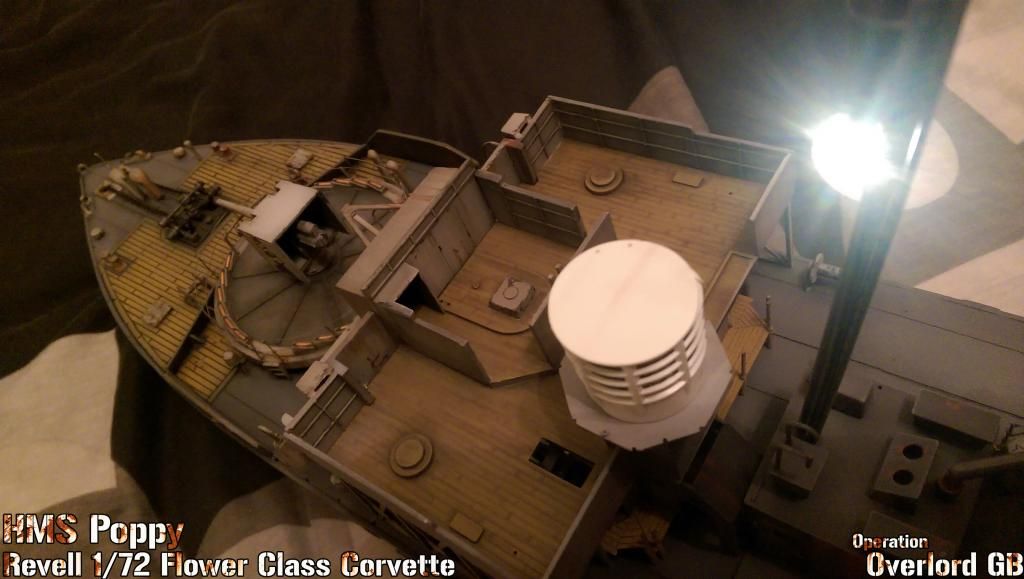  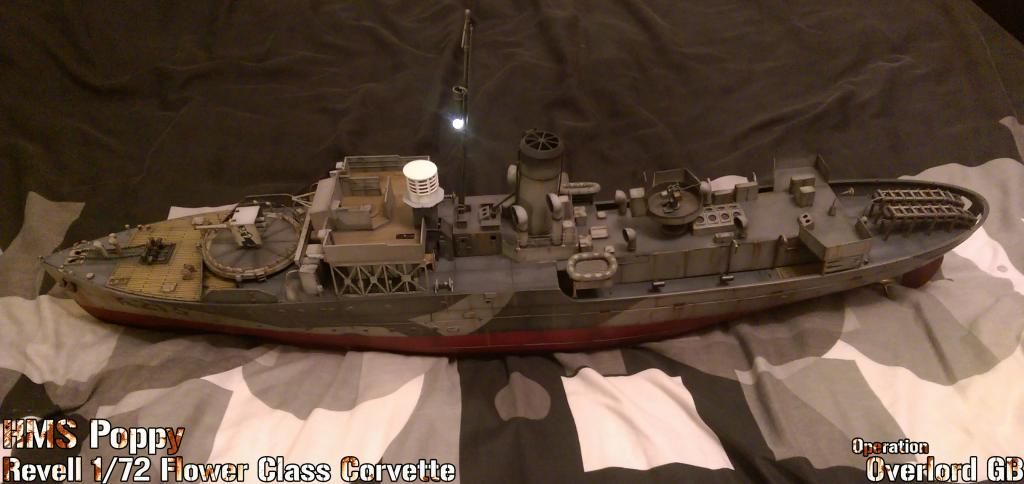 On the home straight now! Next up will be the Bridge and Lifeboat davits. TBC...
__________________
Alex Don't judge a ship by the number of it's guns, but by the skill of it's crew. |

|

|
 10-31-14, 05:04 AM
|
#11 |
|
Royal Kinotropist
Join Date: Mar 2007
Location: Sheffield, UK
Posts: 987
Downloads: 18
Uploads: 0
|
[15/09/2014]
UPDATE 16: 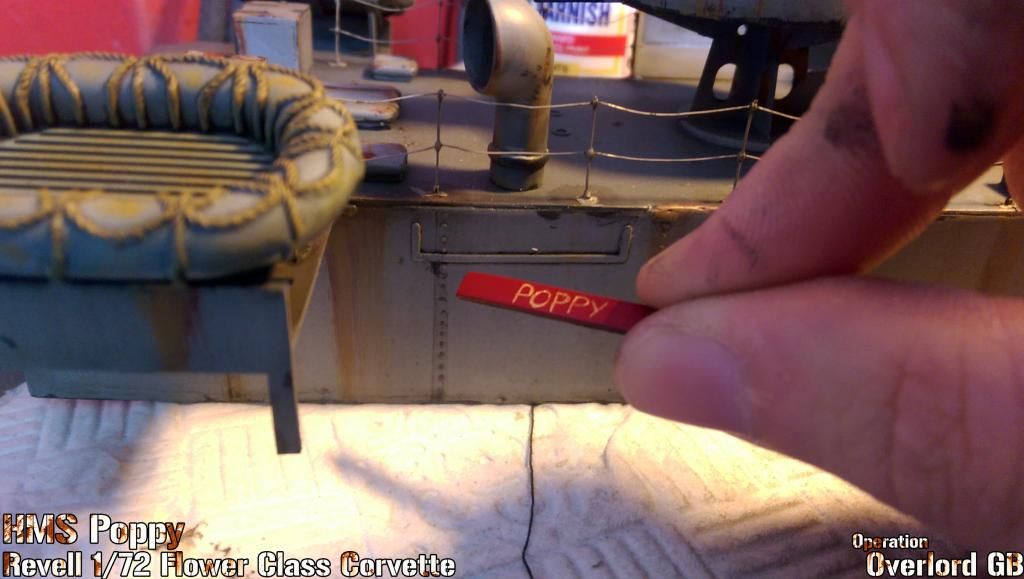 Got some final touches done yesterday, still not quite there but I managed to get the nameboard on! 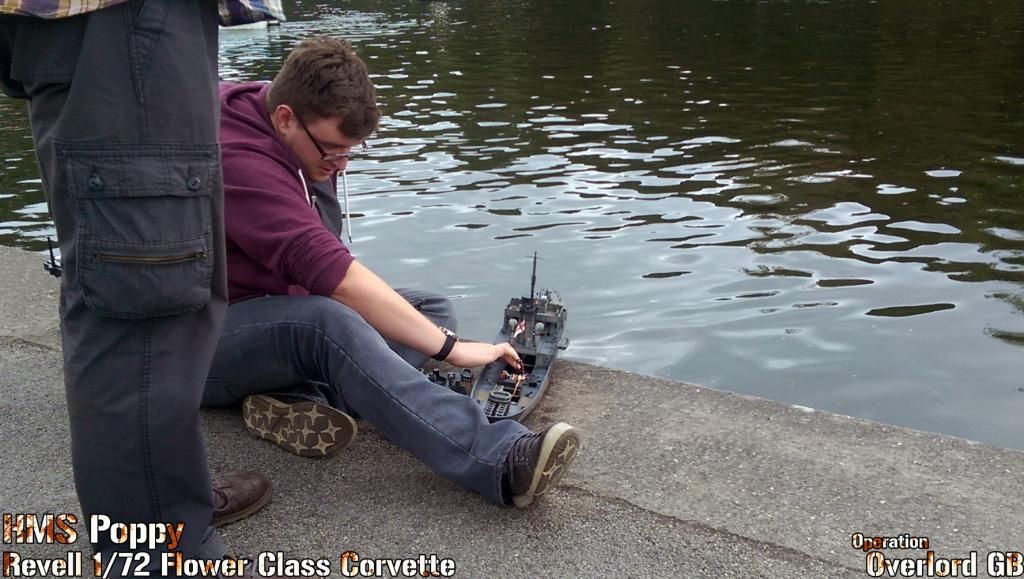 So she was finally at a point where I was happy to get her on the water, very exciting. Here's some idiot connecting the battery... 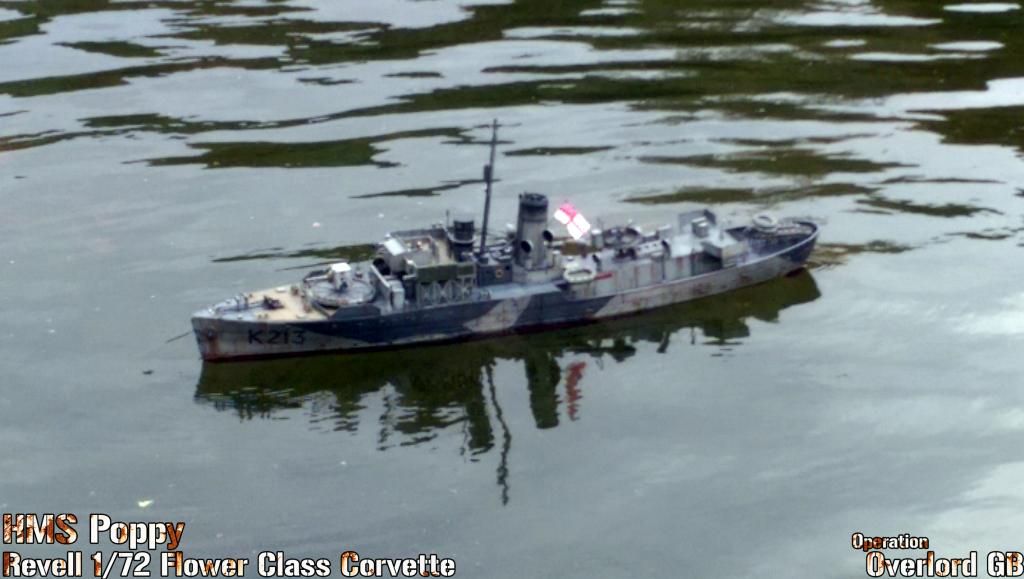 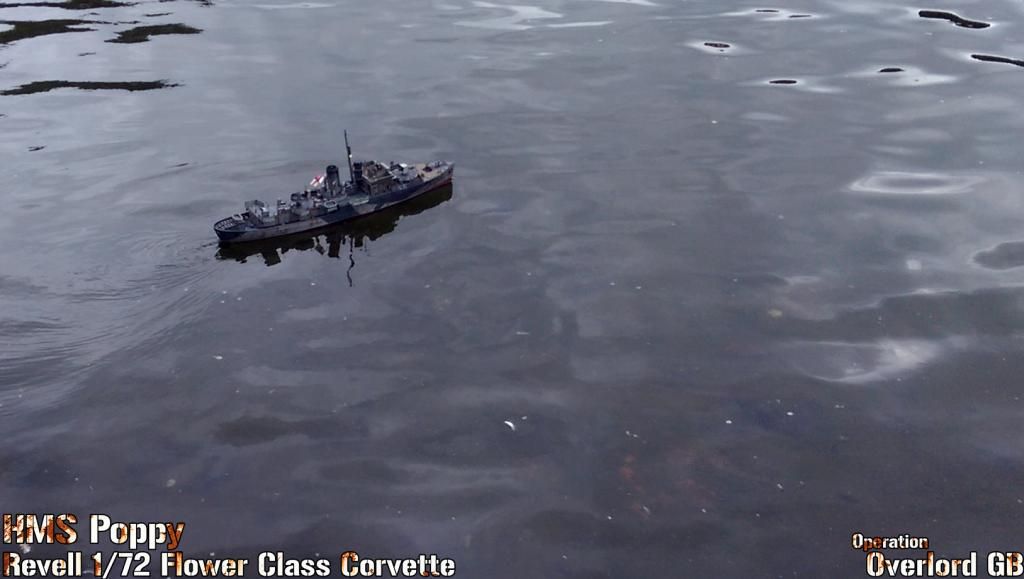 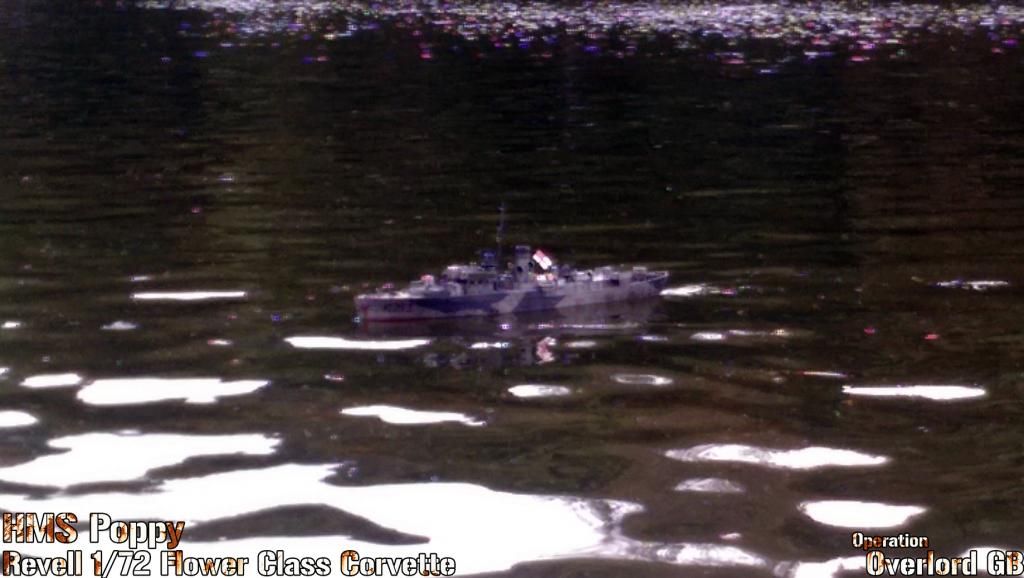 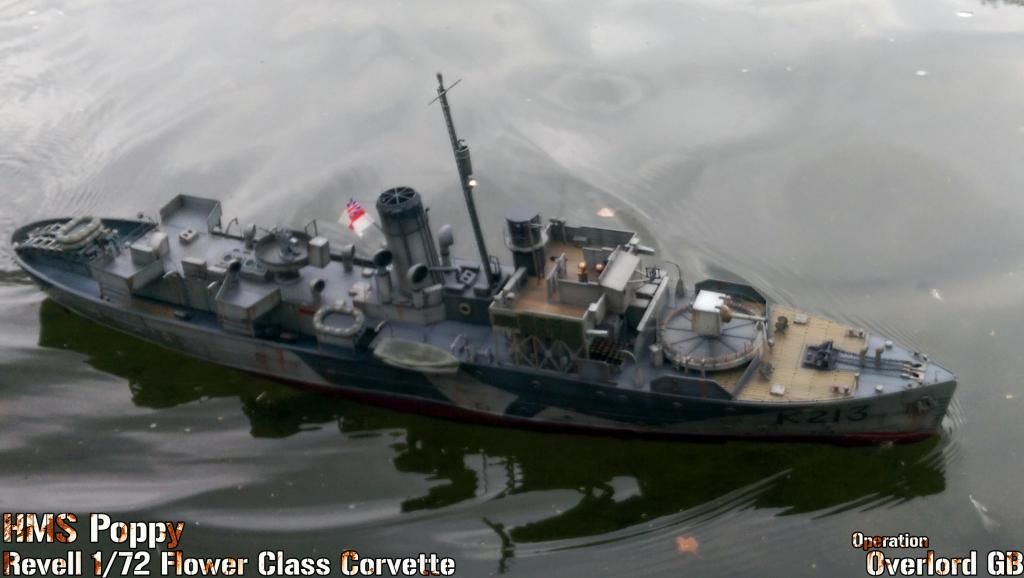 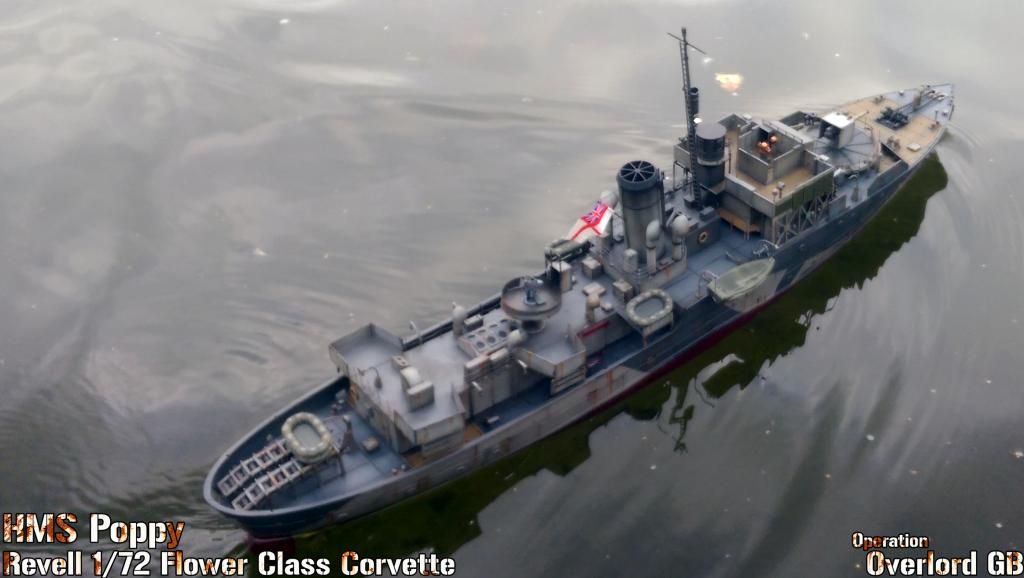 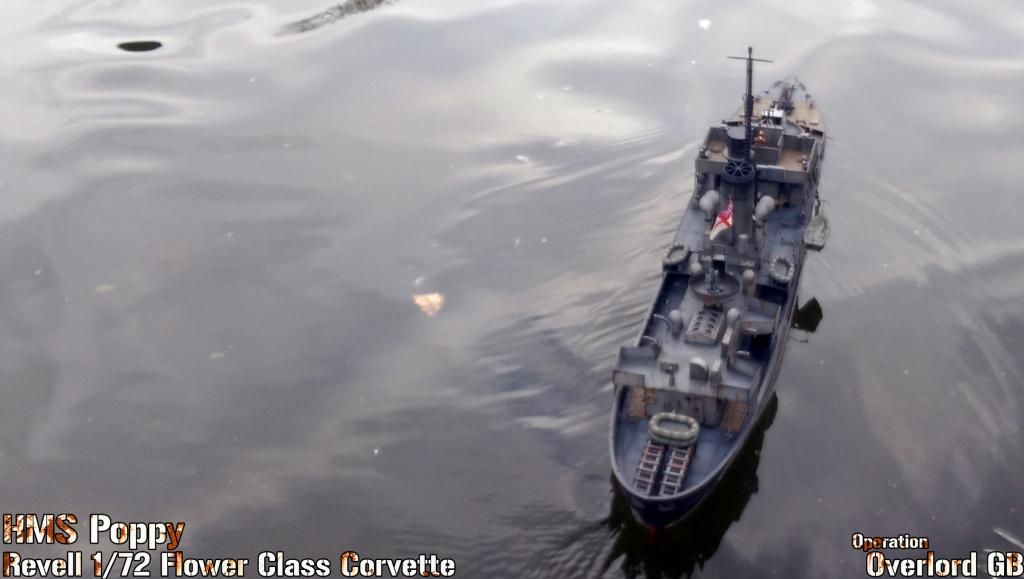 What can I say? She sails beautiful, I just had to remove one lump of lead as she was sitting a little low, and she could do with a little more at the stern. But she glides through the water lovely, at a nice speed. Unfortunately it was a bit short lived as she suddenly lost drive after half an hour or so lol, luckily, being a boating lake, there was a chap in waders sorting the pedalos out who kindly rescued it for us. It seems the motor linkage had slipped, I was relieved to find it wasn't anything more serious, so I'll have to sort something out a bit more robust. I also have an old RTR boat somewhere in the loft which I'm going to convert into a rescue boat for this kind of event lol. Still some stuff to do on her before I'm calling it. I'm about to order the 6 Oerlikons, and some crew, and there's still some railings around the bow to put on. Is it bad that I'm already eyeing up the 1/72 Type VII to stalk her with? lol TBC...
__________________
Alex Don't judge a ship by the number of it's guns, but by the skill of it's crew. |

|

|
 10-31-14, 05:06 AM
|
#12 |
|
Royal Kinotropist
Join Date: Mar 2007
Location: Sheffield, UK
Posts: 987
Downloads: 18
Uploads: 0
|
[29/10/2014]
UPDATE 17: Had a little break while I waited for payday lol, straight back into the build now, nearing completion! 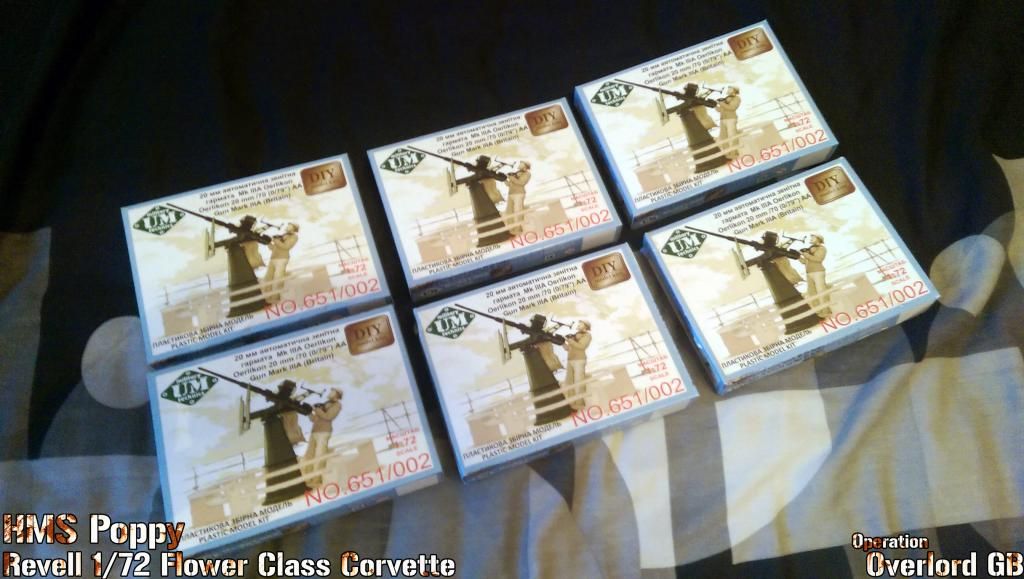 I managed to get hold of 6 Unimodel Oerlikons (think I cleared Hannant's out haha) 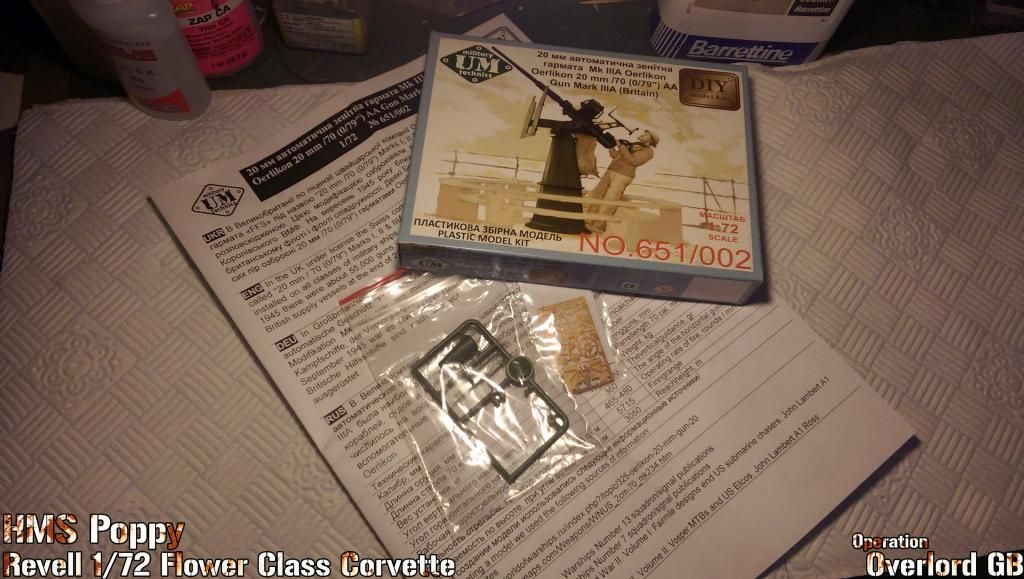 You don't get a massive amount of plastic for £3.99 but they are nicely detailed. 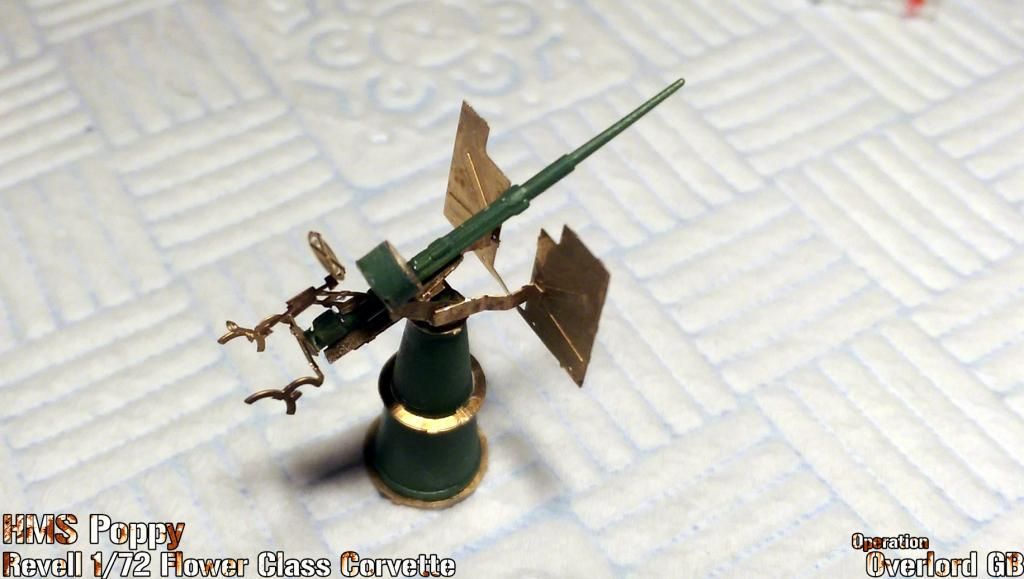 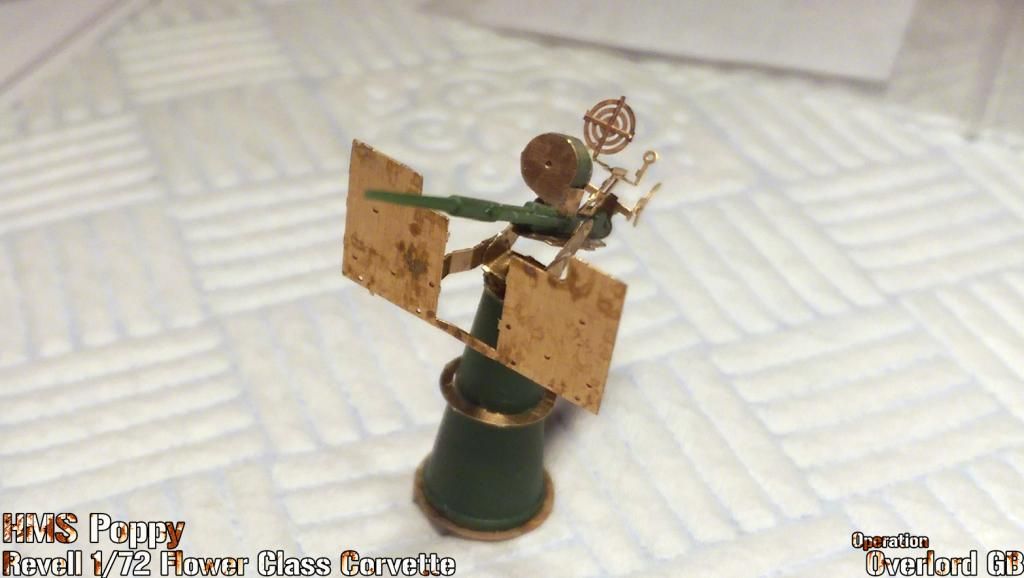 I found it takes around 20 mins to build one up, the plastic parts are nicely moulded and look the part, while being a little basic (although this is mainly down to the scale). The PE parts are quite disappointing as the tabs you have to cut to get the parts off are VERY thick and take some effort to get through. The parts are also very mixed up in the sprue and various parts are inside others which, while this obviously saves material for UM and is the most cost effective way of doing things, it doesn't make it easy for the end user. However I'd have to recommend them as your only other option are the DJParkins ones, and at around 14 quid a pair they aren't cheap. 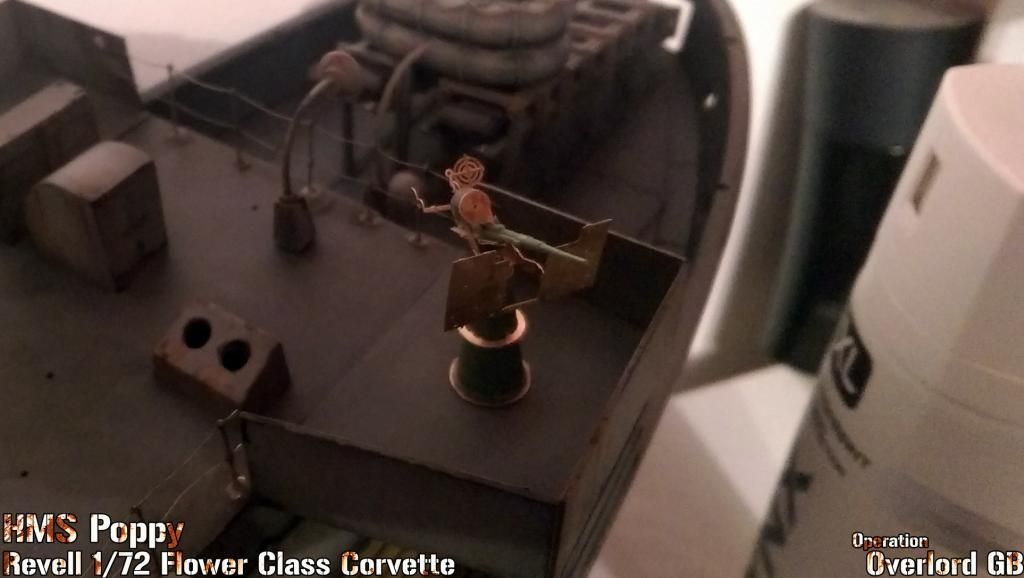 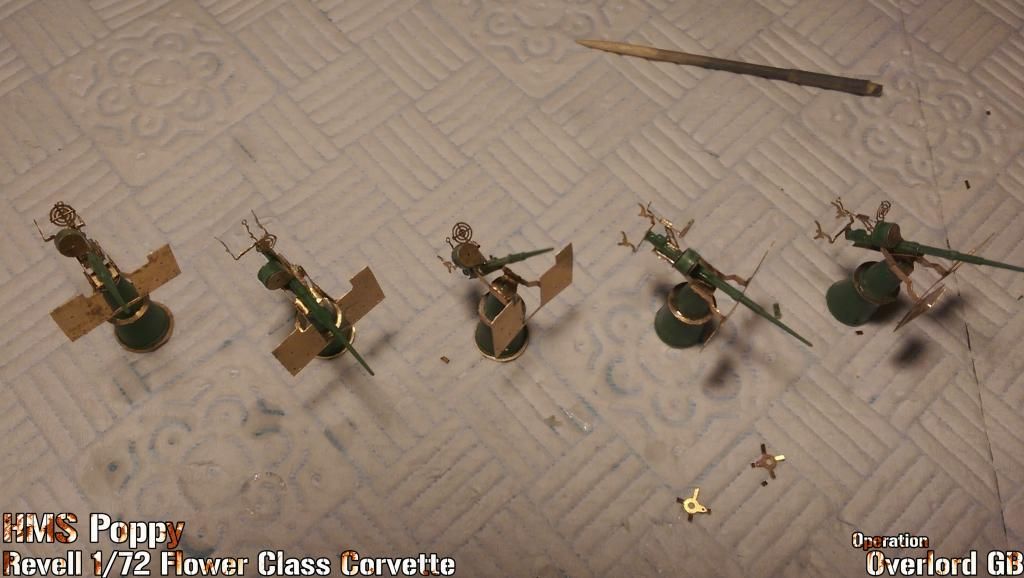 They do look rather lovely when built up though. Note I only managed 5 before giving up for the night, I couldn't even bring myself to do the last one haha 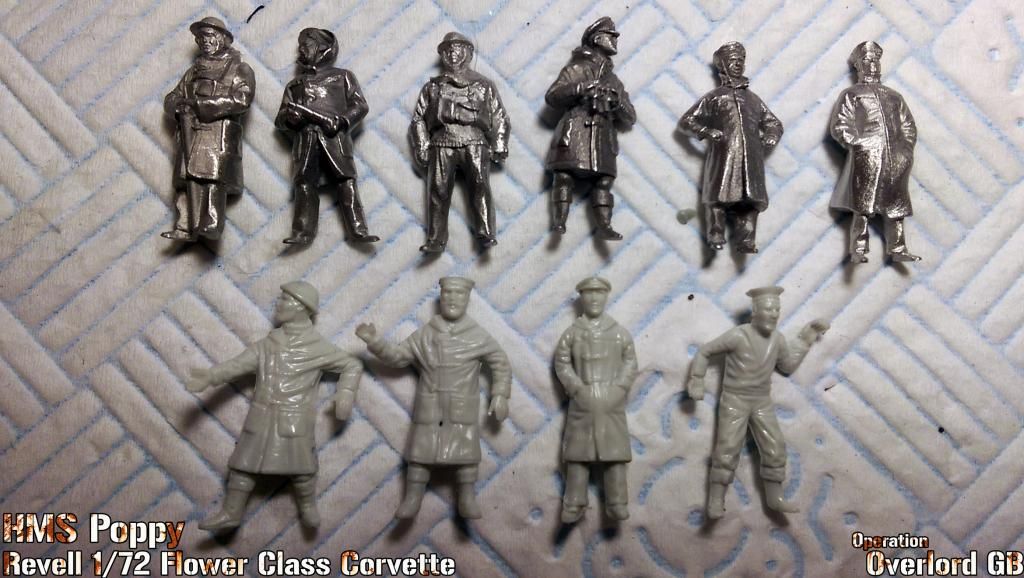 Next up, the crew! I ended up getting both sets from Hecker & Goros. I originally wanted to get a watch set from Gunthwaite miniatures, however only Hecker & Goros make the 4inch gun crew so I ended up just getting their watch set to avoid paying excessive P&P. I say 'just', they are superb too, although I slightly prefer the poses that the Gunthwaite ones are in. In the pic above you can see the H&G figures at the top, with about the only ones I could salvage from the kit below. You can really see the difference. 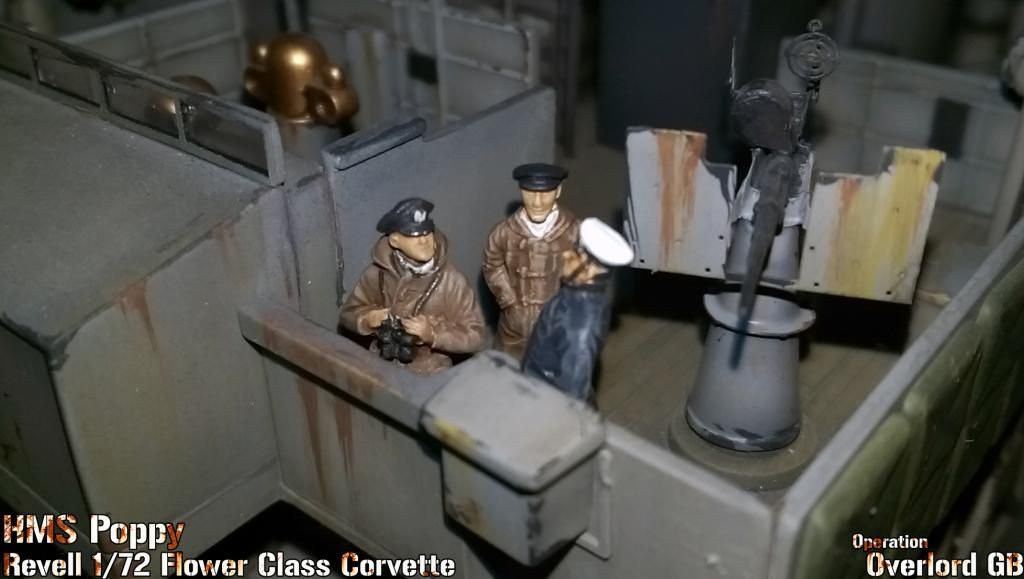 "Don't you dare blow kisses from my bridge Number 1!"  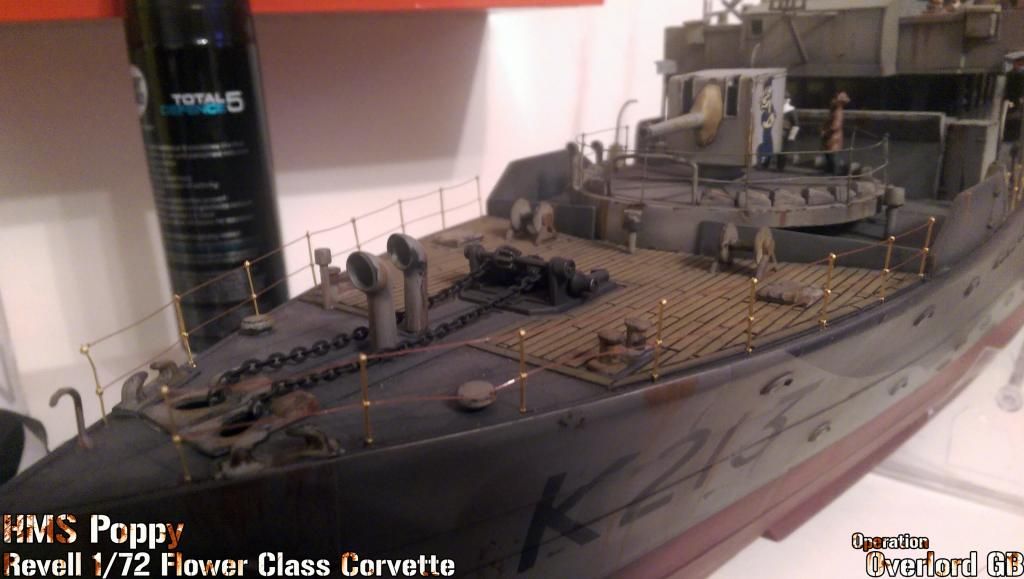 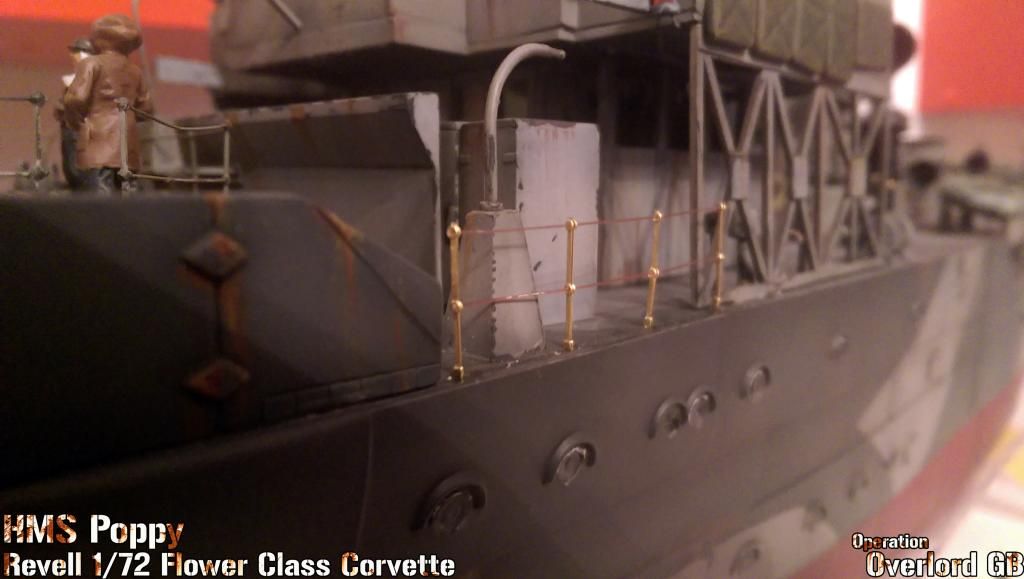 And to bring you all up to today, I finally managed to get the railings done! Unfortunately I've just realised I didn't get a photo of them painted up.... 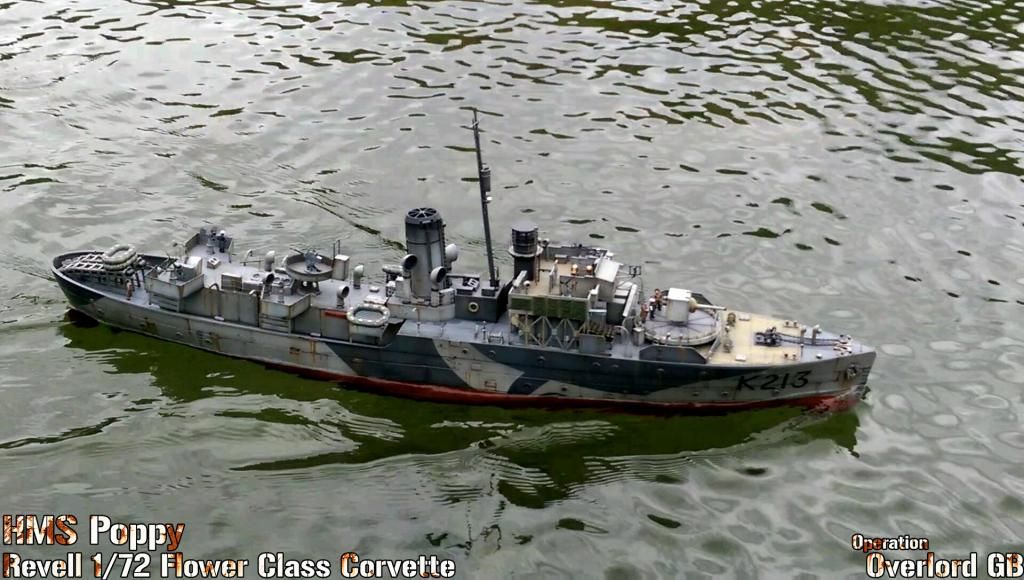 Anyway, I got her down to the lake last Sunday too. I've taken out a large lump of lead from the bows (nearly destroying the whole damn thing in the process) and now she sails just perfect! Until the motor linkage broke again haha. I have now actually ordered a proper universal joint set so that should cure it I'm very close to calling this one done, all I'm waiting for is to get a nice fabric flag and maybe another crew set next payday which I should just get sorted in time for the deadline. I might have also managed to persuade my girlfriend to buy me another kit for my birthday last week. A rather big kit. I mean really quite large. Sort of long, hard and full of seame.... Yeah I got a fricken 1/72 Type VIIC U-Boat to go with it hahaha. It's a real beast. I finally have something to stalk the Flower Class with! 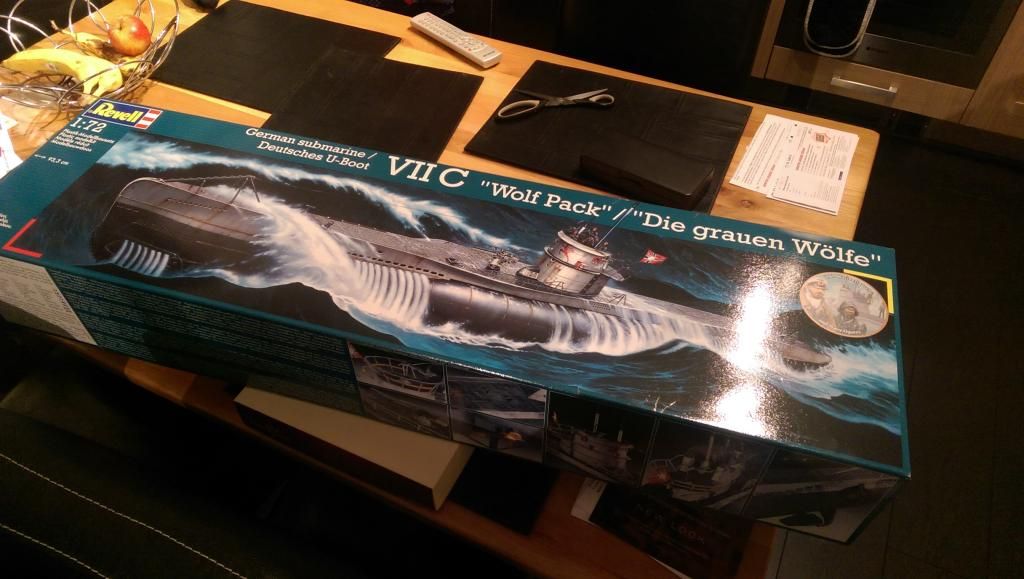 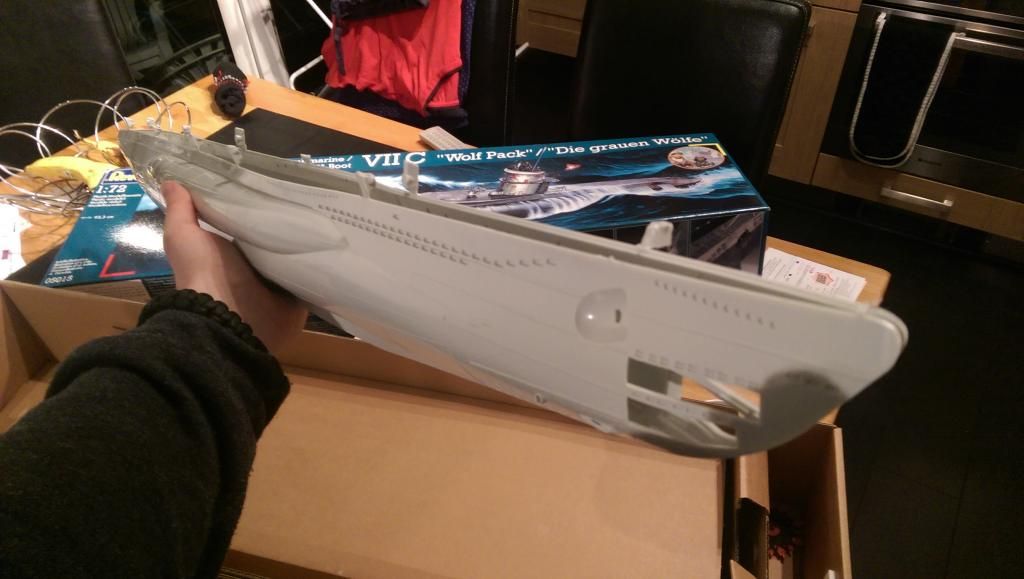 I will be doing a build thread and It is going to be R/C, but will only be a surface runner unfortunately. I thought about making it a dynamic diver, i.e. using the dive planes to force it under, but I'm not confident in my ability to make it watertight enough lol. I have on order: 2x 2mm prop shafts (half the size of the Corvette ones!) 2x 20mm brass props (left and right handed, as per the prototype) 2x small 360 size motors 1x 3300mAh battery pack 1x itty bitty mini servo There's plenty enough room in there to fit stuff in, it's just a bit narrow so may be a bit of a faff. I also need to devise some mechanism for the dual rudder too. Again, I'll also be getting a fabric flag and some crew. Stay tuned!
__________________
Alex Don't judge a ship by the number of it's guns, but by the skill of it's crew. |

|

|
 10-31-14, 05:07 AM
|
#13 |
|
Royal Kinotropist
Join Date: Mar 2007
Location: Sheffield, UK
Posts: 987
Downloads: 18
Uploads: 0
|
So there we go, that brings you all up to date! I must apologise for the large number of posts and photos lol, I just hope you find them of some interest.
I'm also incredibly excited about starting on the Type VIIC  As usual, comments are much appreciated. Cheers guys.
__________________
Alex Don't judge a ship by the number of it's guns, but by the skill of it's crew. |

|

|
 10-31-14, 08:39 AM
|
#14 |
|
Eternal Patrol
 |
Fantastic work!
 I would think most people wouldn't go to that kind of effort for a sailing model. I'm betting you could enter it in a standard display contest. My only complaint is that you didn't keep us updated with a day-by-day account. Still, it's something you can be proud of.
__________________
“Never do anything you can't take back.” —Rocky Russo |

|

|
 10-31-14, 08:56 AM
|
#15 |
|
Royal Kinotropist
Join Date: Mar 2007
Location: Sheffield, UK
Posts: 987
Downloads: 18
Uploads: 0
|
Thanks Steve! I'm about to make a start on the Type VIIC so I'll start another build log and keep you all updated with that!
__________________
Alex Don't judge a ship by the number of it's guns, but by the skill of it's crew. |

|

|
 |
| Tags |
| model |
|
|
