
|
|
SUBSIM: The Web's #1 resource for all submarine & naval simulations since 1997
|
SUBSIM: The Web's #1 resource for all submarine & naval simulations since 1997 |
|
|
 03-07-14, 11:22 AM
|
#1 |
|
Growing Old Disgracefully

 Join Date: Dec 2012
Location: Dibden Purlieu - Southampton
Posts: 9,606
Downloads: 1123
Uploads: 0


|
Last updated 14th November 2019
This Tutorial is for installing TDW's Generic File Patcher (GFP) anywhere on your system as a stand alone application. If a complete uninstall is done the stand alone GFP application is unaffected by this. When the re-install is done just reconnect the GFP Patches to the SH5 Folder again. DO NOT INSTALL THIS STAND ALONE VERSION FOR: The Wolves of Steel (TWoS) Sobers Mega Mod Link to the (GFP). http://www.subsim.com/radioroom/showthread.php?t=181433 Do Not put the GFP in JSGME or in any Silent Hunter 5 folder. It is recommended that you backup the 9 original files below that are in your Silent Hunter 5 Main Folder by Copying and Pasting them to a New Folder in the Ubisoft folder. (Picture 2) Likely looking Main Folder Path. C:\Ubisoft\Silent Hunter 5 1. Cameramanager.act 2. EnvSim.act 3. SimData.dll 4. Kernel.dll 5. Sh5.exe 6. SHCollisions.act 7. SHSim.act 8. SHSound.act 9. SH_NClient.dll Picture 1 > Shows original files when backed up in a folder. 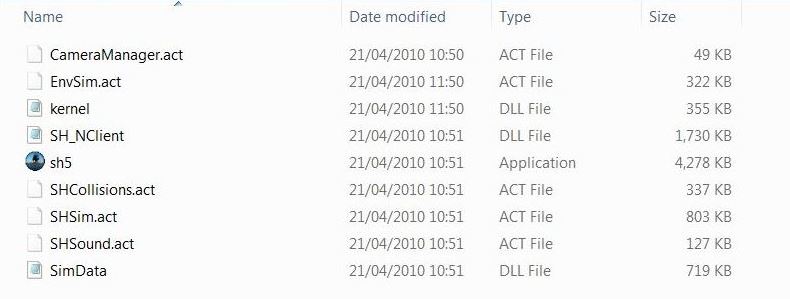 Picture 2 > Ubisoft folder behind the main game folder. 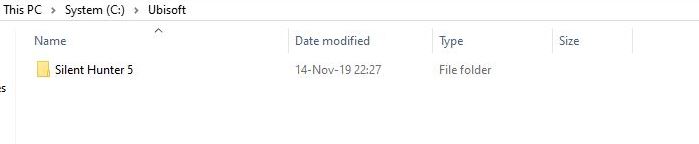 Picture 3 > GFP168 folder.  Picture 4 >Download the (GFP) in to the GFP168 Folder. 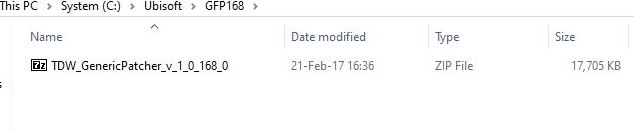 Picture 5 > Open the Zip File and click on the Extract Tab. 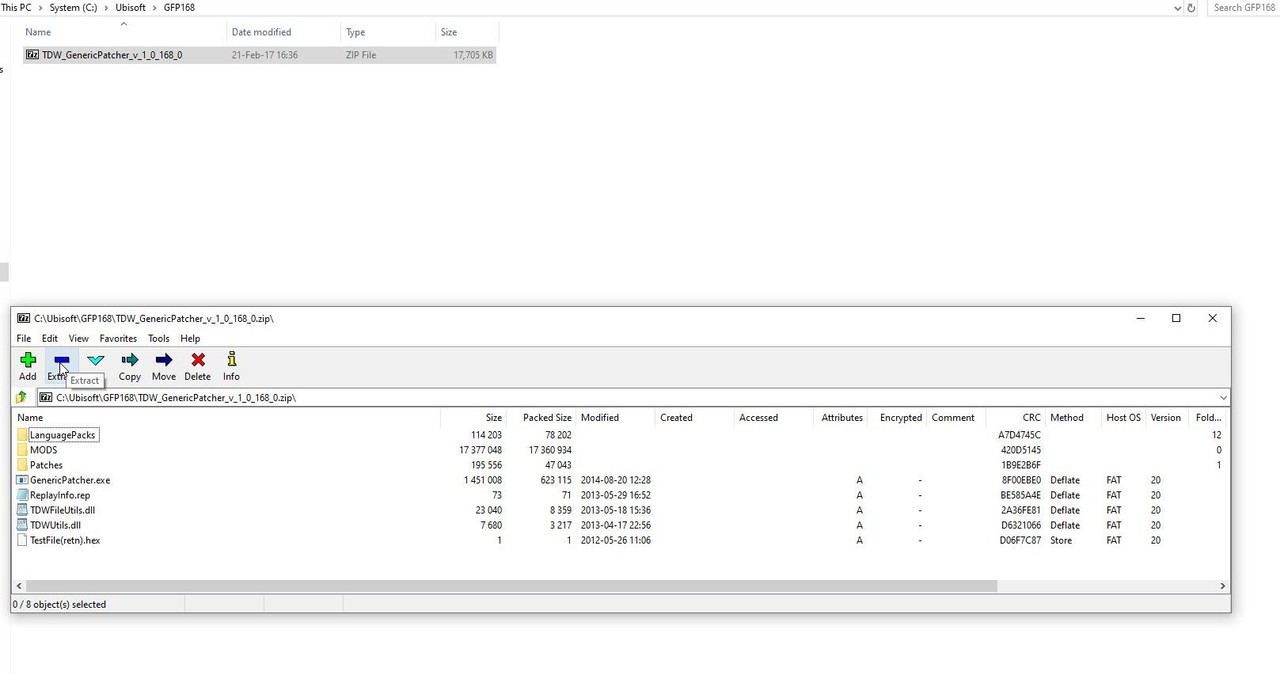 Picture 6 > Click Ok to confirm. 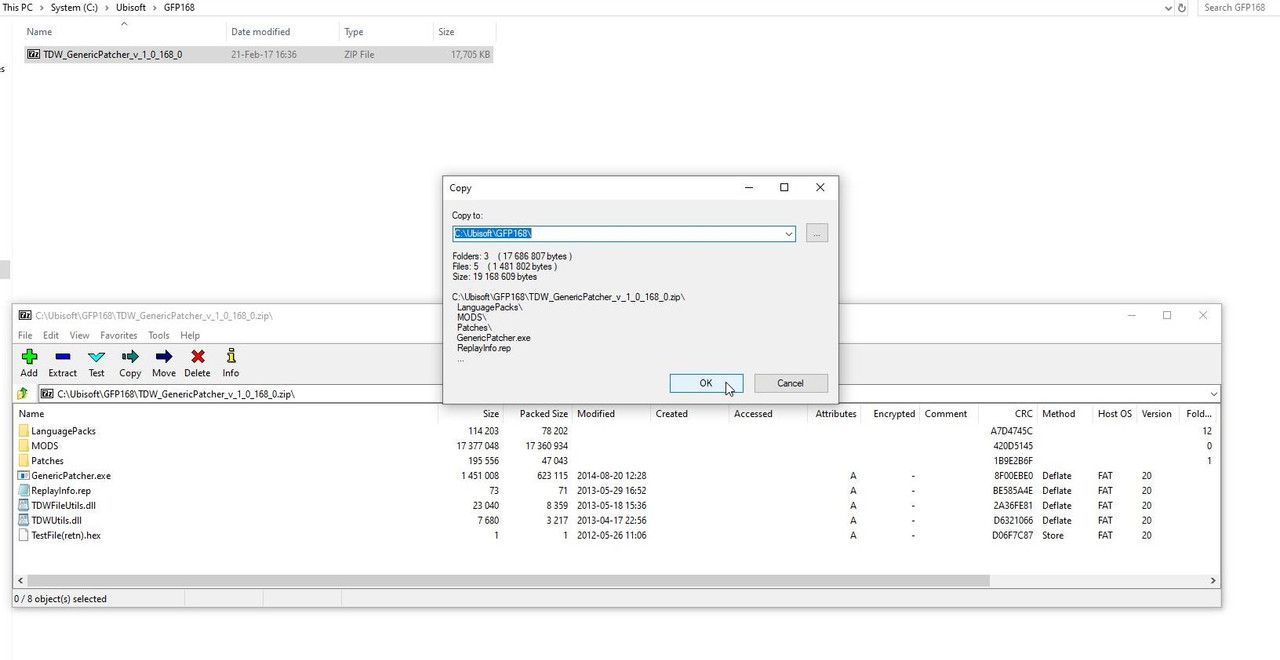 Picture 7 > Shows the 8 files extracted to the GFP168 folder. 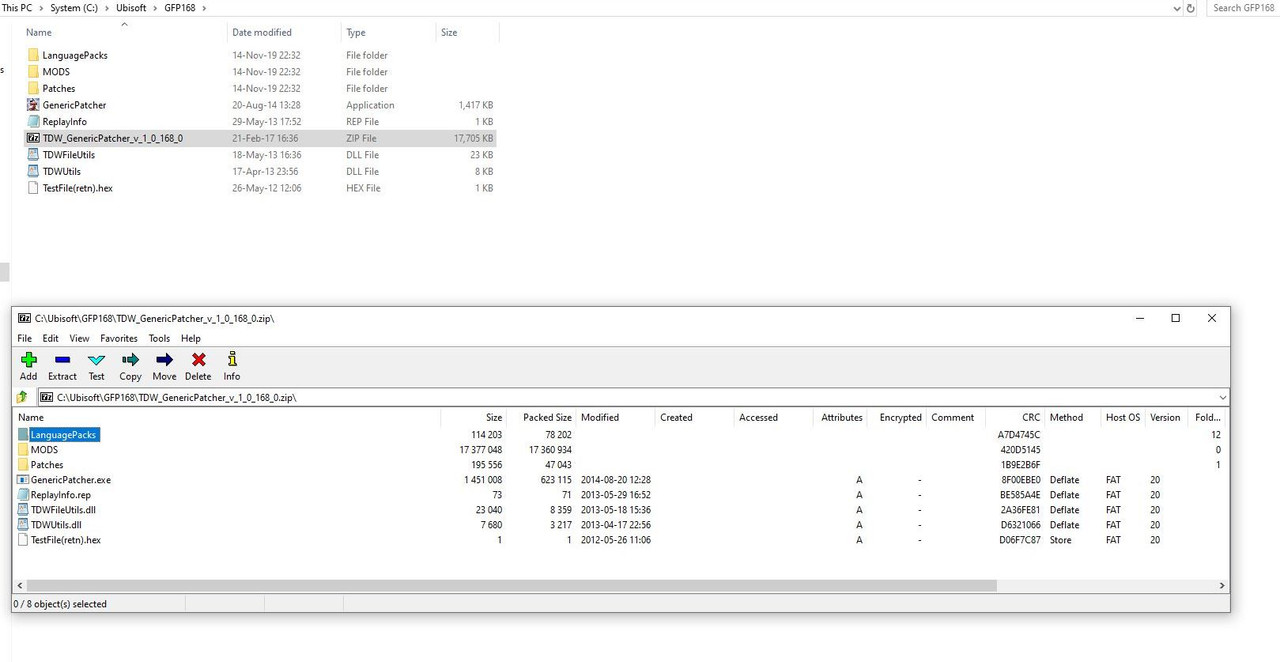 Picture 8 > X to exit. 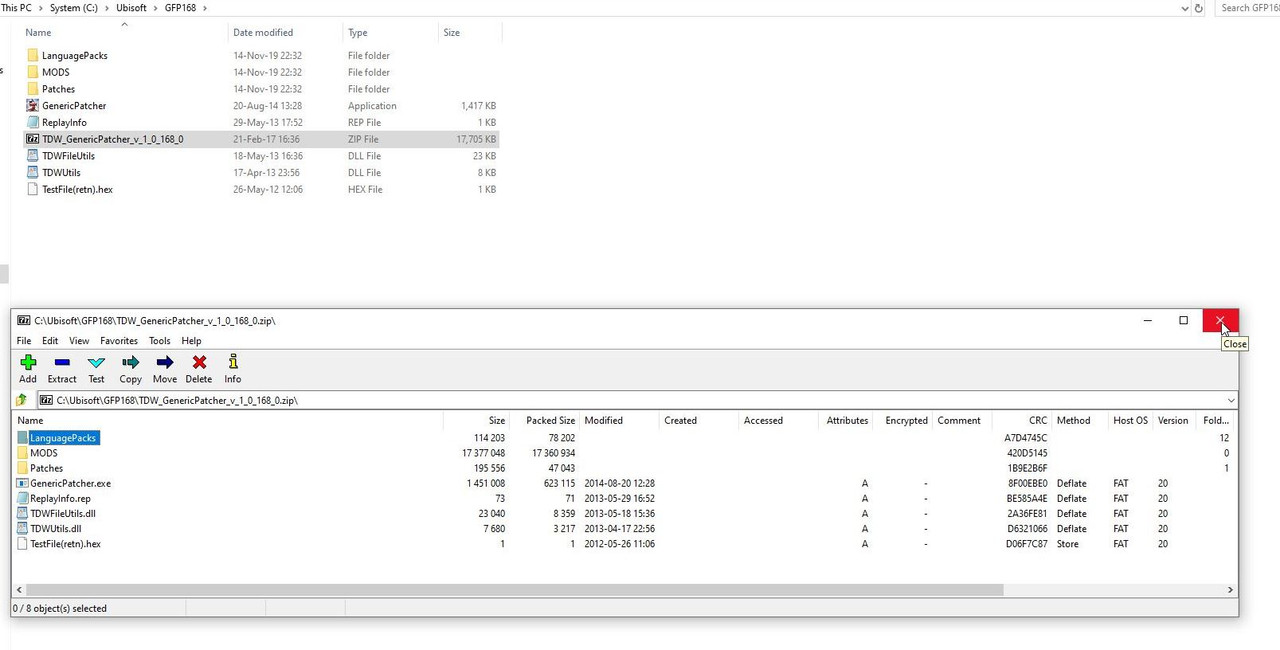 Picture 9 > Start the application by double clicking on the Mickey Mouse icon.  Picture 10 > Select your language and double click on it. Selecting the Language takes you to this next screen.  Picture 11 > Opens to this screen. Click on File.  Picture 12 > Open. 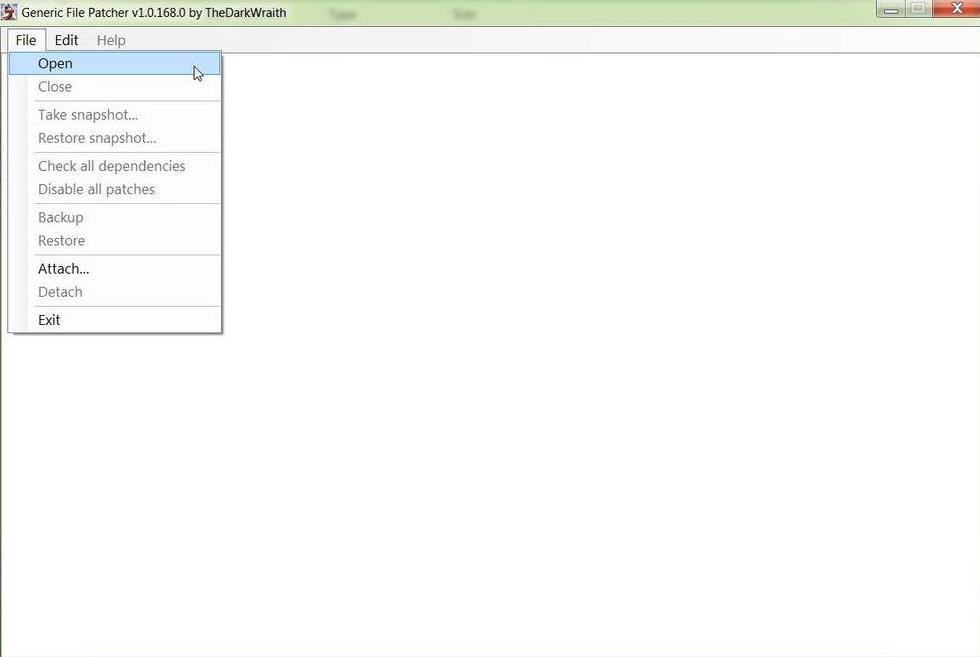 Picture 13 > Select the file path to your Silent Hunter 5 game folder. 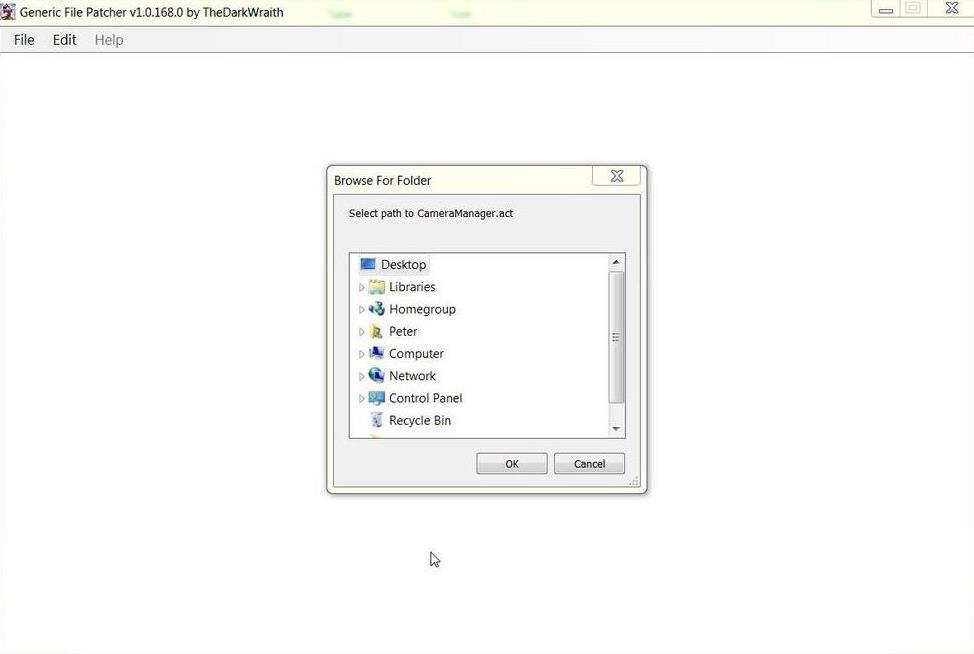 Select Path to CameraManager.act. < First Patch. Computer. Drive C: Ubisoft folder Picture 14 > Silent Hunter 5 (Highlight folder only DO NOT OPEN).  Click on OK. Repeat the instructions from 21 to 30 for each of the remaining 8 Patches as they appear. Select Path to EnvSim.act Select the Path to kernel.dll. Select Path to SH5.exe Select Path to SHCollisions.act Select Path to SHSim.act Select Path to SHSound.act Select Path to SH_NClient.dll Set Path to SimData.dll There are 43 actions to install all Patches you should then see all 9 Patcher Files. Picture 15 > Shows all 9 patches correctly installed.  If you do not see 9 patches then you have not installed to the right path. Follow the instructions in Picture 16, Picture 16 > Open the Generic Patcher CFG file. Look for the patch with the wrong path and change it manually to the same path as the others. Exit and Save. 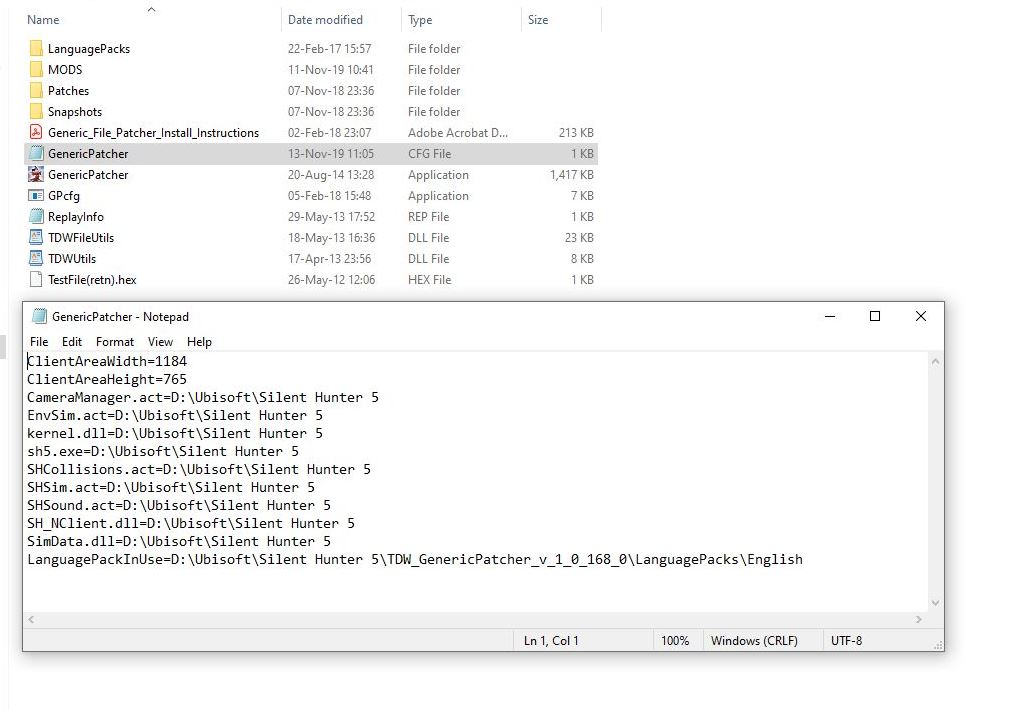 Picture 17 > Go to File and open. Picture 18 > Shows Patches are installed disabled. 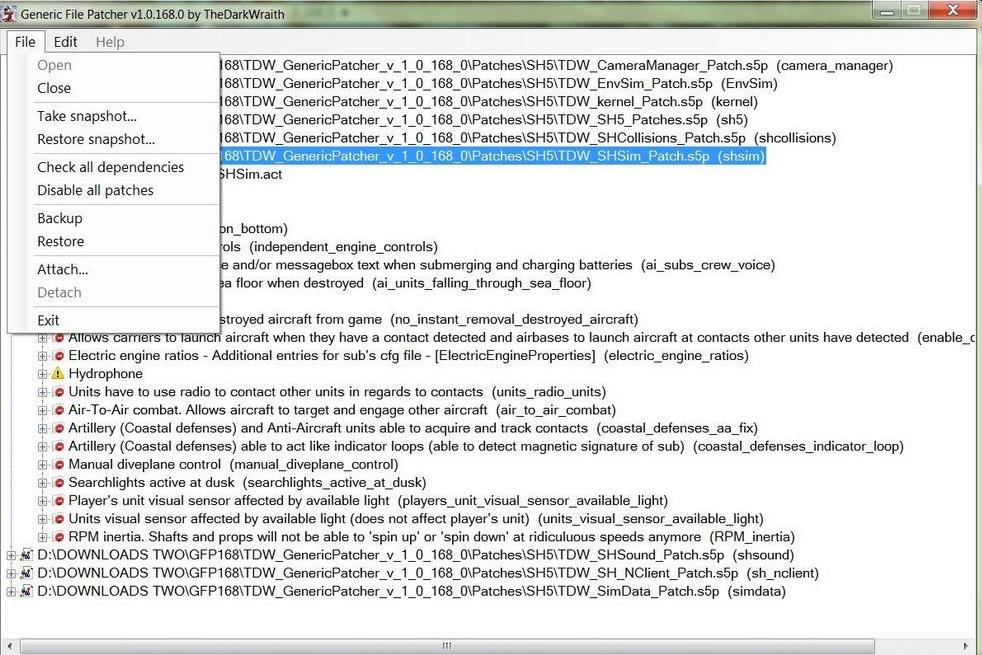 Patches can be opened by Double clicking with your mouse. Closes the (GFP) and completes the installation. Other Generic File Patcher Posts maybe of interest Post #3 How To Make Changes In TDW's Generic File Patcher And Run Administrator Post #39 TDW Generic File Patcher Replacing My Old One With A New One! Post #41 TDW's Generic File Patcher Changing The Map Colours Post #56 TDW’s Generic File Patcher Illustrated Settings You Can Use in Yours Post #62 TDW’s Generic File Patcher > Taking A Snapshot > Disabling Patches > Restoring A Snapshot Courtesy acknowledgement to TheDarkWraith
__________________
LSH3-2015 <> TUTORIALS <> ALL YOU NEED TO KNOW <> ALL IN ONE PLACE SH4 <> TUTORIALS <> HOW TO DO IT <> INFORMATION <> DOWNLOAD LINKS SH5 <> TUTORIALS <> HOW TO DO IT <> INFORMATION <> DOWNLOAD LINKS Always Here To Help A Fellow 'Subber' | Need An Answer to A Question Just Send Me A PM Last edited by THEBERBSTER; 11-14-19 at 08:14 PM. Reason: Replaced missing pictures |

|

|
|
03-07-14, 11:30 AM
|
#2 |
|
Growing Old Disgracefully
Join Date: Dec 2012
Location: Dibden Purlieu - Southampton
Posts: 9,606
Downloads: 1123
Uploads: 0
|
Last updated 11th November 2015
How To Make Changes In TDW's Generic File Patcher (GFP) This Tutorial will also show you how easy it is to run all your Silent Hunter Applications in Administrator Mode 1. Go to the (GFP) Folder GFP168 and open it. (Picture 1R) Picture 1R  2. Open the first folder (File Folder) 3. First folder opened. (Picture 2R) Picture 2R 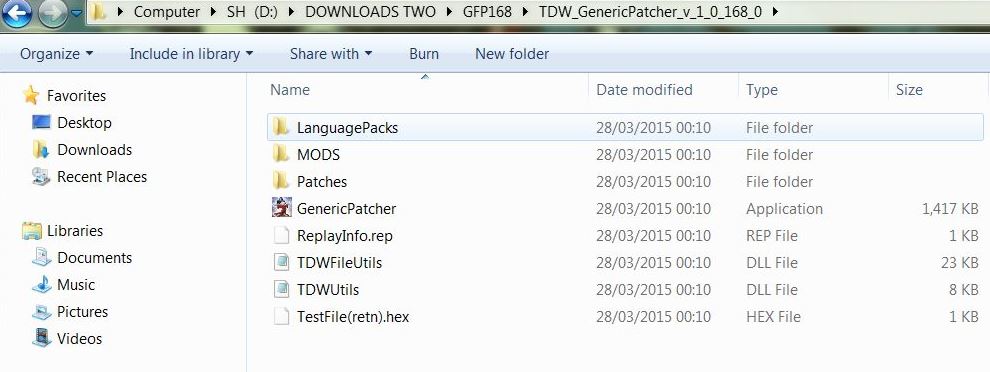 3. The second folder is your Original Compressed Zip folder. 4. Click on the (GFP) Icon (Mickey Mouse) (Picture 3R) Right Click with your mouse and select Properties. Go to the Compatibility Tab. Go to Privilege Level. Tick the box Run this program as an Administrator. Click Apply. Click Ok. Picture 3R 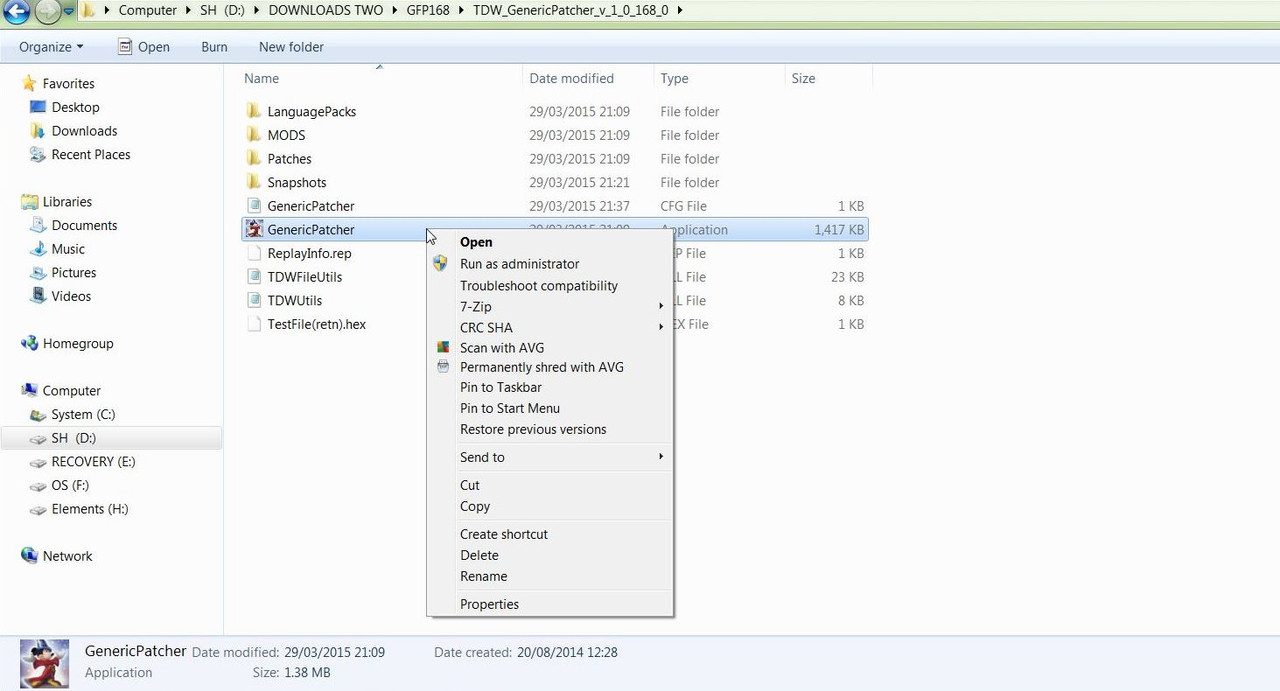 5. Click on the File Tab. (Picture 4R) 6. Click on the Open Tab.(Picture 4R) If you are using TWOS Select > Restore snapshot. Go to the Snapshot Folder and Double Click with the Mouse on the GPS File and it will Enable the required patches. Picture 4R 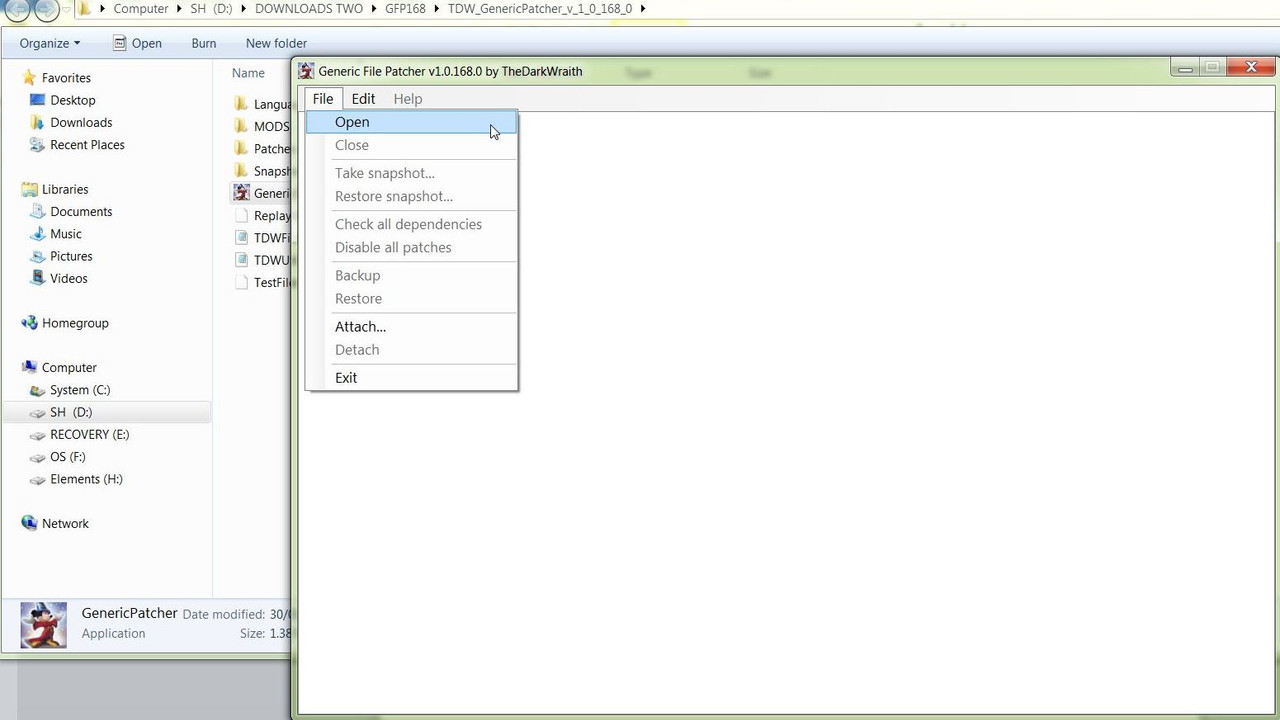 7. Accept all Yes prompts as they appear. (Picture 5R) Picture 5R 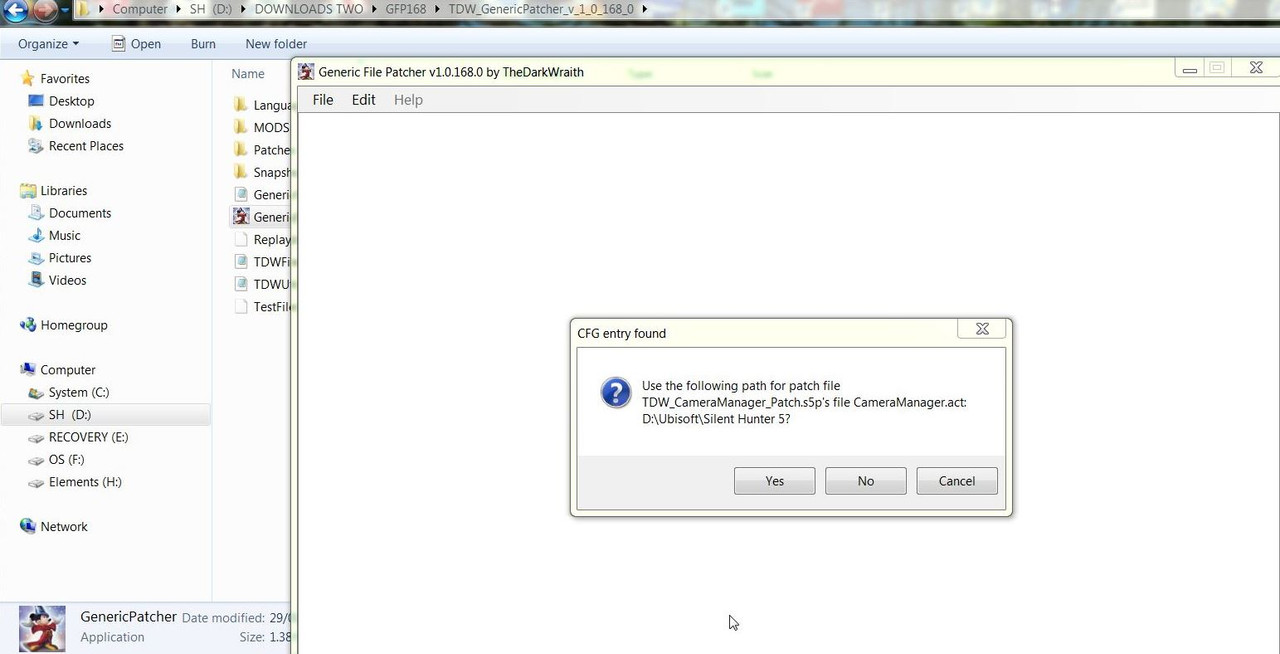 7. Clicking Yes or No will select the Patchers you will see. 8. If you clicked Yes to all 9 Patcher Files you will see this as in (Picture 6R) Picture 6R 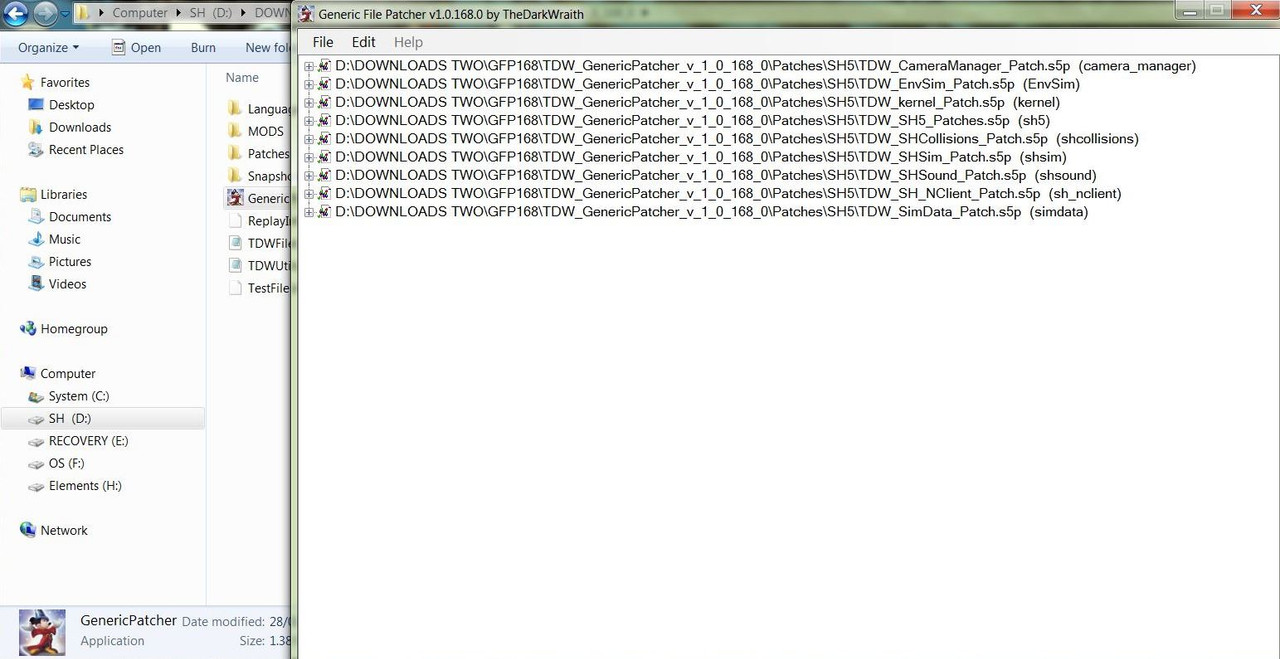 9. Double click a Patcher to open it. 10. You will notice in this Patcher that all the individual Patches are Red as none have been enabled. (Picture 7R) Picture 7R  11. Double click on a Patch to open it. (Picture 8R) Picture 8R 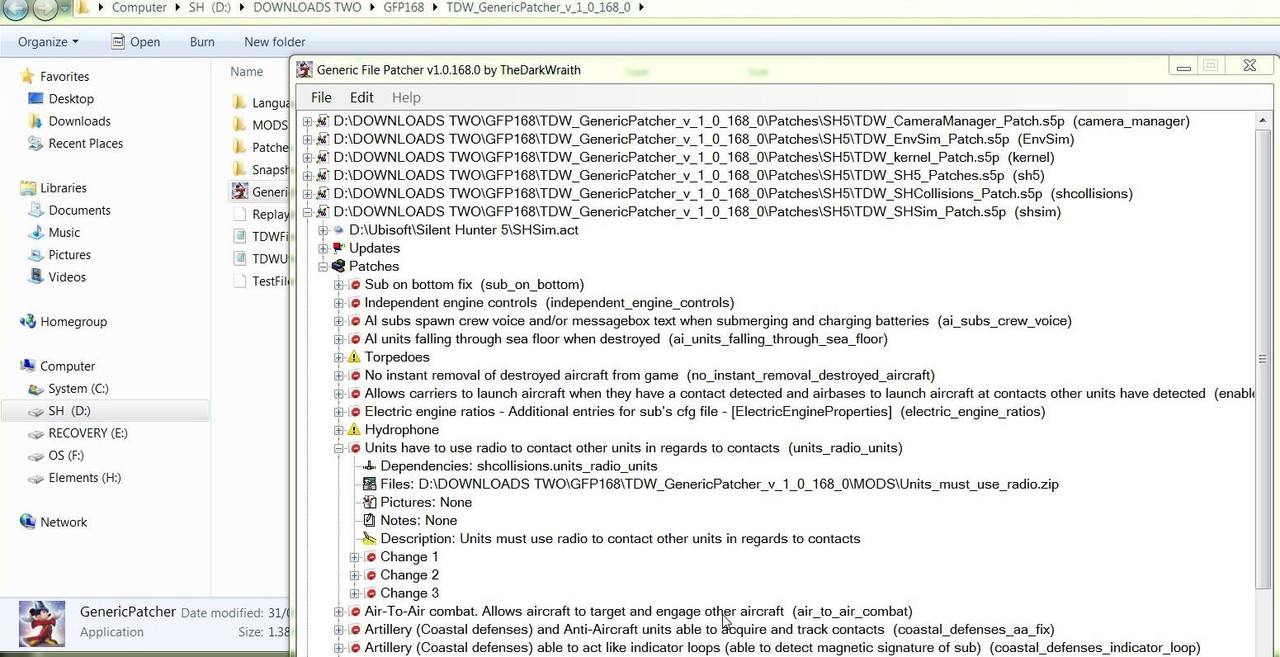 12. Double click on the Change Number to open it. (Picture 9R) Picture 9R 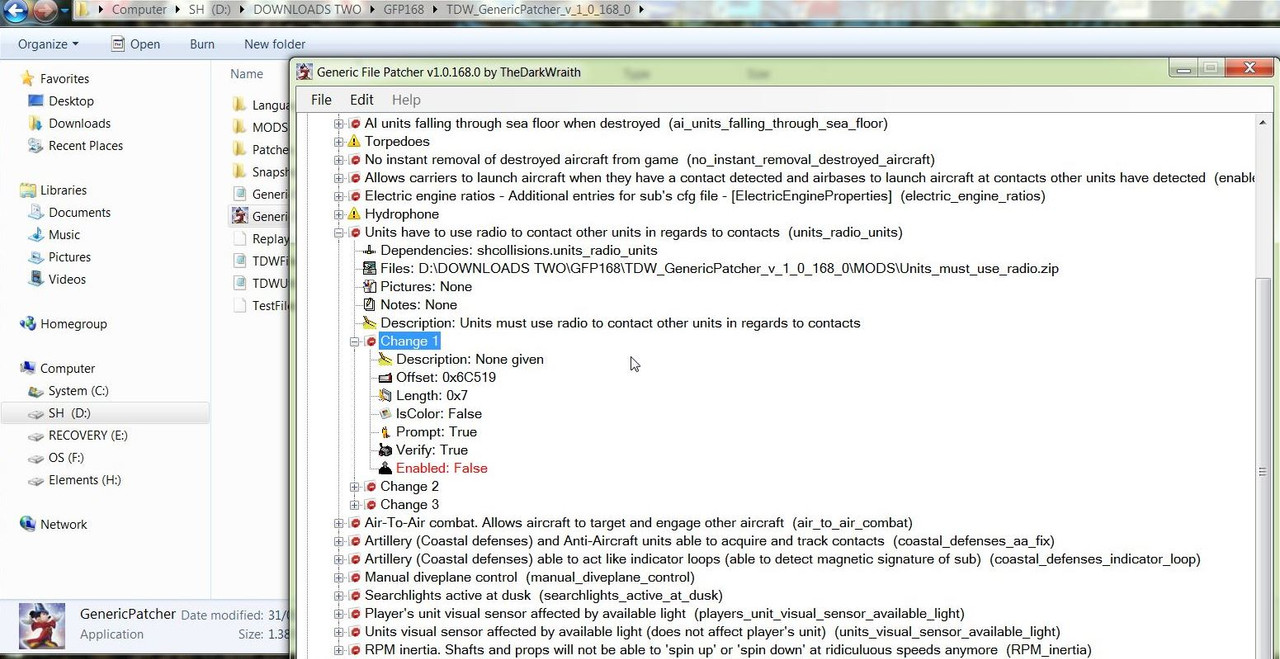 13. Double click on Enabled False. (Picture 10R) Picture 10R 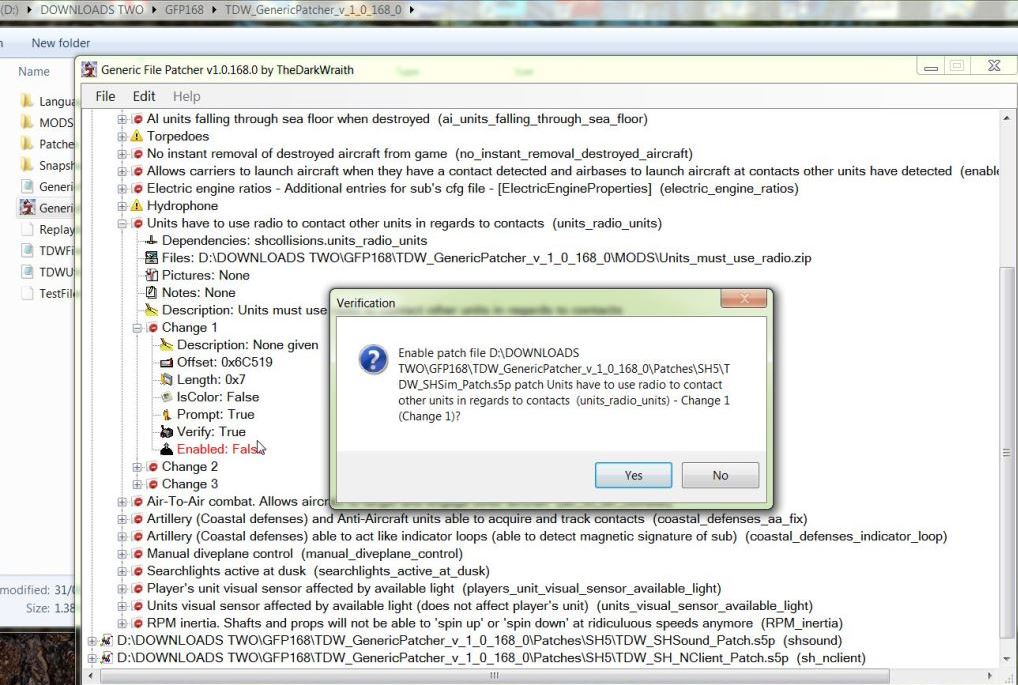 14. Accept any 'Yes' prompts. (Picture 11R) Picture 11R 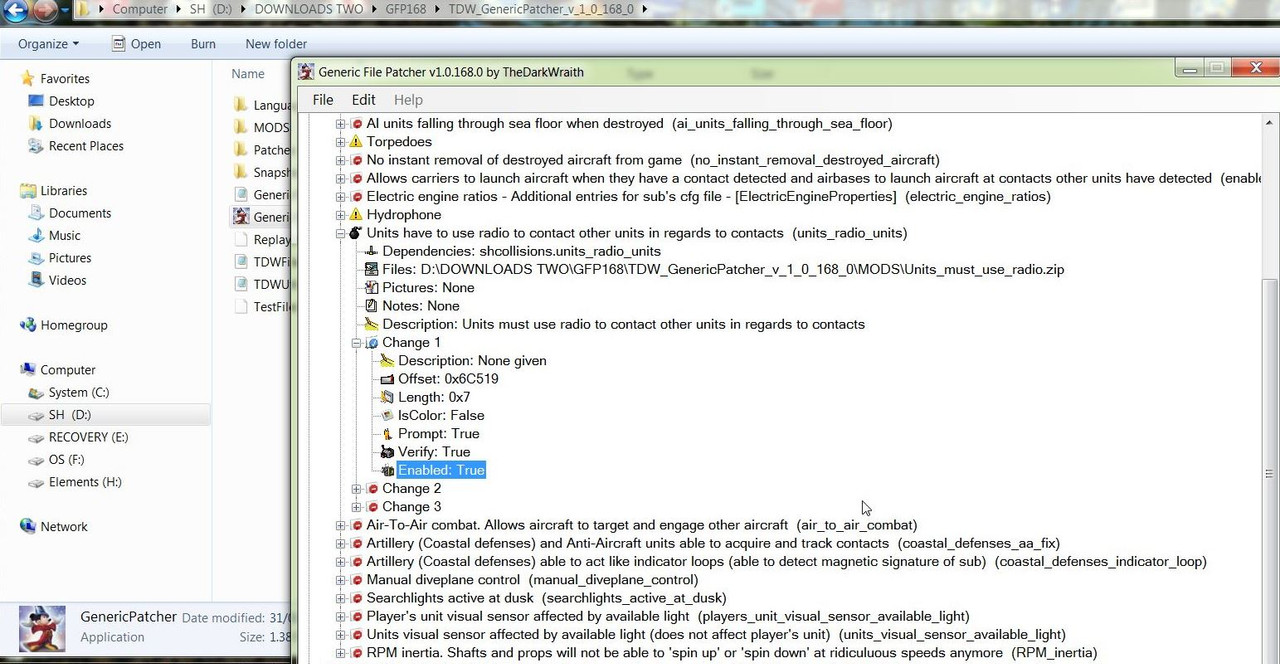 15. You repeat the action for changing patch numbers 2 and 3. (Picture 12R) Picture 12R 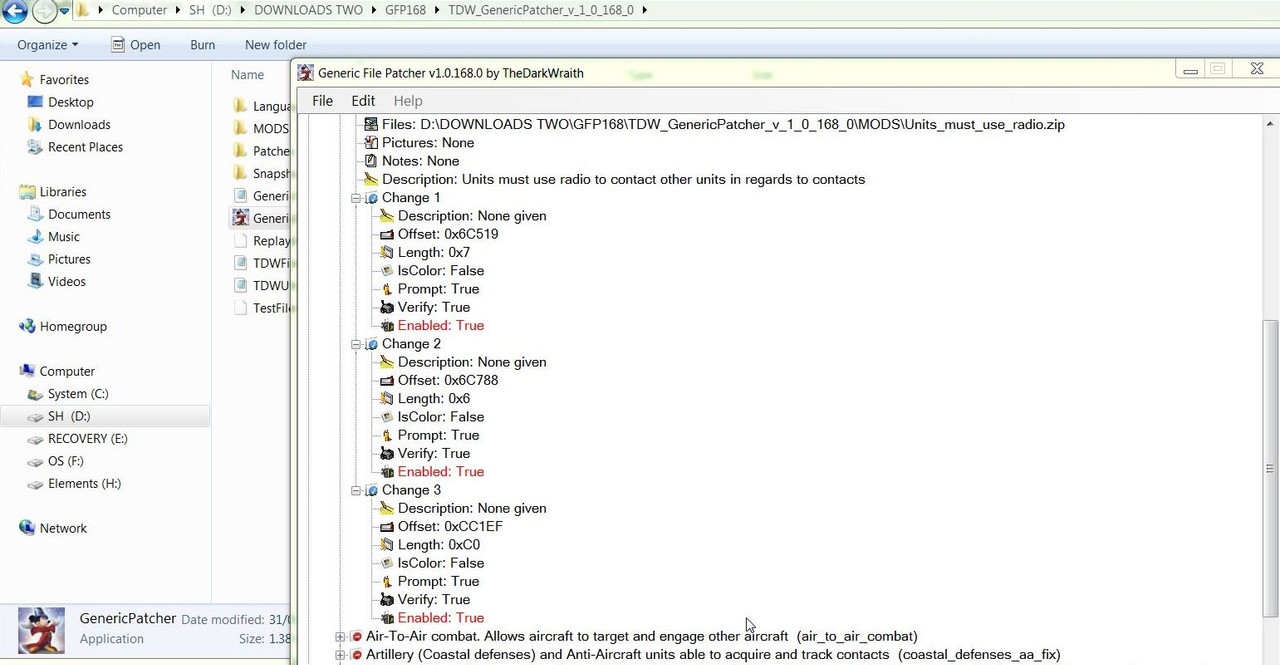 16. 'Check All Dependencies' 17. If there are multiple patches to change and they are in more than one Patcher 'Check All Dependencies' will bring it to your attention that these also need to be changed. 18. When you have finished making your changes. 19. Go to the File Tab. (Picture 13R) 20. Go to Exit. (Picture 13R) Picture 13R 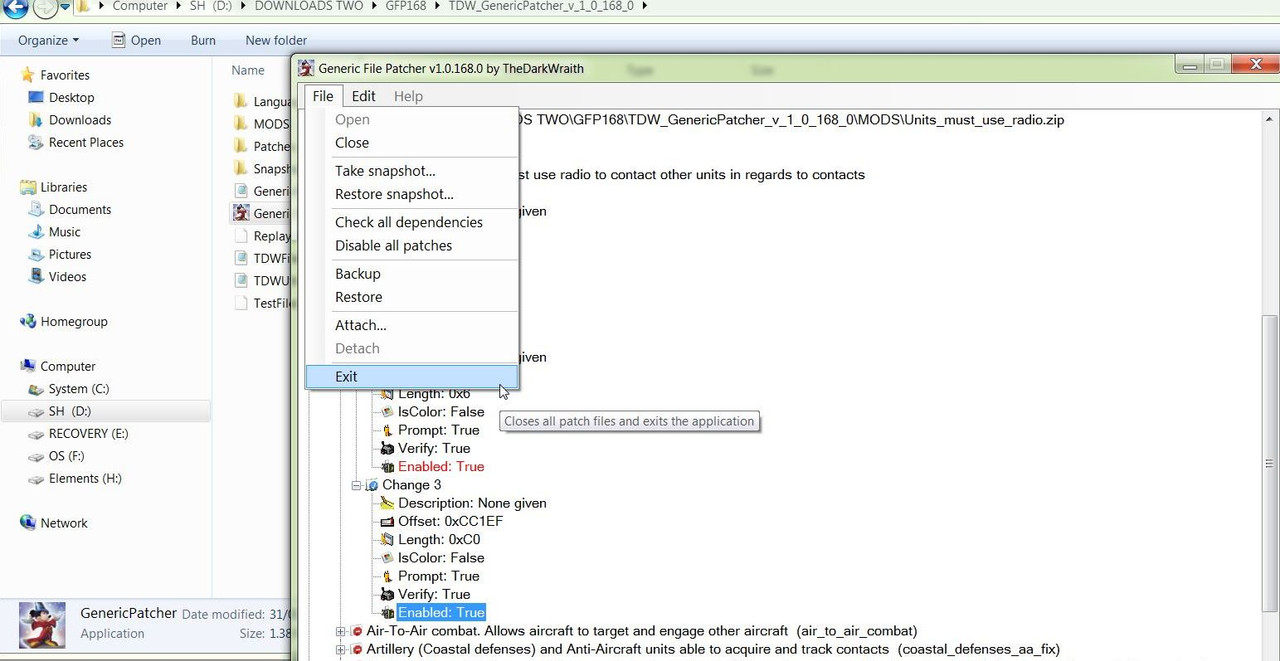 21. All changes are saved. Other Generic File Patcher Posts Post # 2 Installing TDW's Generic File Patcher Post #39 TDW Generic File Patcher Replacing My Old One With A New One! Post #41 TDW's Generic File Patcher Changing The Map Colours Post #56 TDWs Generic File Patcher Illustrated Settings You Can Use in Yours Post #62 TDWs Generic File Patcher > Taking A Snapshot > Disabling Patches > Restoring A Snapshot Courtesy acknowledgement to TheDarkWraith
__________________
LSH3-2015 <> TUTORIALS <> ALL YOU NEED TO KNOW <> ALL IN ONE PLACE SH4 <> TUTORIALS <> HOW TO DO IT <> INFORMATION <> DOWNLOAD LINKS SH5 <> TUTORIALS <> HOW TO DO IT <> INFORMATION <> DOWNLOAD LINKS Always Here To Help A Fellow 'Subber' | Need An Answer to A Question Just Send Me A PM Last edited by THEBERBSTER; 10-03-19 at 05:10 PM. Reason: Replaced missing pictures |
|
|
|
|
03-07-14, 11:38 AM
|
#3 |
|
Growing Old Disgracefully
Join Date: Dec 2012
Location: Dibden Purlieu - Southampton
Posts: 9,606
Downloads: 1123
Uploads: 0
|
Last updated 25th April 2018
JSGME Installing It correctly The Wolves Of Steel Mega Mod automatically installs this application for you. This application is included in Sobers Subsim Bonus Mega Mod All In One Version1421 20072017 Download JSGME Downmload link. http://www.subsim.com/radioroom/down...o=file&id=4725 Picture 1 > Subsim JSGME Download. 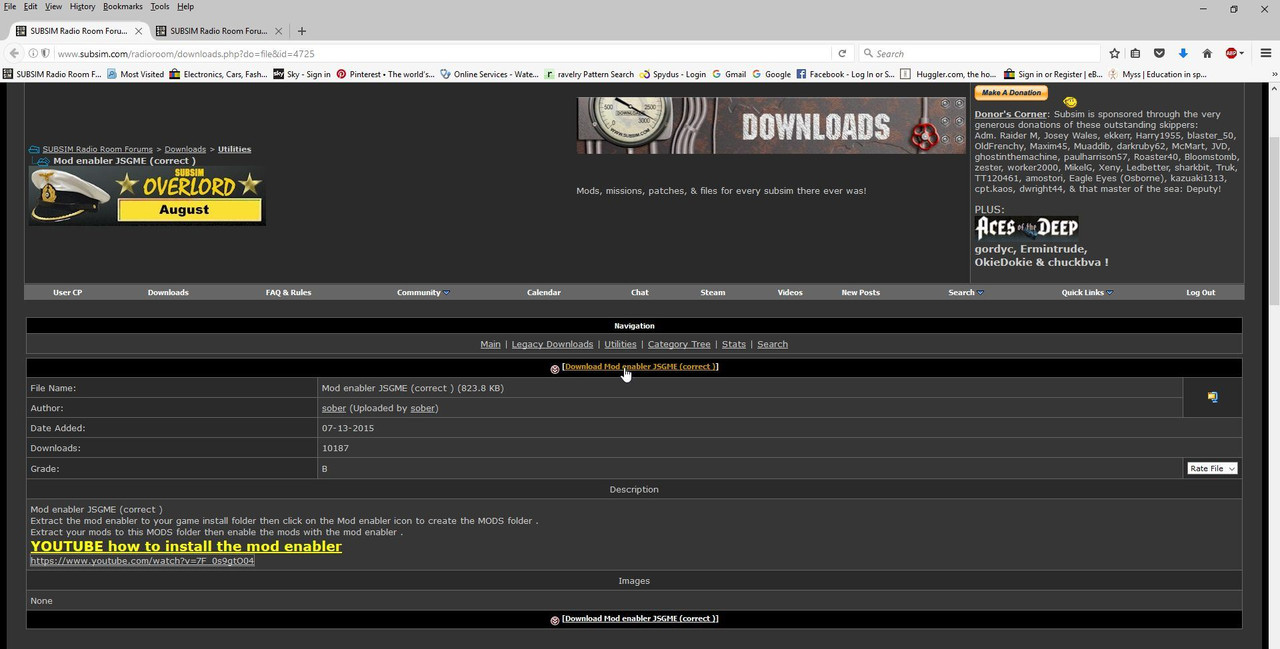 Picture 2 > Shows JSGME downloaded into the SH5 Main Game Folder. 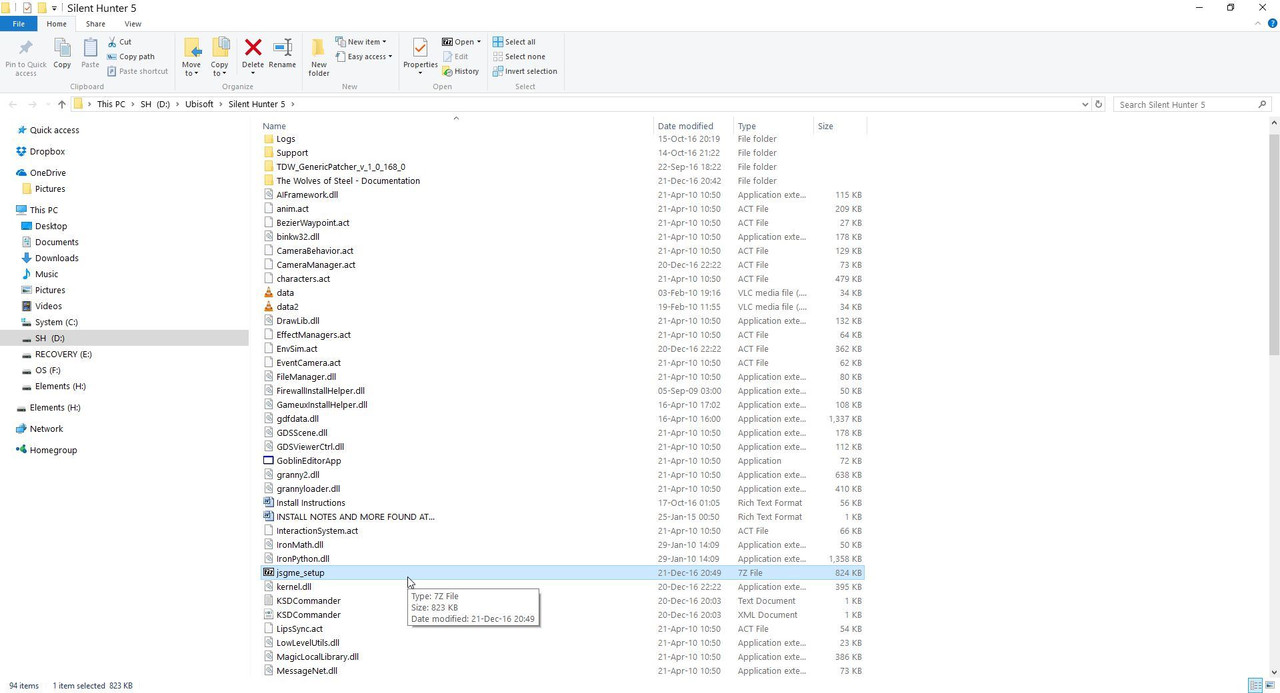 Picture 3 > Double click on the JSGME Zip File to open it.  Picture 4> Click on the Extract Tab. 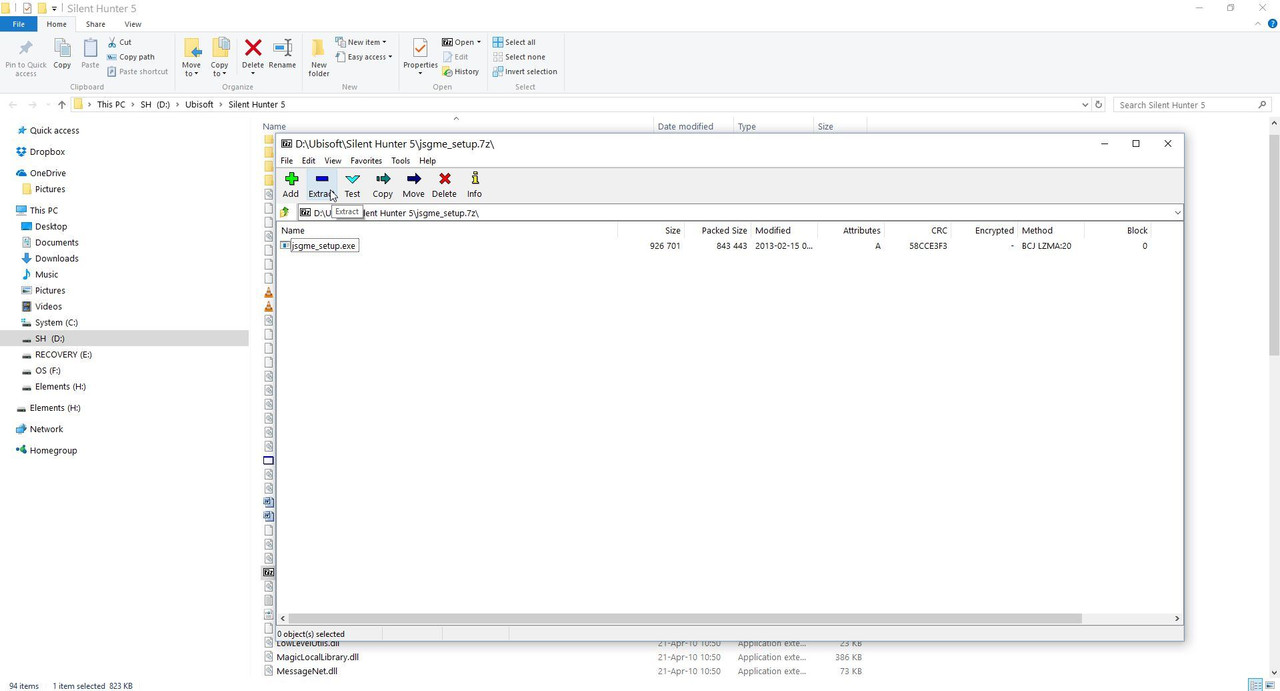 Picture 5 > The path shows the SH5 Main Game Folder. Press OK. 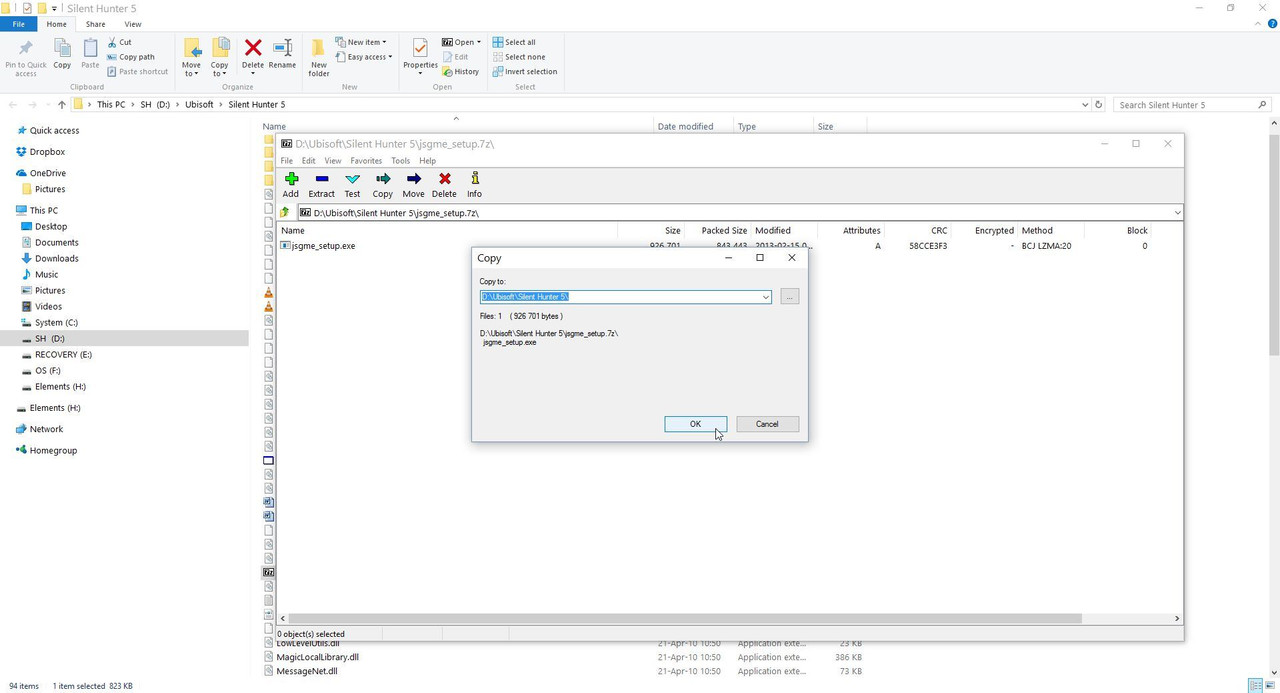 Picture 6 > Close the Zip File. 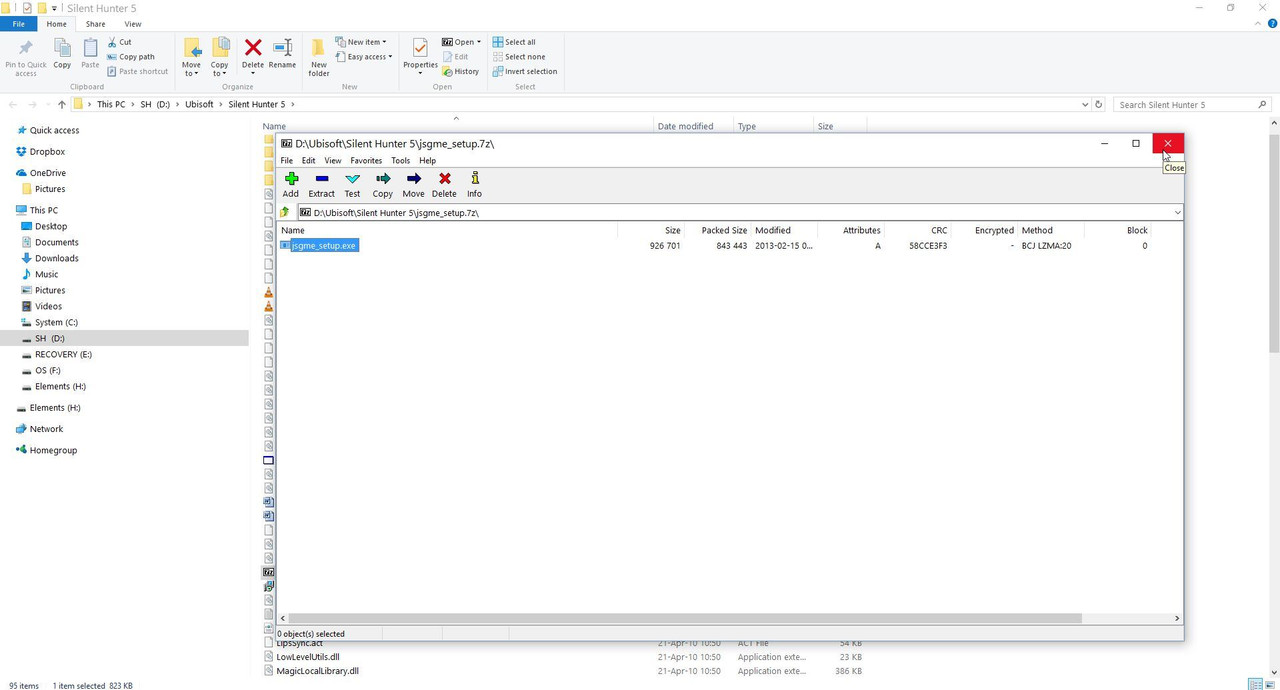 Picture 7 > Double click on the JSGME_Setup to start the installation. 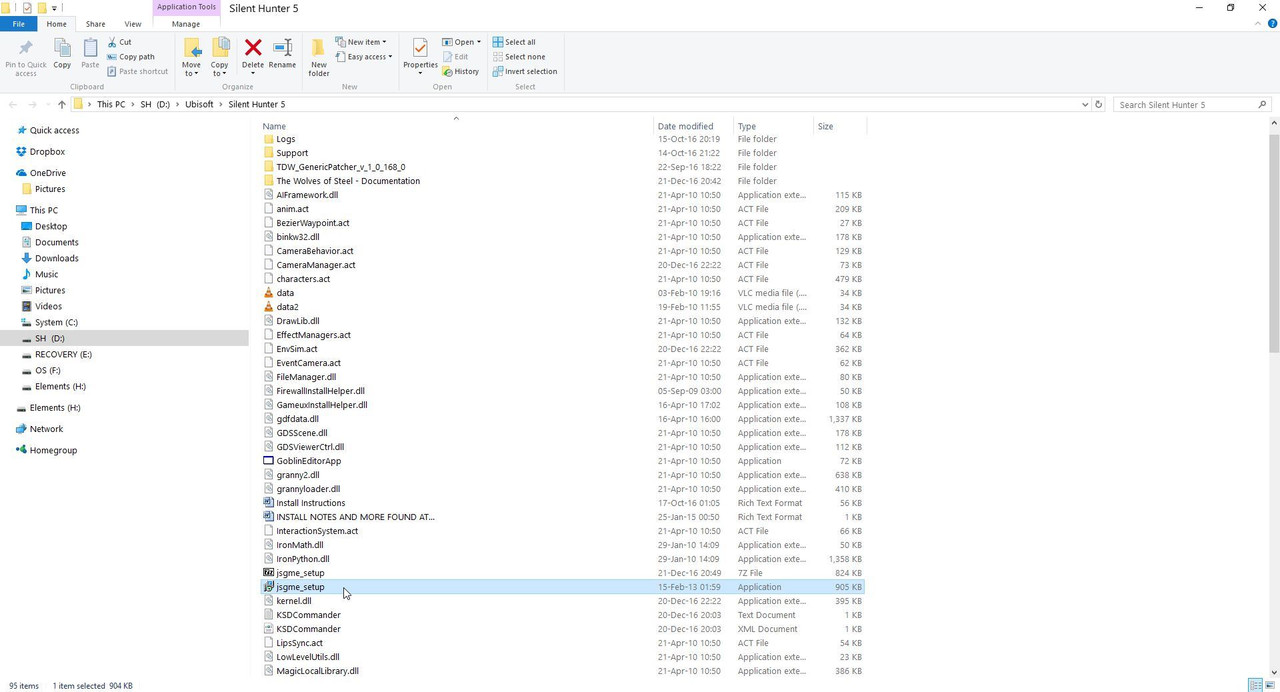 Picture 8 > Click Next on the Wizard. 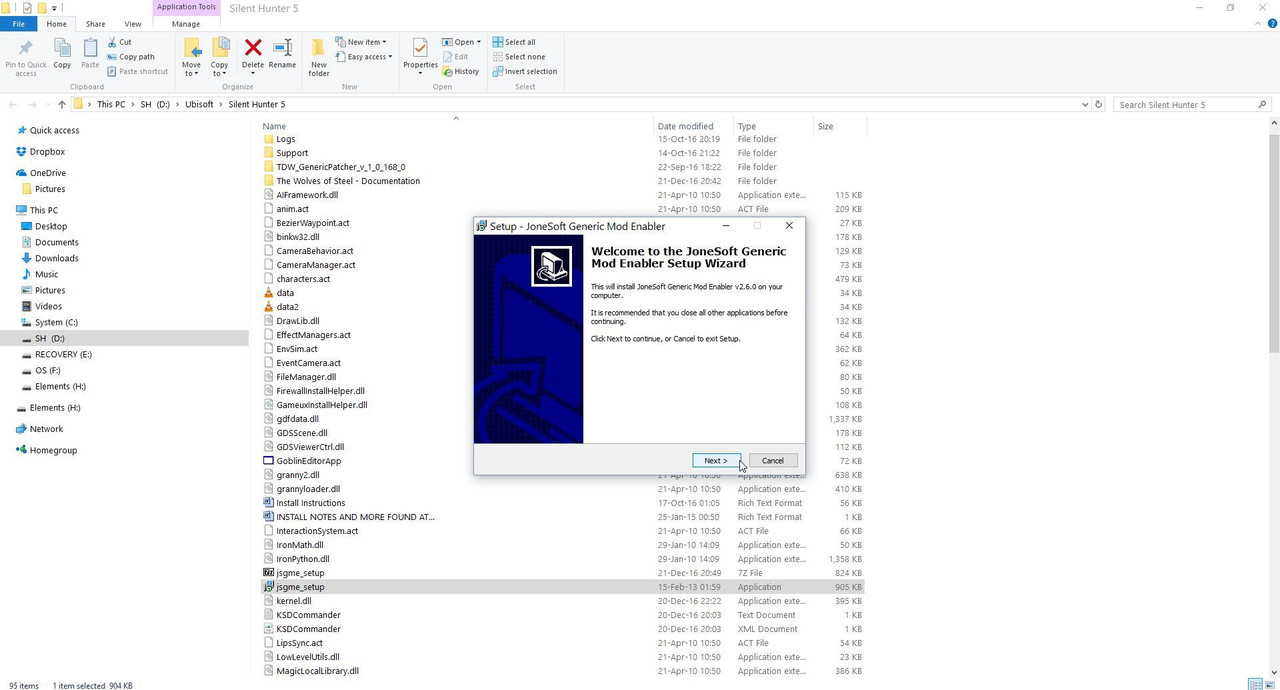 Picture 9 > Tick I accept agreement 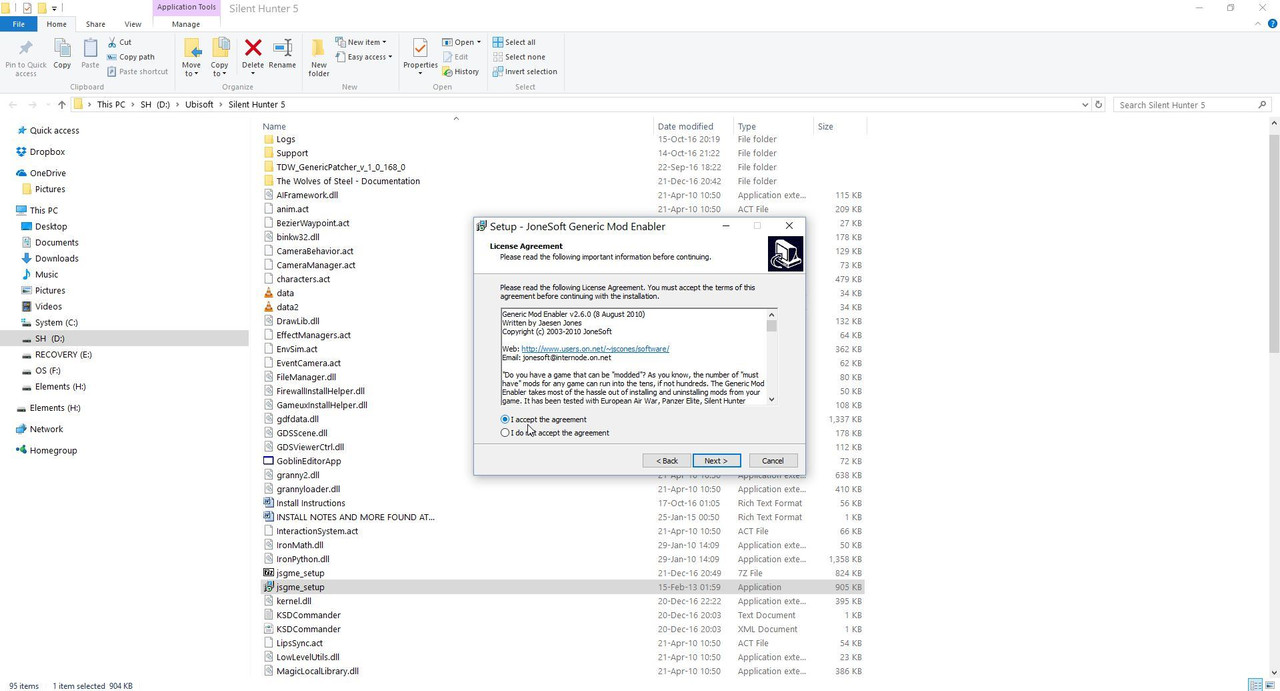 Picture 10 > Press Next.  Picture 11 > Press Next. 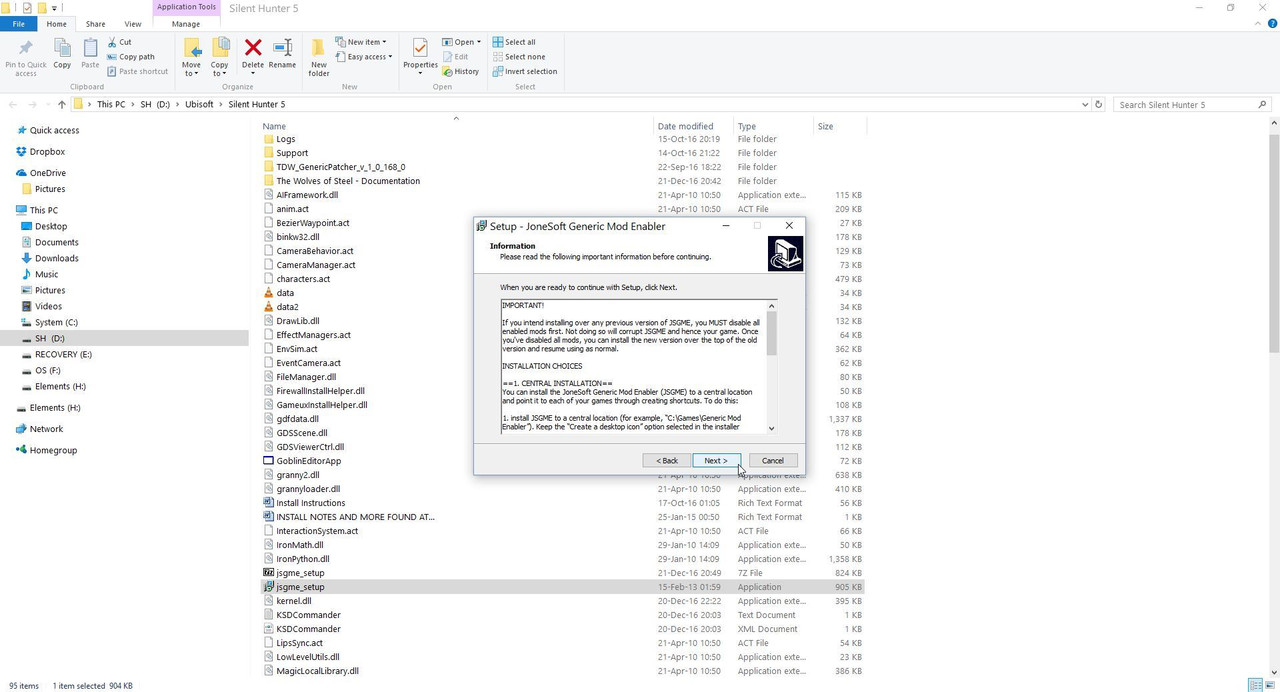 Picture 12 > The path shows the SH5 Main Game Folder. Press Next. 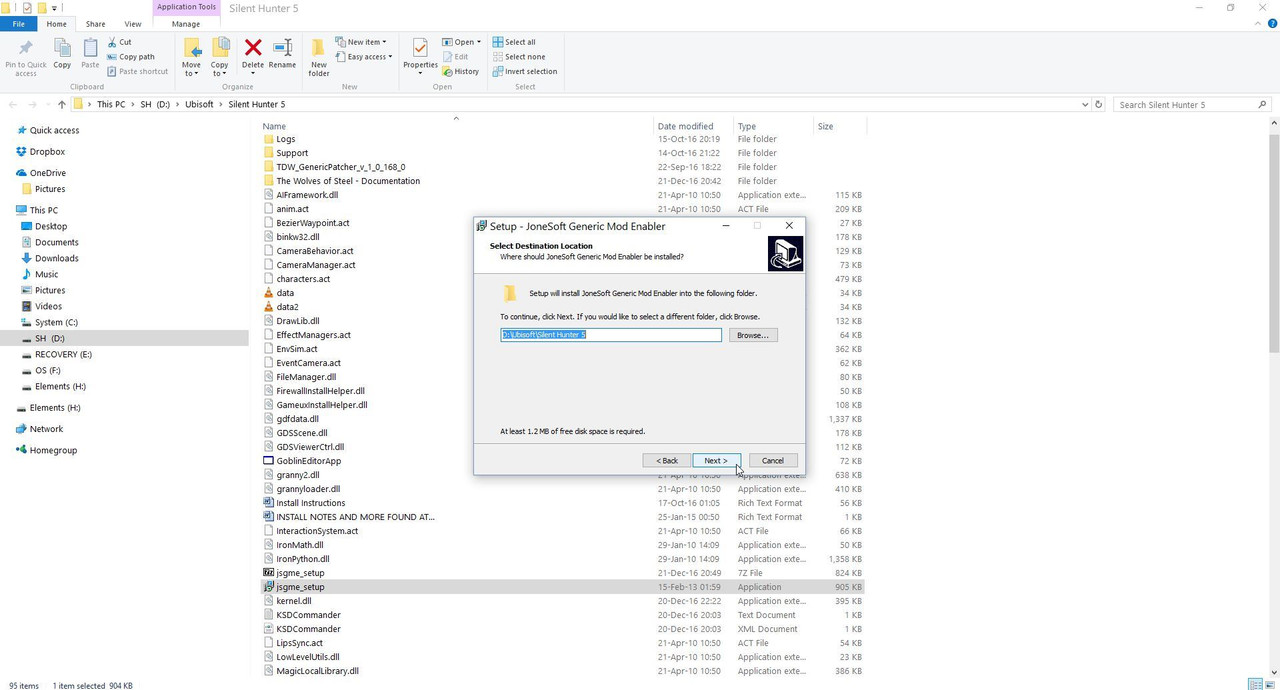 Picture 13 > Tells you it will put the JSGME Icon on your Desk Top. Press Next. 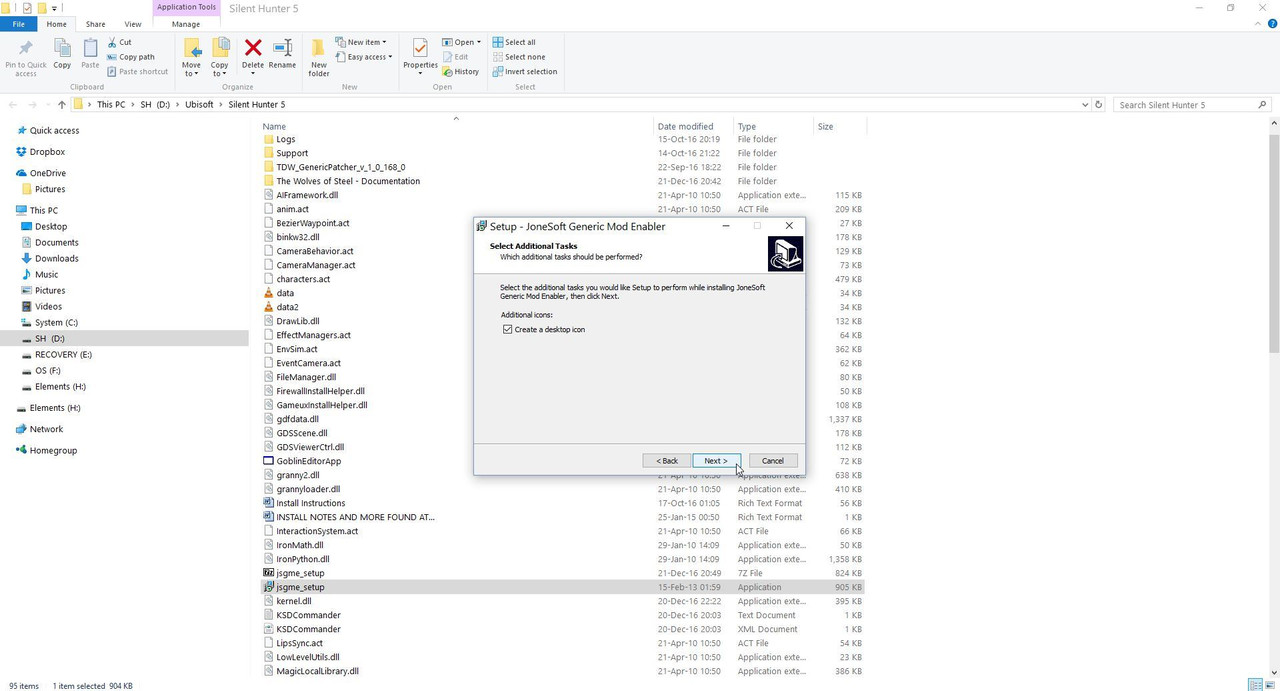 Picture 14 > Click on Install.  Picture 15 > Tells you about the different languages and how to access them. Click Next. 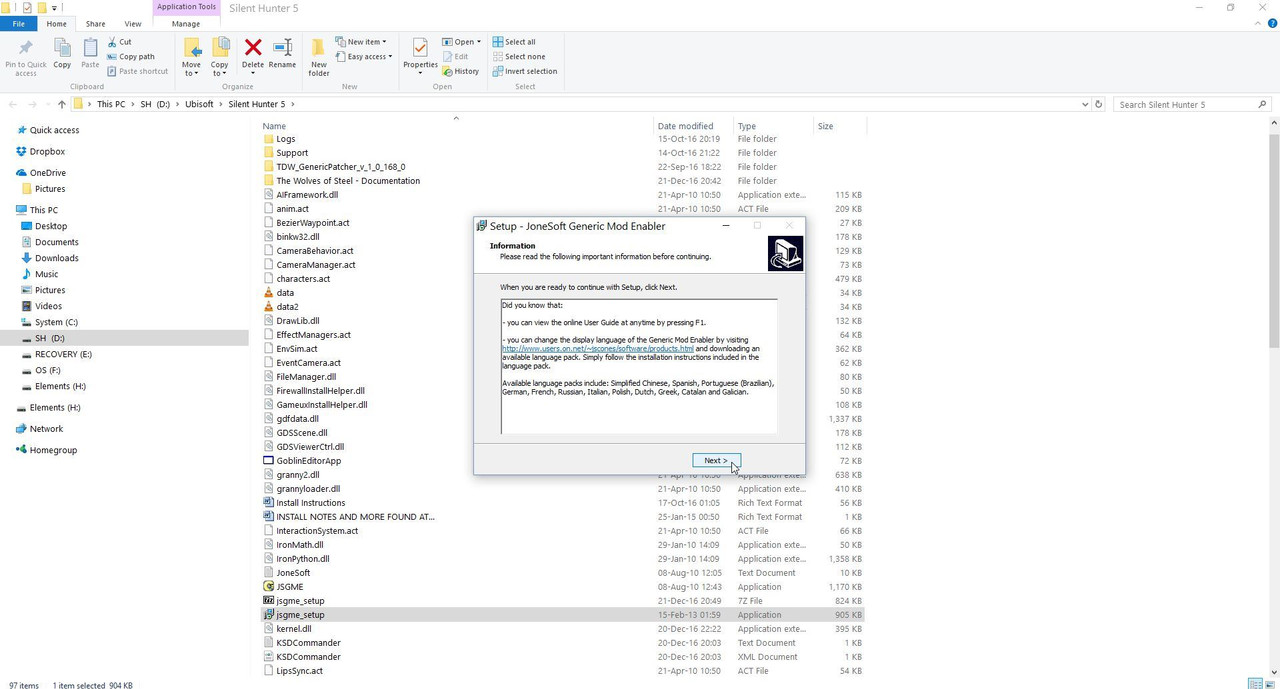 Picture 16 > Untick the (Online) user guide as it only shows an error message. Click Finish. 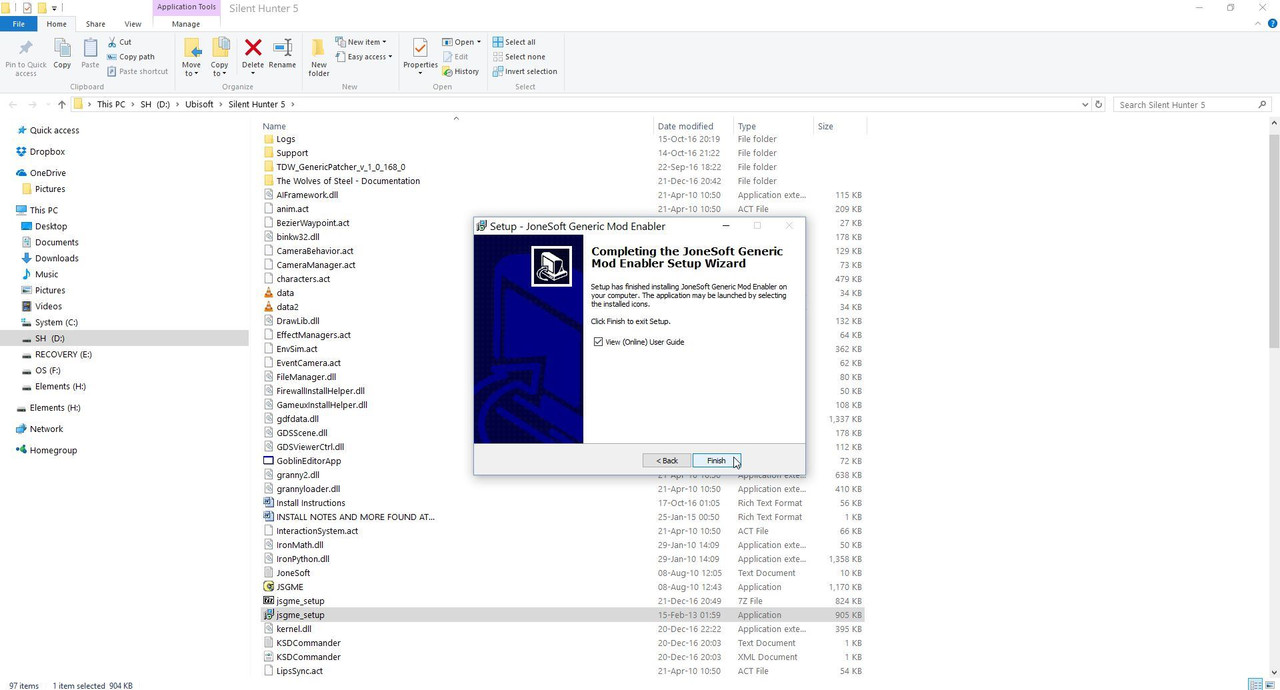 Picture 17 > Double click on the JSGME Icon to open the mod enabler. 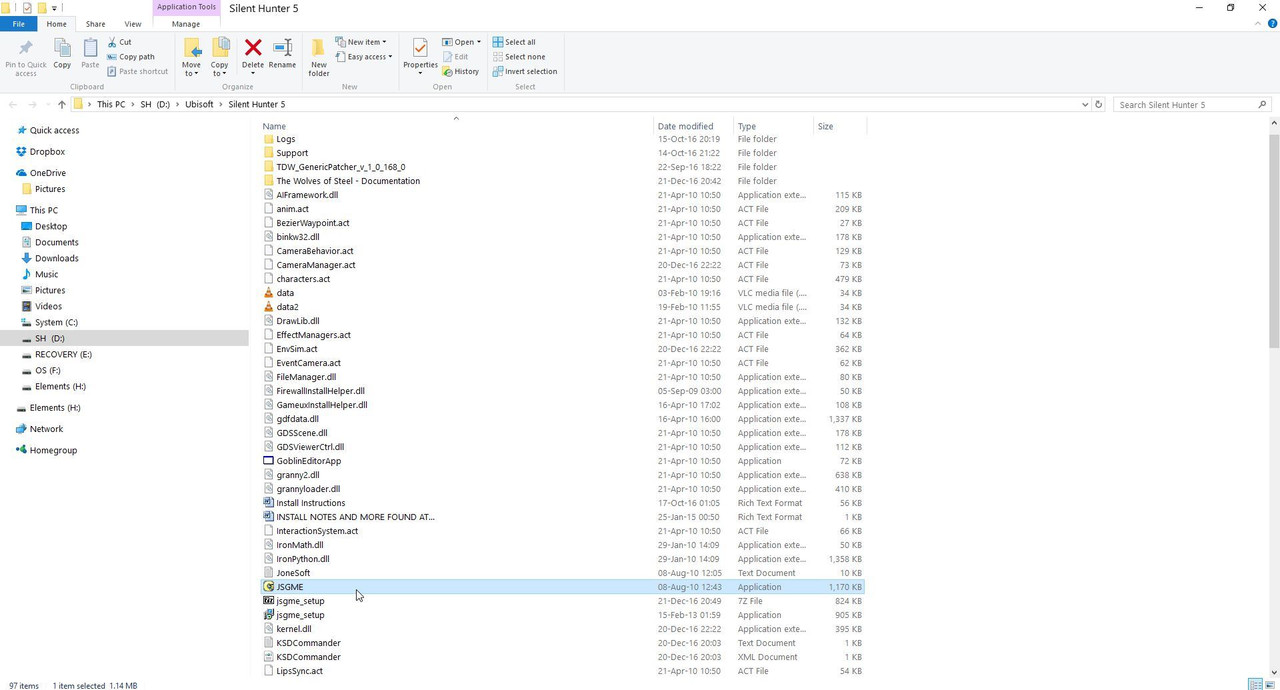 Picture 18 > Click on OK so the Mods folder can be installed. 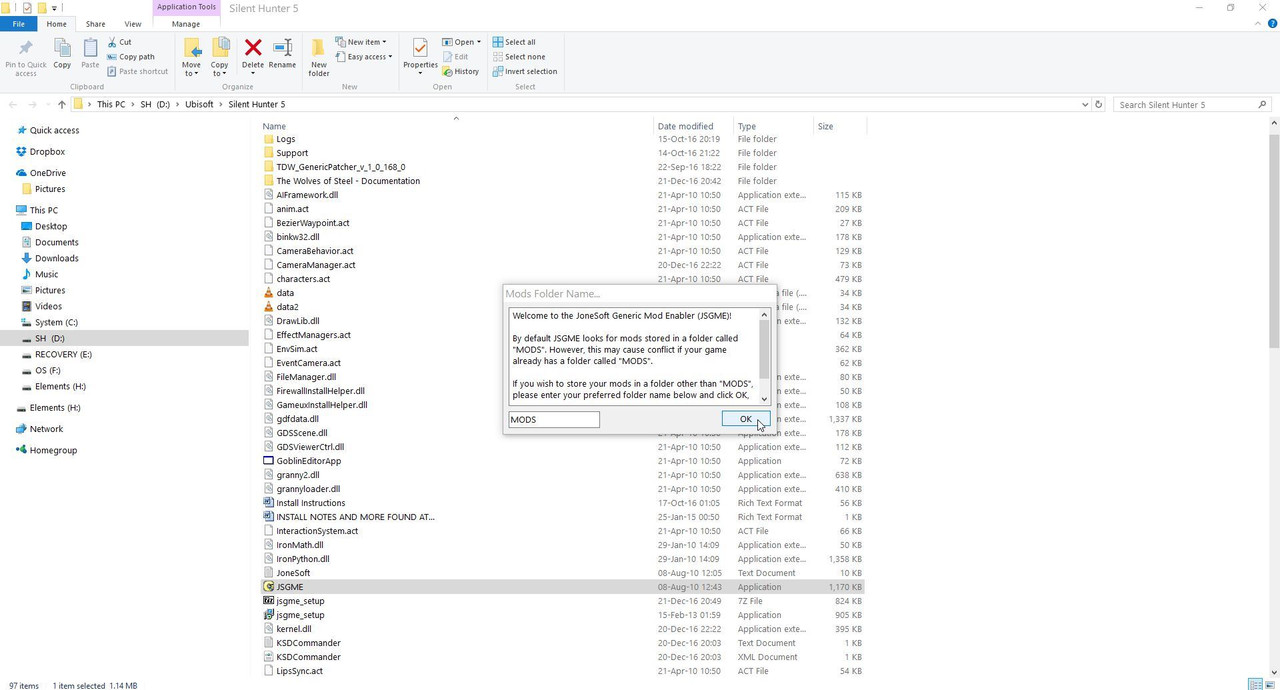 Picture 19 > Close JSGME. 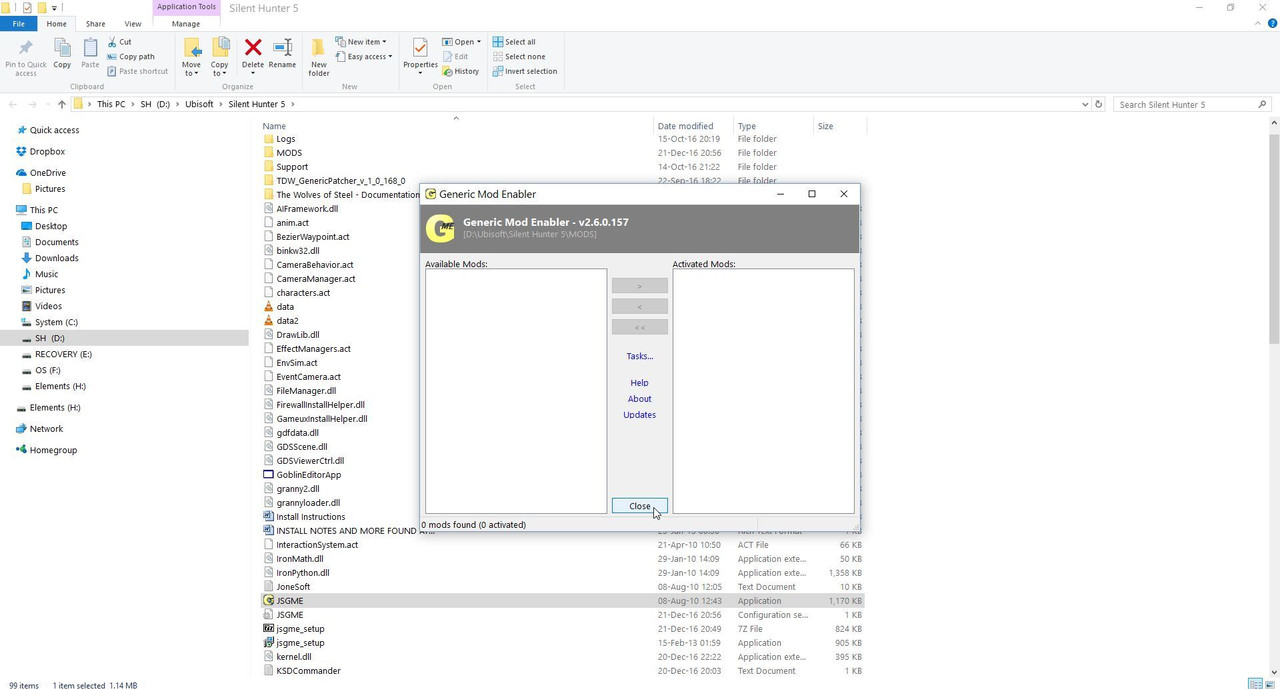 Your game is now ready to accept Mods. Last edited by THEBERBSTER; 04-25-18 at 03:33 AM. Reason: Replaced missing pictures |
|
|
|
|
03-07-14, 11:41 AM
|
#4 |
|
Growing Old Disgracefully
Join Date: Dec 2012
Location: Dibden Purlieu - Southampton
Posts: 9,606
Downloads: 1123
Uploads: 0
|
Last updated 23rd December 2022
Important information Uplay replaced by Ubisoft Connect Updated Tutorial When the SH5 installation has completed it is important that this is updated to the latest game version v1.2.0 before going any further. Go to the Ubisoft Folder. Go to the main Silent Hunter 5 Folder. Picture 1 > Shows the SH5.exe application v1.0.5.0 as installed. 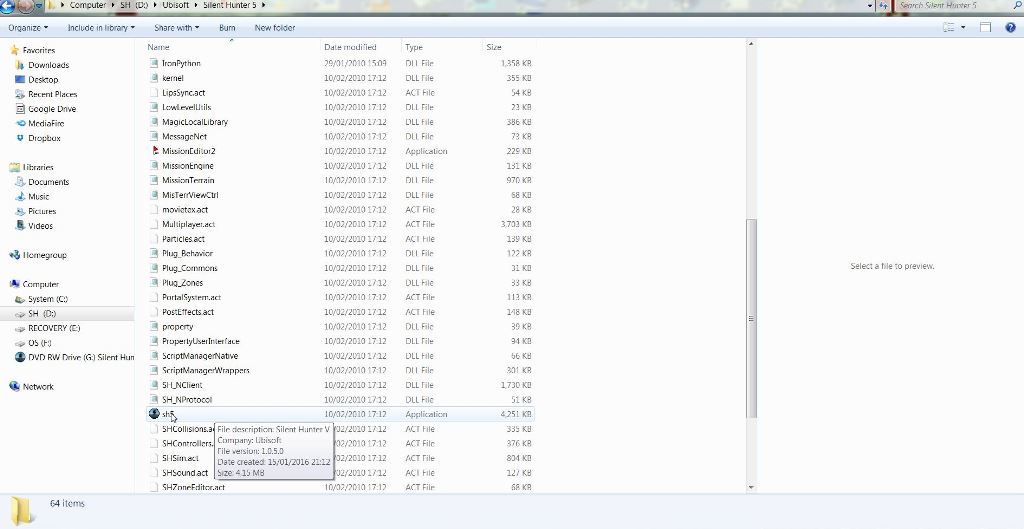 Picture 2 > Go to the Support Folder 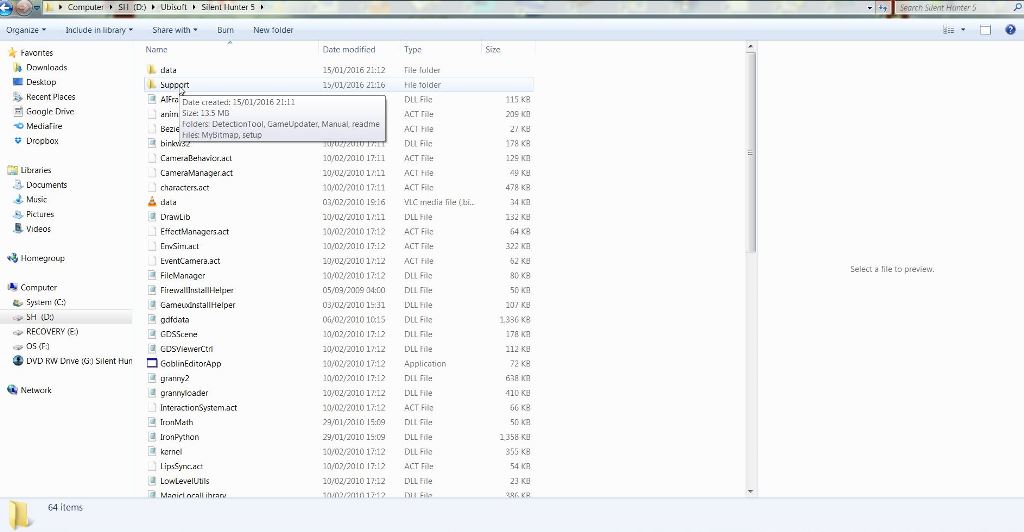 Picture 3 > Go to the GameUpdater Folder 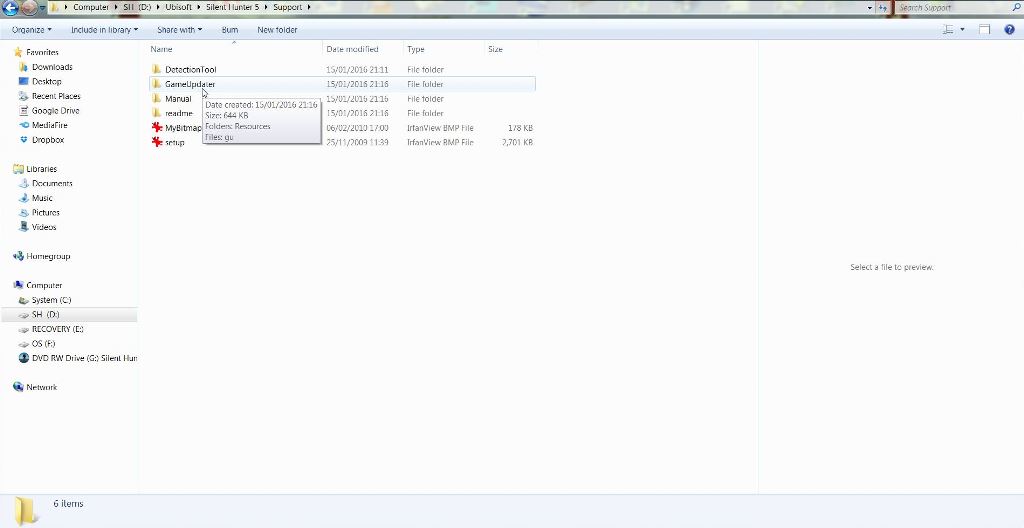 Picture 4 > Double click to run the GU Application 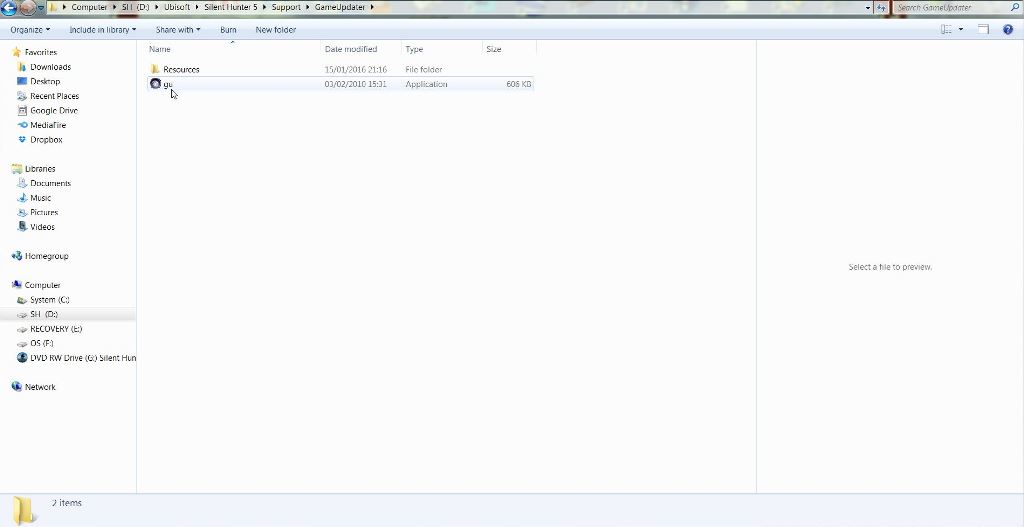 Picture 5 > Yes to start the update 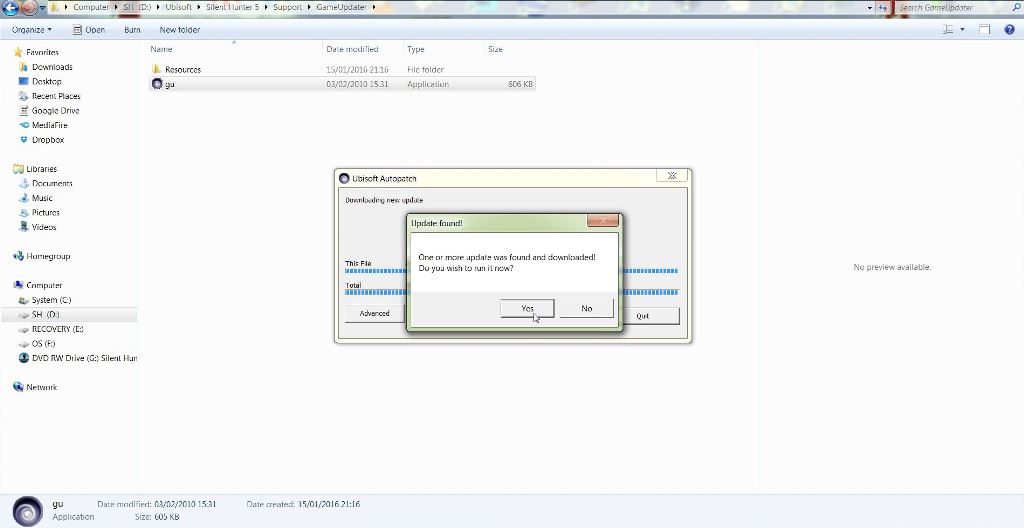 Picture 6 > When finished updating confirms the version has changed to v1.2.0  Picture 7 > Shows the 'Connection Error Message' 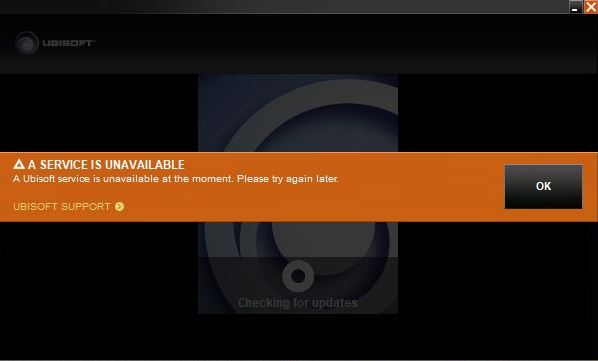 Picture 8 > Use your search engine to find 'Ubisoft Connect & select 'Download for PC'  Picture 9 > Start the installation and select your language from the 'Drop Down' arrow  Page 10 > Accept the Licence  Page 11 > You can use 'Browse' to select a different location to install to (It is not recommended to install in the 'Protected Directory' showing) 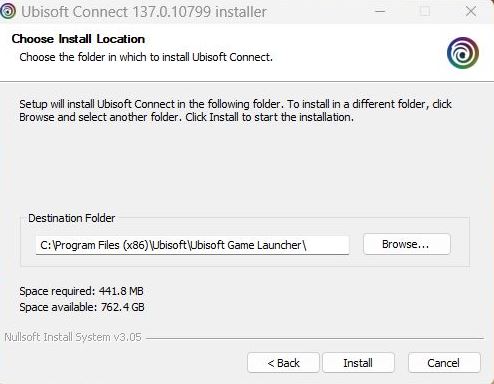 Page 12 > I am installing in the folder in front of the game folder 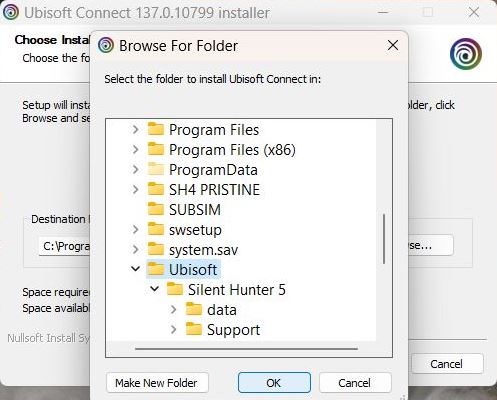 Page 13 > The location is showing my installation path 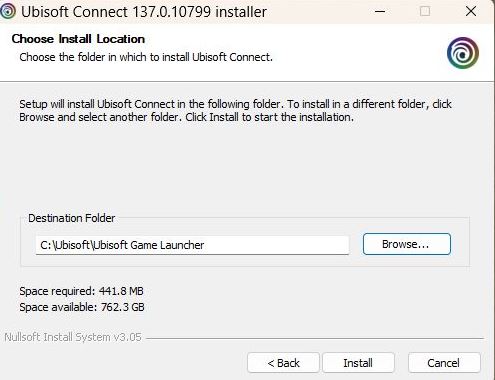 Page 14 > Installation has completed Press Next 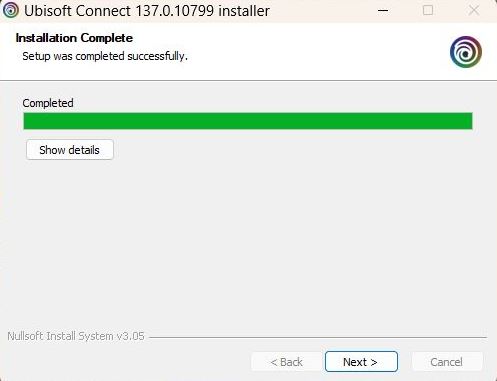 Page 15 > Click on 'Finish' to run Ubisoft Connect 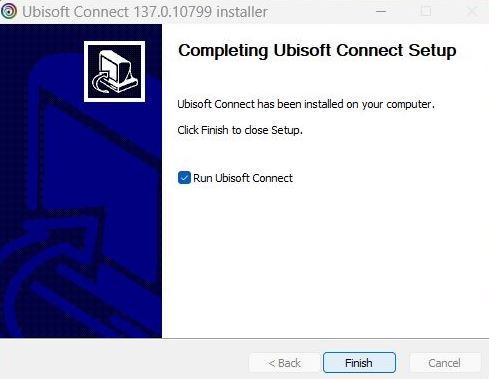 Page 16 > If this is the first time you have played SH5 you will need to 'Create an Account' If you are re-installing then you will need the Email and Password you used for Uplay 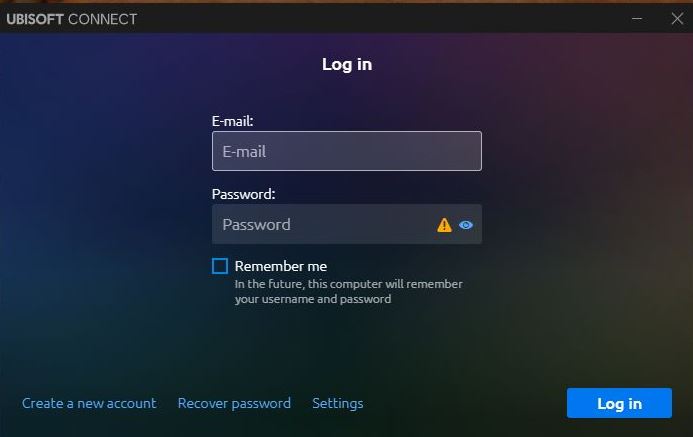 Page 17 > You now have a security option which can be skipped 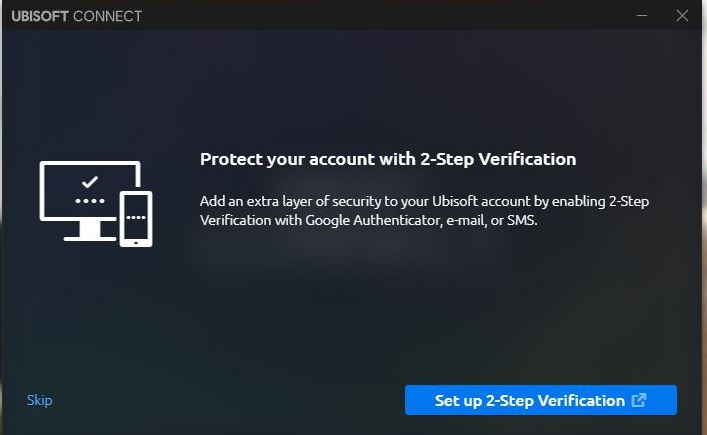 Page 18 > Select the 'Games' tab 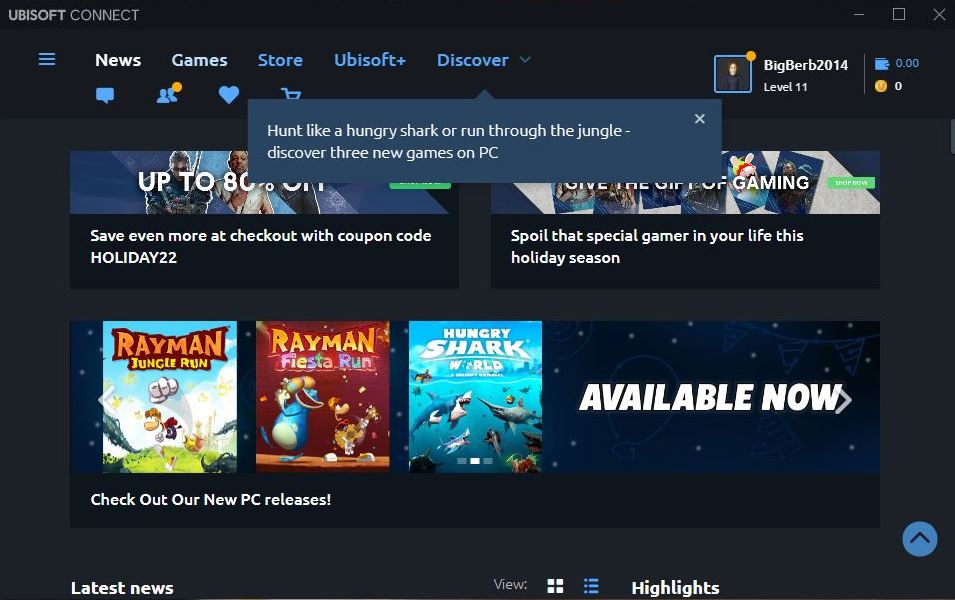 Page 19 > Click on the Silent Hunter 5 game picture 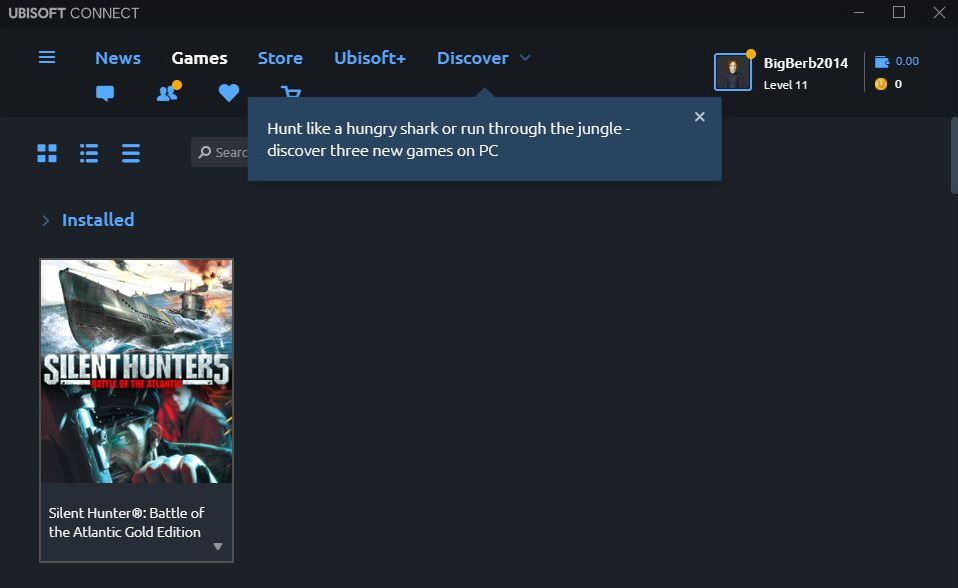 Page 20 > Click on 'Update' 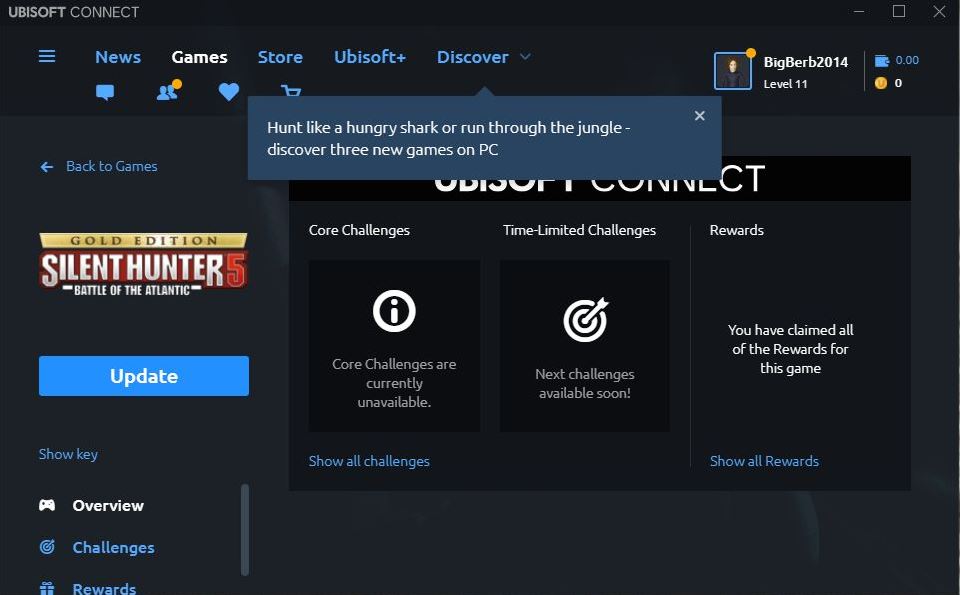 Picture 21 > Game is synchronising before loading 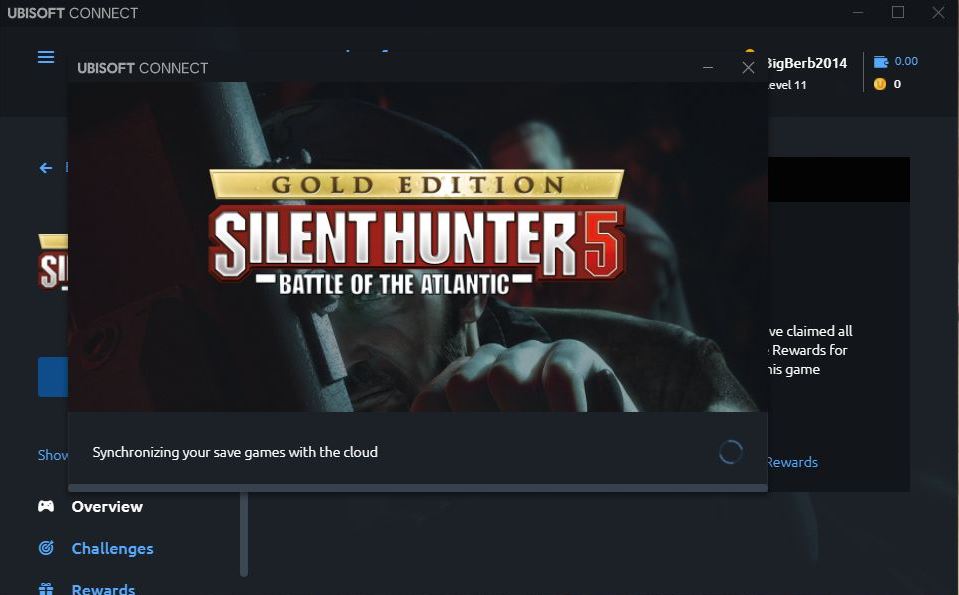 Page 22 > Select your preferred option  Page 23 > This picture shows the game has loaded to the 'Main Menu' and shows the correct version 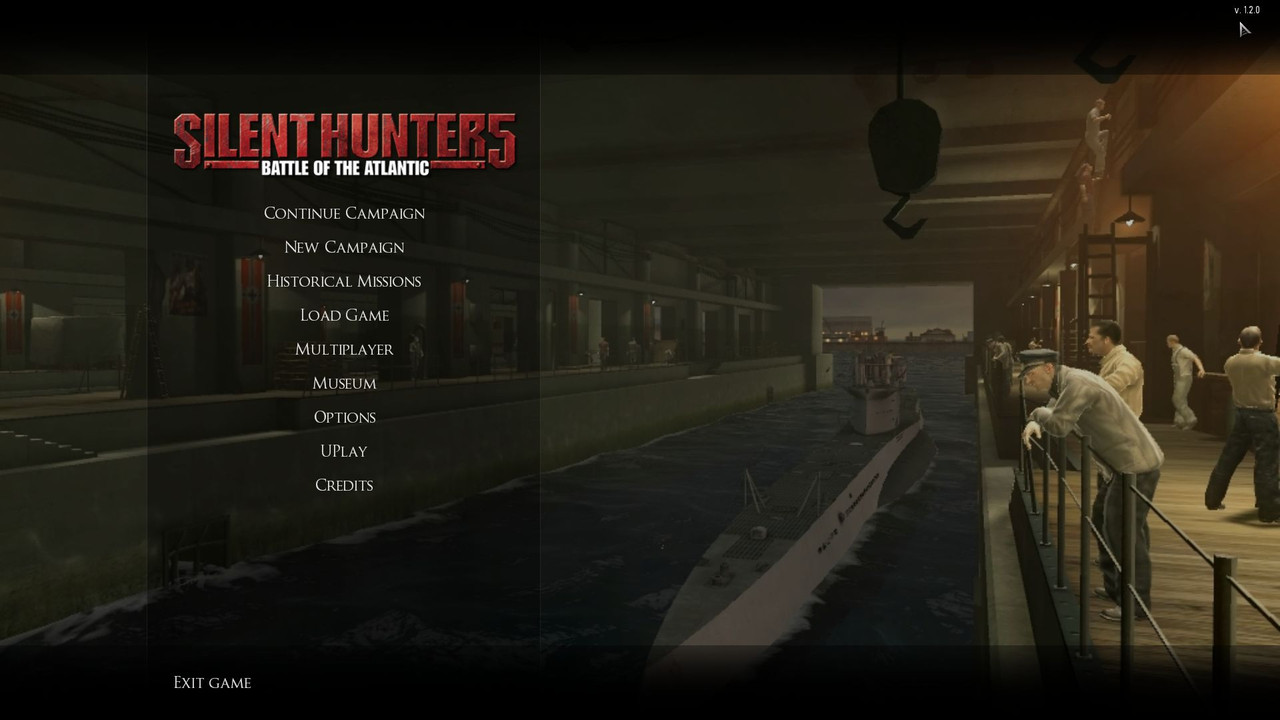 Note If you are having a problem with the game loading from the SH5.exe see Picture 24 below the circle is continuously spinning trying to update the game before launching. Click on the x to close the game down and it will exit back o the Desktop. Now load the game from Ubisoft Connect it is quite possible that your game picture is showing an update button and for some reason could not do it from the SH5.exe  You can make 'Ubisoft Connect' a Shortcut on your Desktop or Pin it to the Taskbar
__________________
LSH3-2015 <> TUTORIALS <> ALL YOU NEED TO KNOW <> ALL IN ONE PLACE SH4 <> TUTORIALS <> HOW TO DO IT <> INFORMATION <> DOWNLOAD LINKS SH5 <> TUTORIALS <> HOW TO DO IT <> INFORMATION <> DOWNLOAD LINKS Always Here To Help A Fellow 'Subber' | Need An Answer to A Question Just Send Me A PM Last edited by THEBERBSTER; 12-25-22 at 11:27 AM. Reason: Replaced missing pictures |
|
|
|
|
03-07-14, 11:46 AM
|
#5 |
|
Growing Old Disgracefully
Join Date: Dec 2012
Location: Dibden Purlieu - Southampton
Posts: 9,606
Downloads: 1123
Uploads: 0
|
Last updated 1st December 2018
This Tutorial is for installing TDW's Options File Editor Viewer (OFEV) anywhere on your system as a stand alone application only. If a complete uninstall is done the stand alone the OFEV application is unaffected by this. When the re-install is done just follow the instructions from Picture 10 to Picture 14. The OFEV is included in TDW's NewUI's 7-4-2 and 7-5-0 base mods. DO NOT INSTALL THIS STAND ALONE VERSION FOR: The Wolves of Steel (TWoS) Sobers Mega Mod Download Link to > TDWs Options File Editor Viewer Version_v_1_0_32_0 The Basic way to make changes to the OFEV. 1. Disable the version of TDWs NewUIs_TDC_7_4_2 or 7_5_0 ByTheDarkWraith Main Mod that you are using from JSGME. 1.1. Disable all TWOS mods in JSGME. 2. Make a New Folder and give it a name and place it in a convenient place that will be easier to find. 3. For the purpose of this Tutorial I will call the New Folder OFEV32. 4. Download the (OFEV) in to the OFEV32 Folder. (Picture 1) Picture 1  5. Open the Zip File. 6. You will see 2 Files. (Picture 2) Picture 2  7. Open the OptionsFileEditorViewer > Application with your mouse. 8. Click on the Extract All Box. (Picture 3) Picture 3  9. You will see from the path showing that it is going to Extract and Copy to the OFEV32 Folder (Picture 4) 10. Click on Extract. (Picture 4) Picture 4 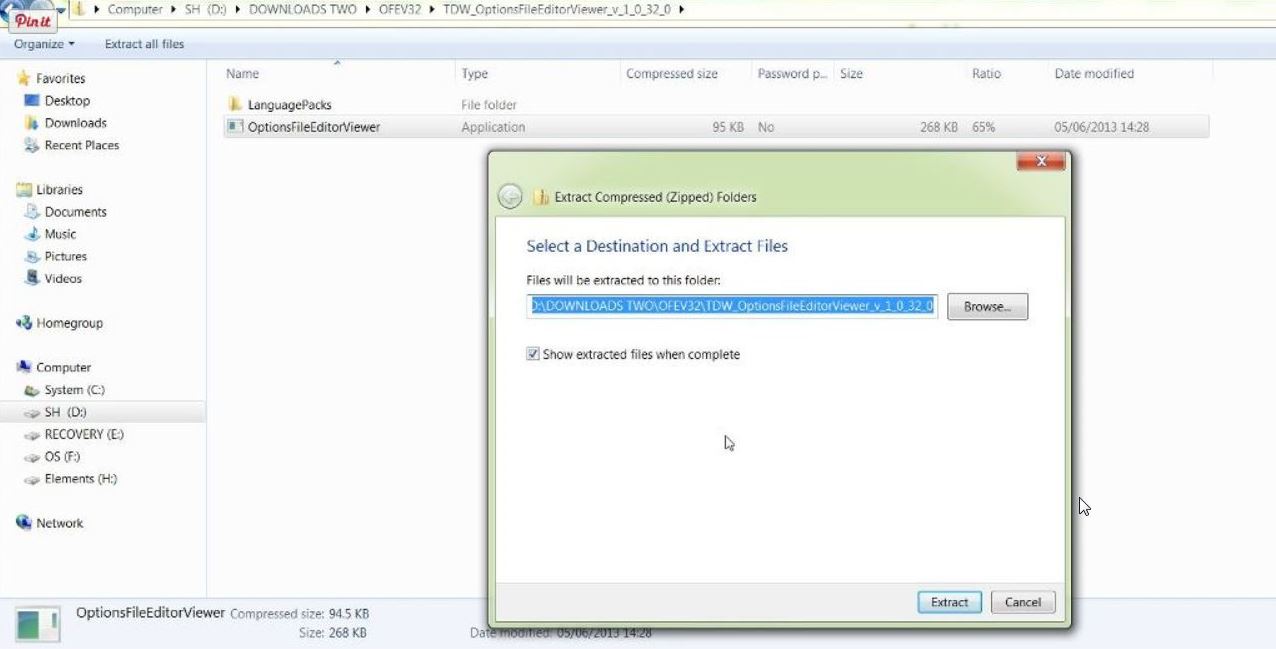 11. (OFEV) > Application exe the Mickey Mouse Icon is now showing. (Picture 5) Picture 5  12. Open the Mickey Mouse .exe Application. 13. You will now get an Error Message. (Picture 6) 14. CFG file missing! Building cfg file! Please restart the App. (Picture 6) Picture 6  15. Click Ok. 16. You will now see the missing cfg file has been added. (Picture 7) Picture 7  17. Open the Mickey Mouse .exe Application. 18. Select your Language (Picture 8) 19. Double click on it to select it. (Picture 8) Picture 8 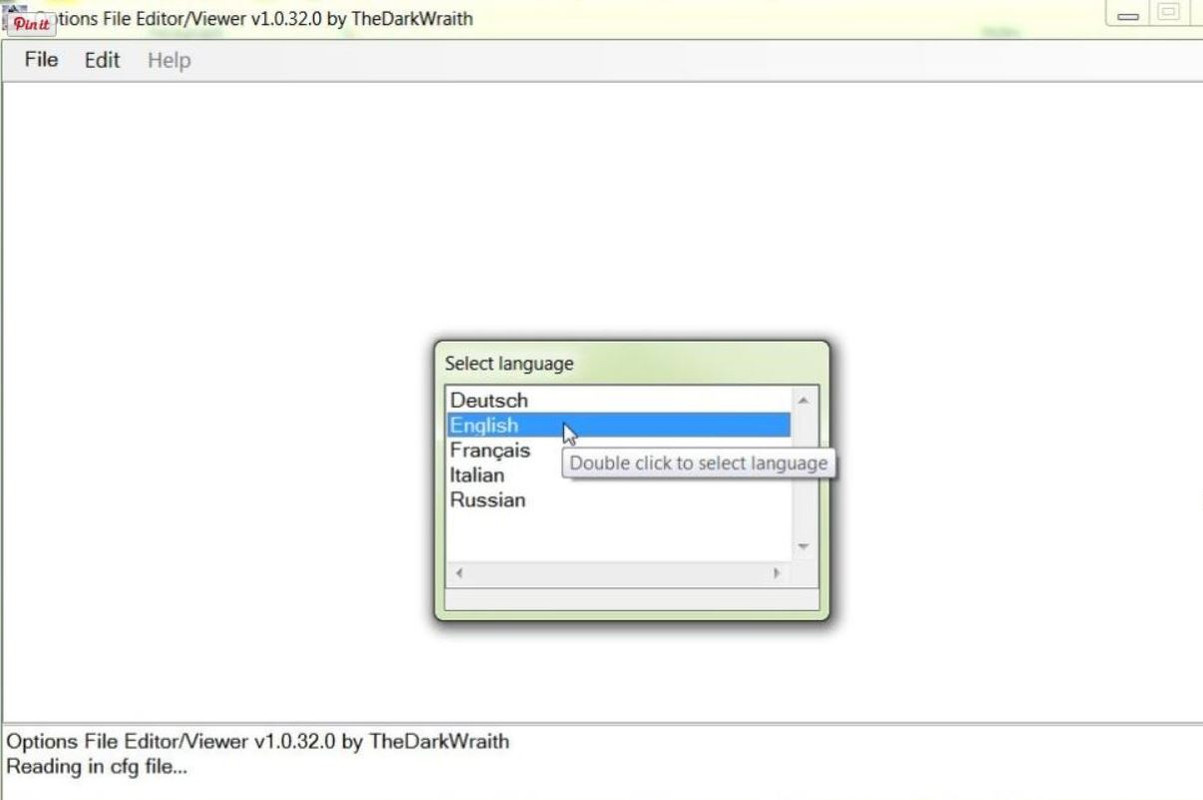 20. Open the File Tab. (Picture 9) Picture 9 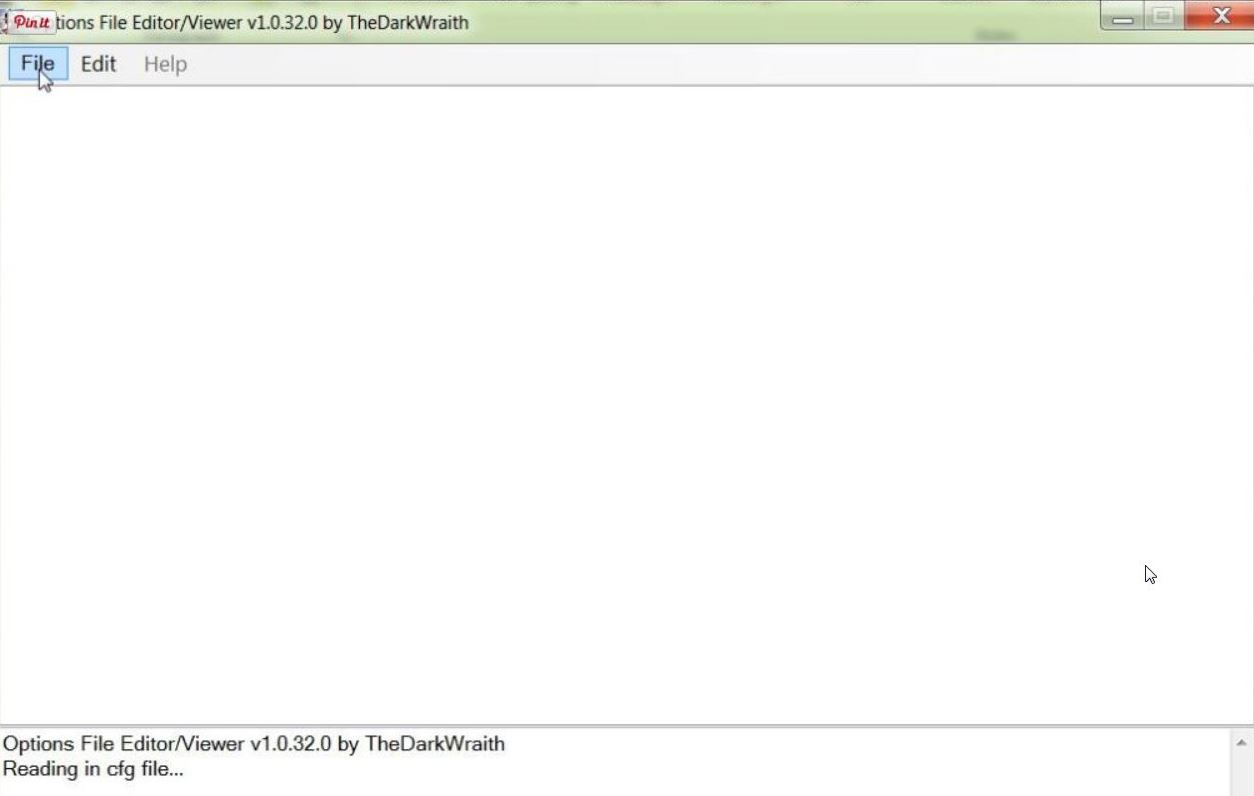 21. Select Set path to menu.txt (Picture 10) Picture 10 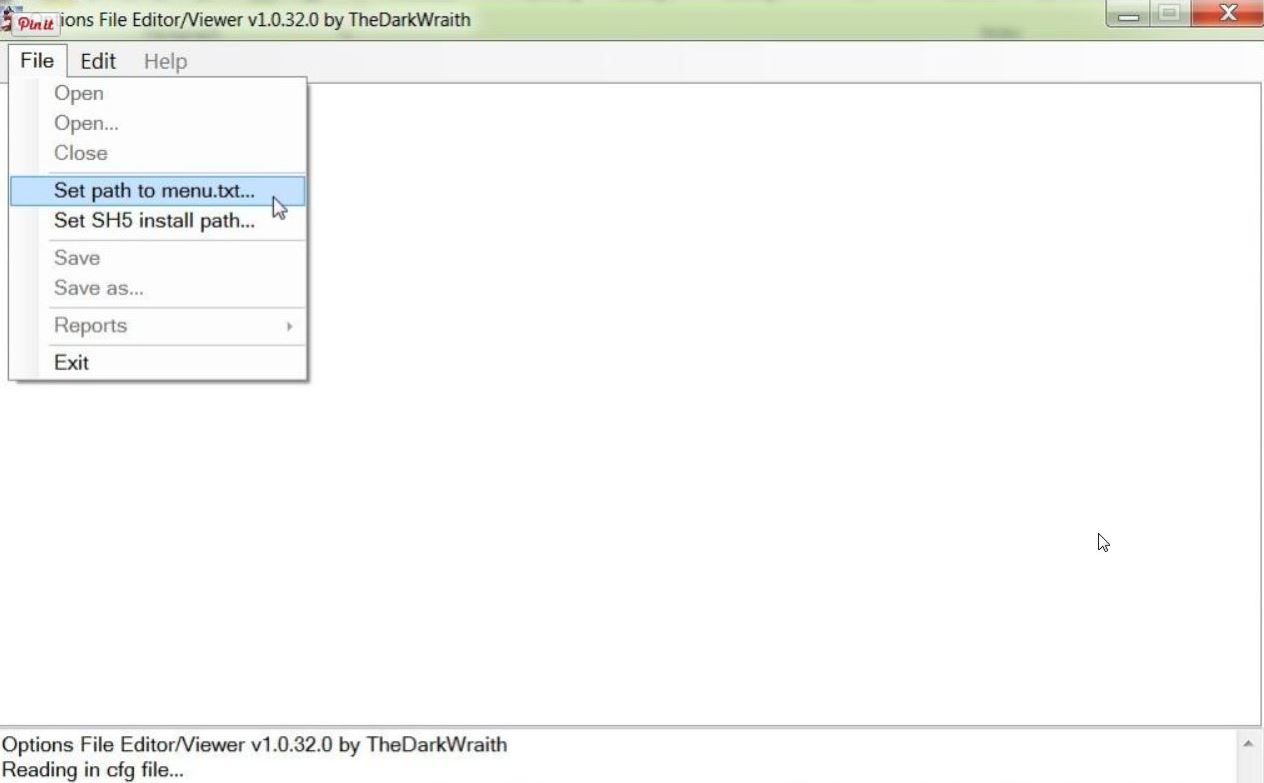 22. Typical looking path could be C:\Ubisoft\Silent Hunter 5\Mods\NewUis_TDC_7_5_0_ByTheDarkWraith\data\Menu (Picture 11) 23. Replace 7-5-0 with 7-4-2 if you are using a different version. 24. Click on Open. (Picture 11) Picture 11 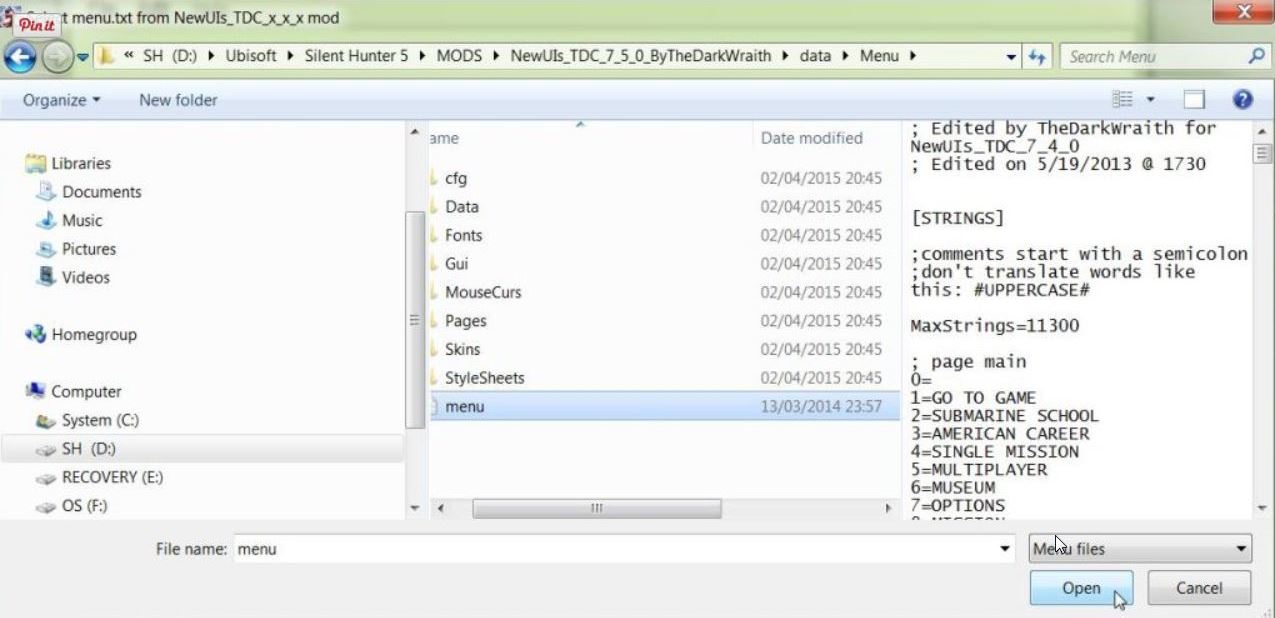 25. Click on the File Tab again. (Picture 12) Picture 12  26. Select Set SH5 install path (Picture 13) Picture 13 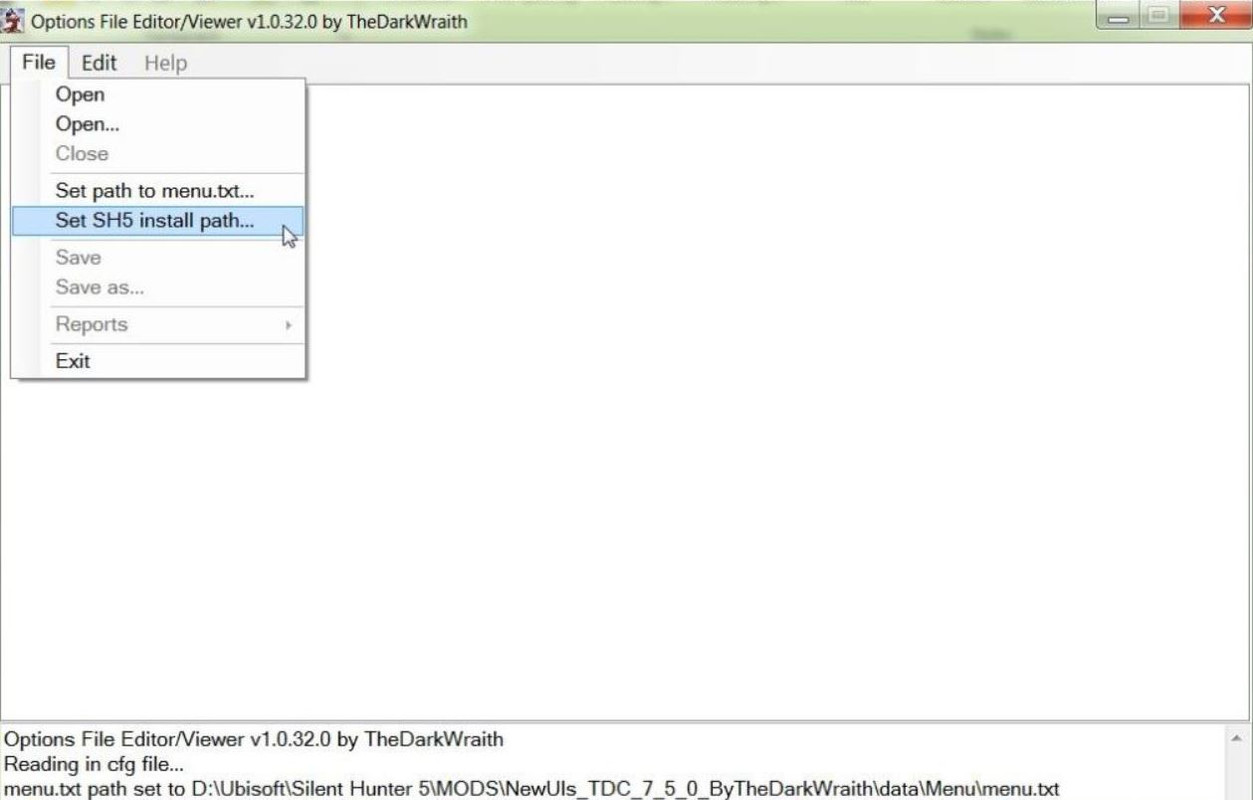 27. Typical looking path could be C:\Ubisoft\Silent Hunter 5 28.Highlight the Silent Hunter 5 Folder by clicking on it Once with your Mouse. (Picture 14) 29. Click on OK. (Picture 14) 30. You can see that the last 2 lines show that both paths have been set correctly. Picture 14 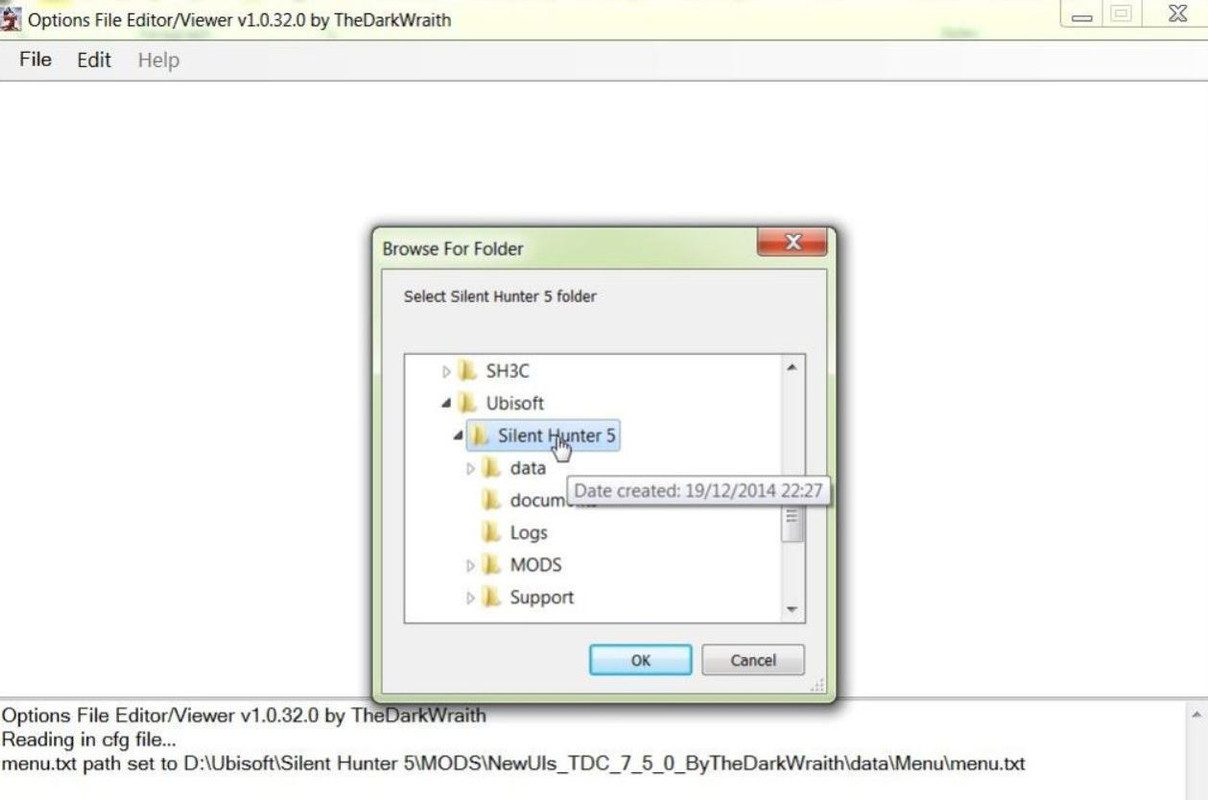 31. Click on the File Tab again. (Picture 15) Picture 15 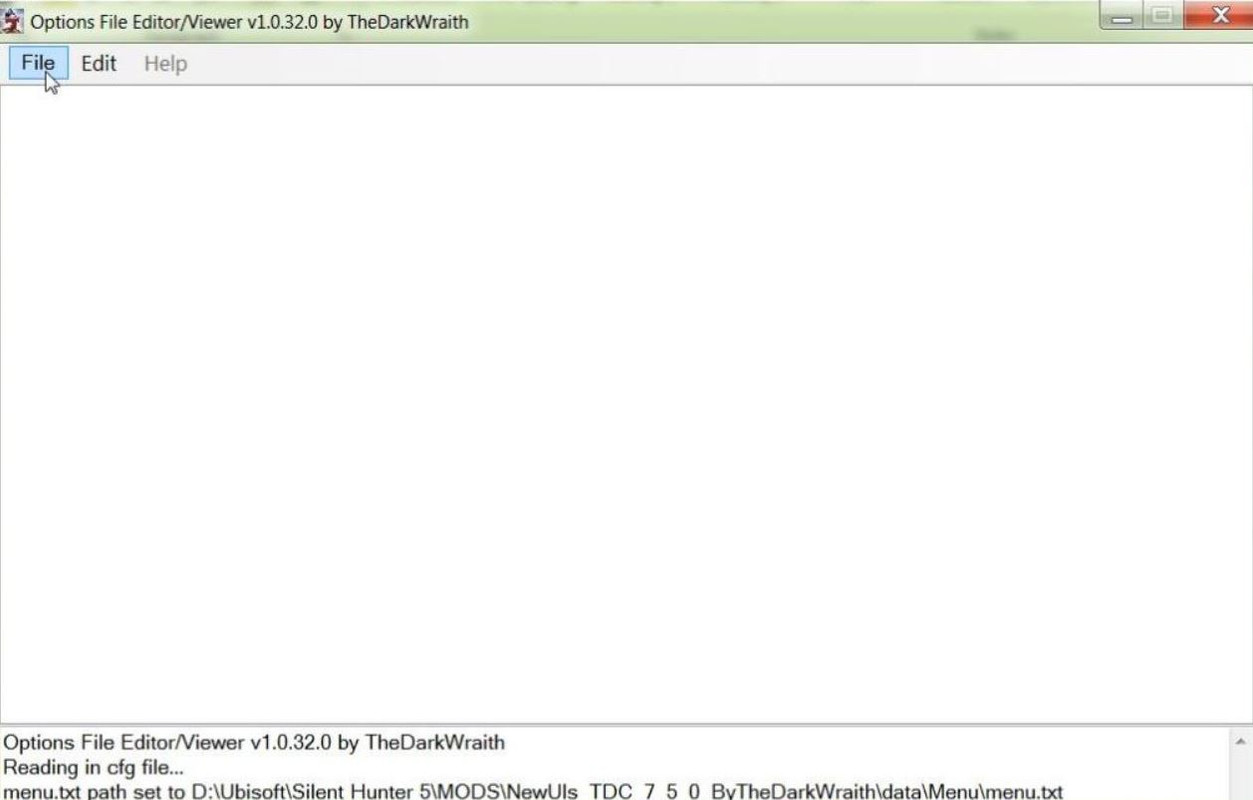 32. Click on the First Open (Picture 16) Picture 16 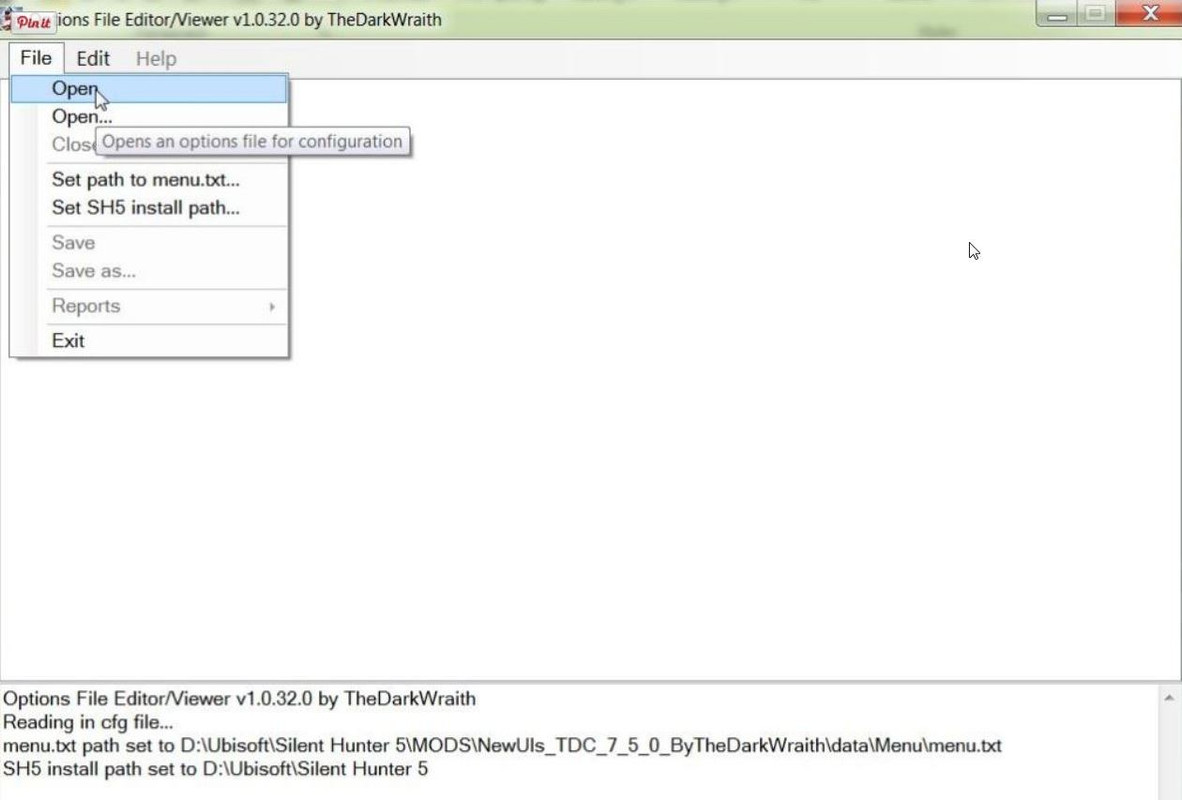 33. We now need to find the .py File. 34. Typical looking path could be C:\Ubisoft\Silent Hunter 5\Mods\NewUis_TDC_7_5_0_ByTheDarkWraith\data\Scrip ts\Menu 35. Open the Menu Folder. 36. You will now see TheDarkWraithUserOptions PY File (Picture 17) 37. Double click with your Mouse on the .py File to open it. (Picture 17) Picture 17  38. (OFEV) showing opened. (Picture 18) Picture 18 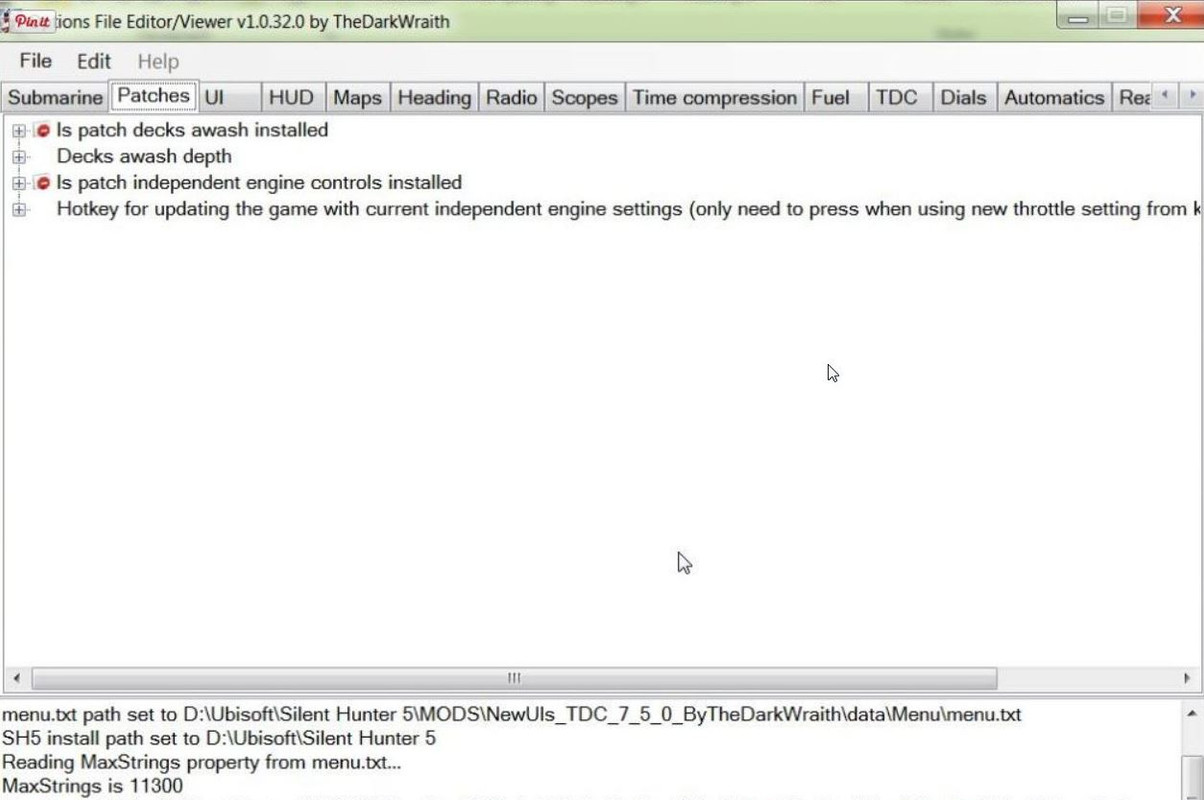 39. To change the Is patch decks awash installed (Picture 19) 40. Double click on False to open. (Picture 19) Picture 19 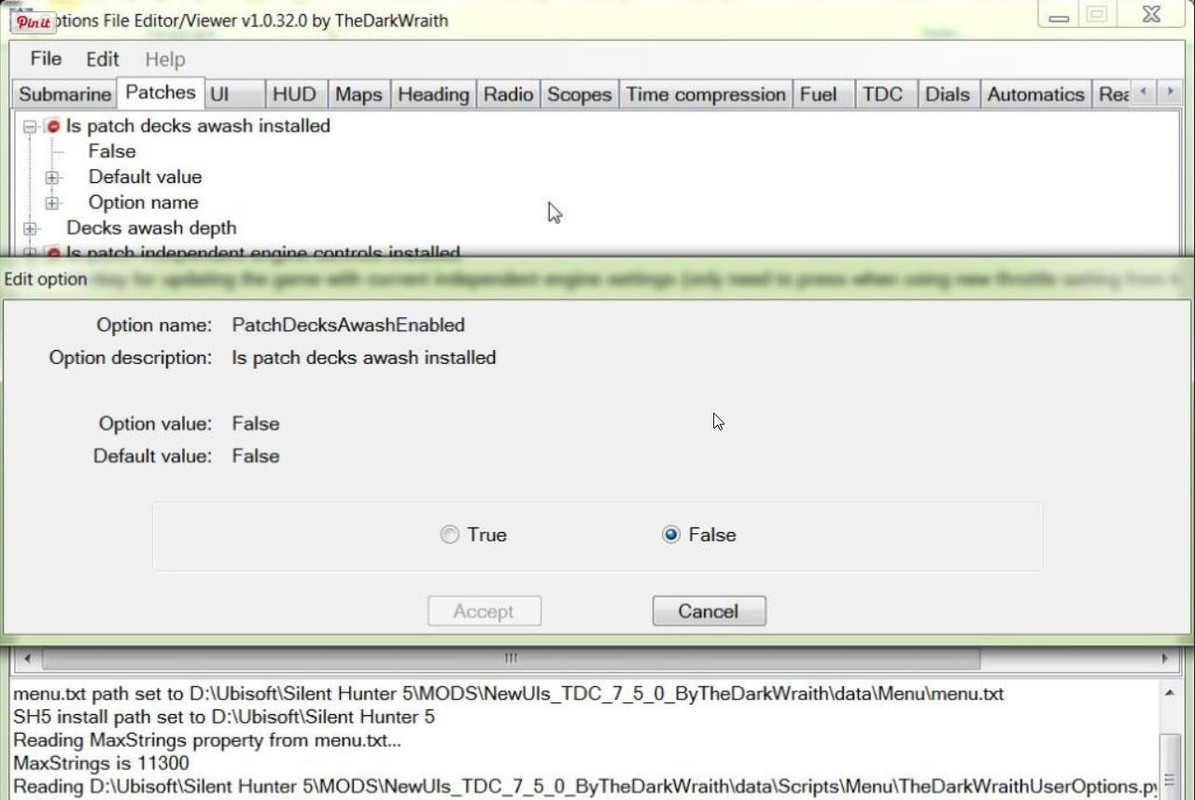 41. Click on the True Button and then Accept. (Picture 20) Picture 20 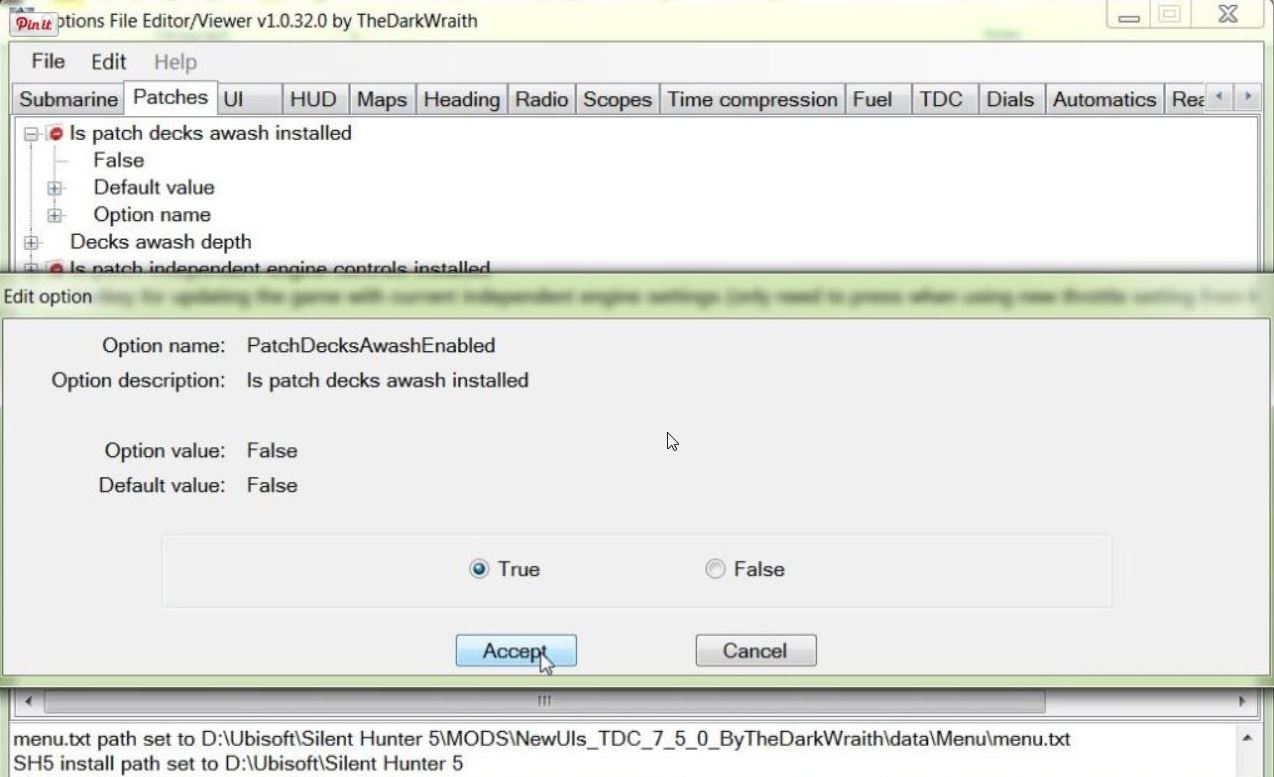 42. You will notice that the False is now True and has changed from Red to the color Blue. (Picture 21) Picture 21 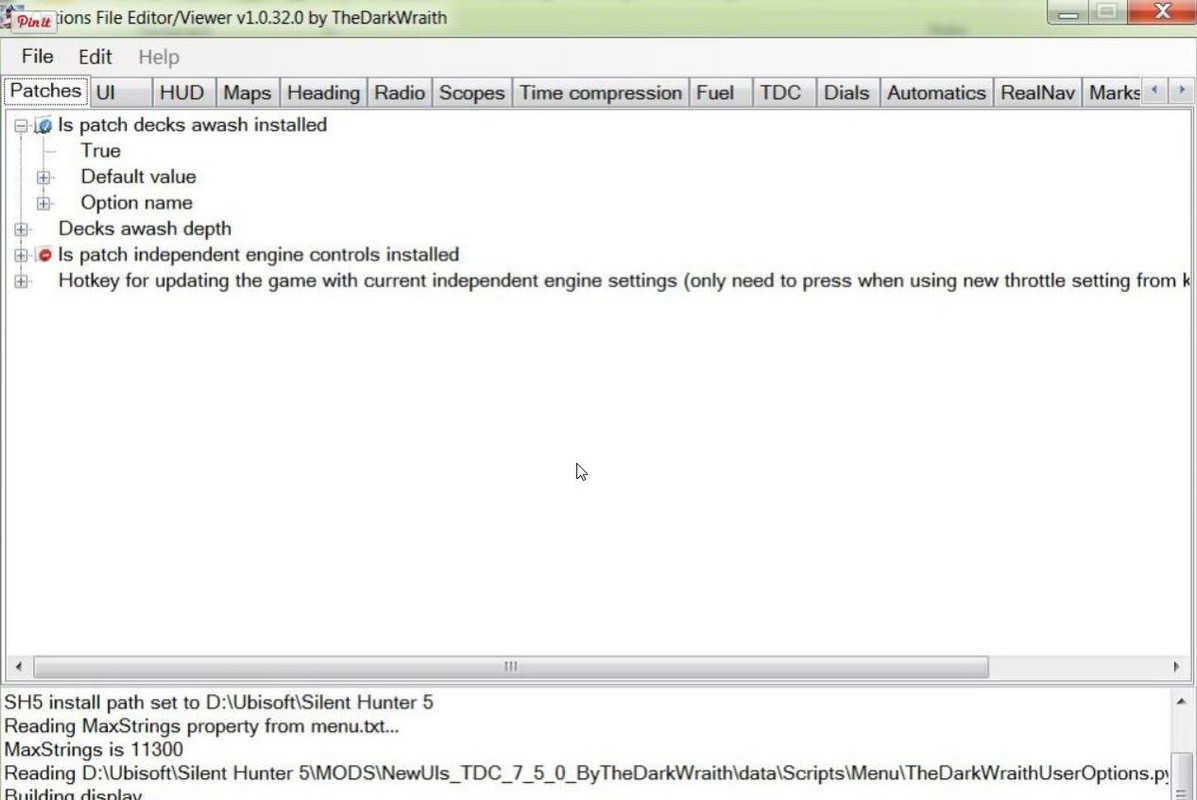 43. To Save any changes go back to the File Tab. 44. And click on Save. (Picture 22) Picture 22 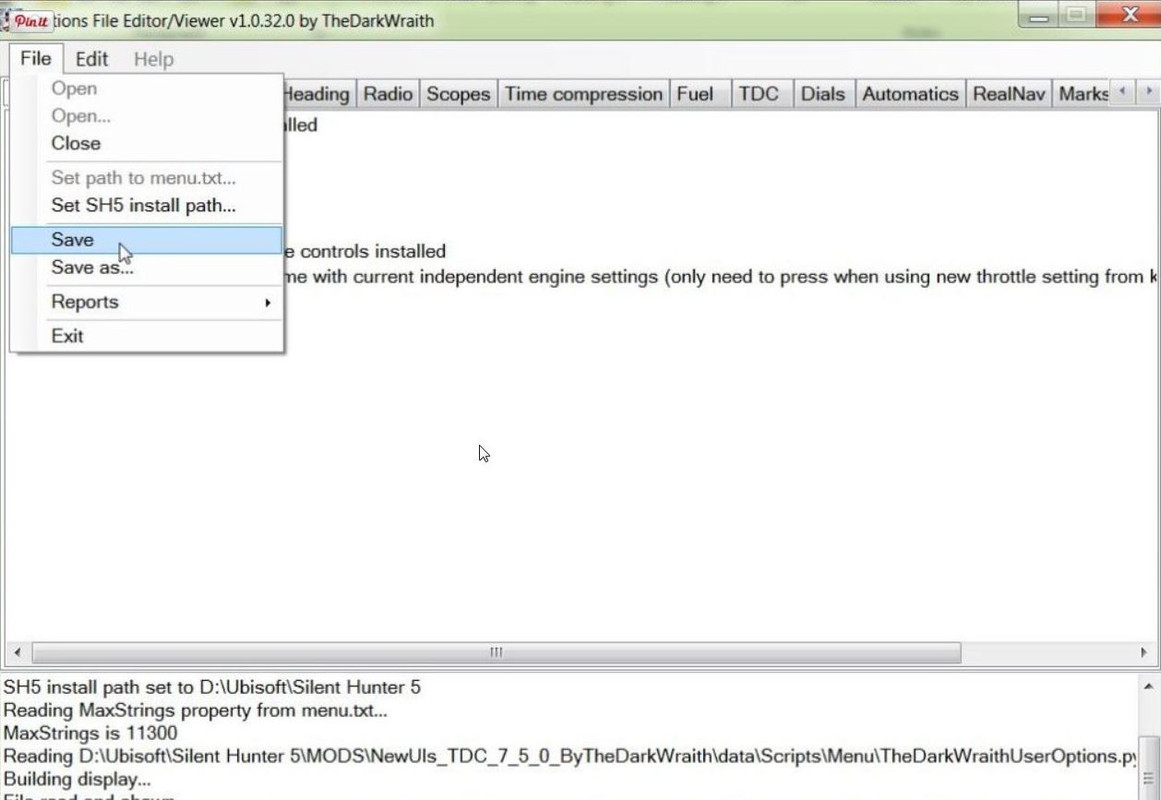 45. Confirm the Save by Pressing Yes. (Picture 23) Picture 23 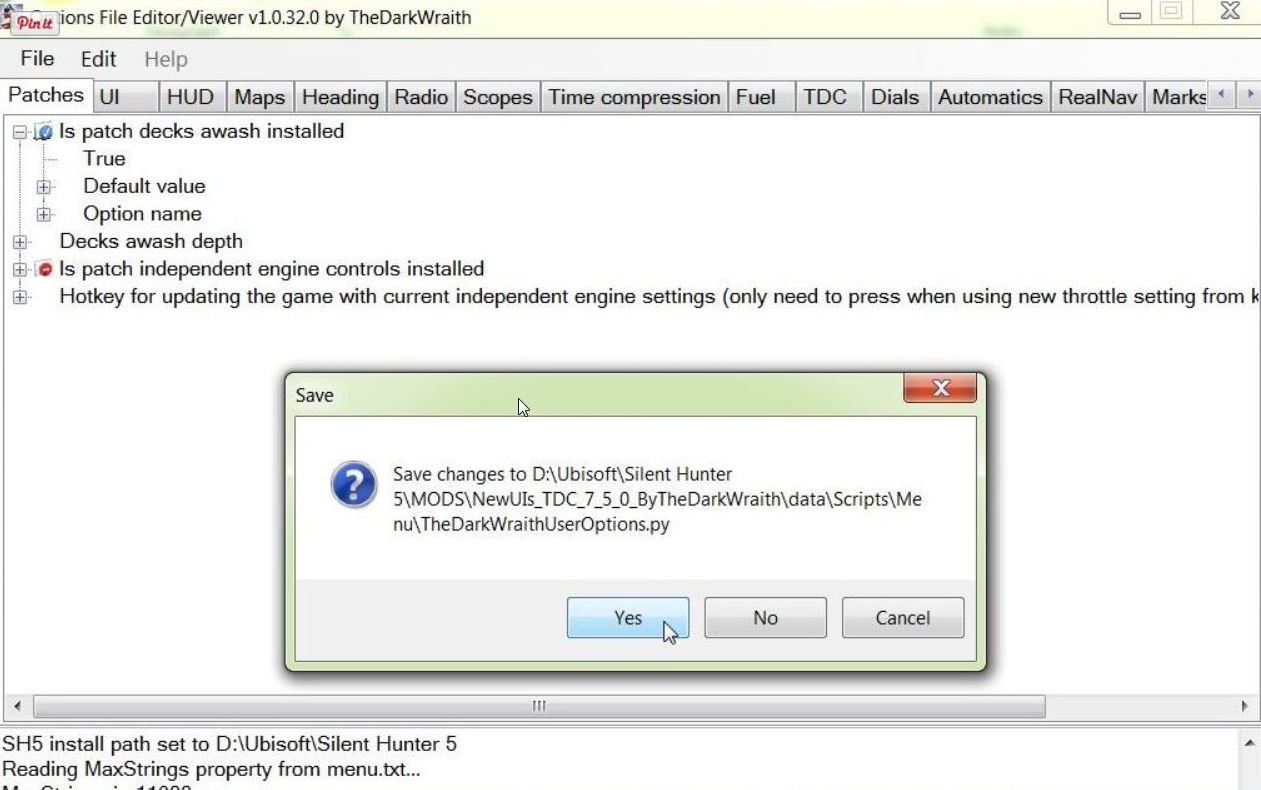 46. Accept any Further prompts you get. 47. Exit to close and leave the (OFEV) (Picture 24) Picture 24  48. If you now back tothe OFEV32 Folder you will see the (OFEV) File Folder and the original Zipped File there. (Picture 25) Picture 25  49. Open the First File Folder. 50. It is a good idea to change the Mickey Mouse .exe Application to Run as Administrator. 51. Another useful option is either to Make a Desktop Shortcut or alternatively Pin to Taskbar. 52. Open the Mickey Mouse .exe Application. 53. You will now see TheDarkWraithUserOptions > .py File (Picture 17) 54. Double click with your Mouse on the .py File to open it. (See Picture 17) 55. (OFEV) has opened. (See Picture 18) 56. Enable the mods in JSGME. 57. If your game is installed from Steam you cannot enable Decks Awash as it also needs to be enabled in TDW's Generic File Patcher. 58. If playing with Real Navigation some changes made True may still remain Disabled. Courtesy acknowledgement to TheDarkWraith TIP If you shade this Tutorial and then copy and paste it to aNotepad you can then edit it.
__________________
LSH3-2015 <> TUTORIALS <> ALL YOU NEED TO KNOW <> ALL IN ONE PLACE SH4 <> TUTORIALS <> HOW TO DO IT <> INFORMATION <> DOWNLOAD LINKS SH5 <> TUTORIALS <> HOW TO DO IT <> INFORMATION <> DOWNLOAD LINKS Always Here To Help A Fellow 'Subber' | Need An Answer to A Question Just Send Me A PM Last edited by THEBERBSTER; 10-03-19 at 06:06 PM. Reason: Replaced missing pictures |
|
|
|
|
03-07-14, 11:56 AM
|
#6 |
|
Growing Old Disgracefully
Join Date: Dec 2012
Location: Dibden Purlieu - Southampton
Posts: 9,606
Downloads: 1123
Uploads: 0
|
Last updated 22nd April 2018
TDWs NewUi_ 7_5_0_TheDarkWraith_ version 18 Installing It Correctly This mod more than any other seems to cause a lot of installing problems. I am referring to where one or more Folders hide behind the Folder that is in view. Download Link TheDarkWraith's New UI for SH5 v7.5.0 test version 18 Picture 1 > TDWs NewUi_ 7_5_0_TheDarkWraith_ version 18 (Current/Latest) is a collection of 15 Mods.  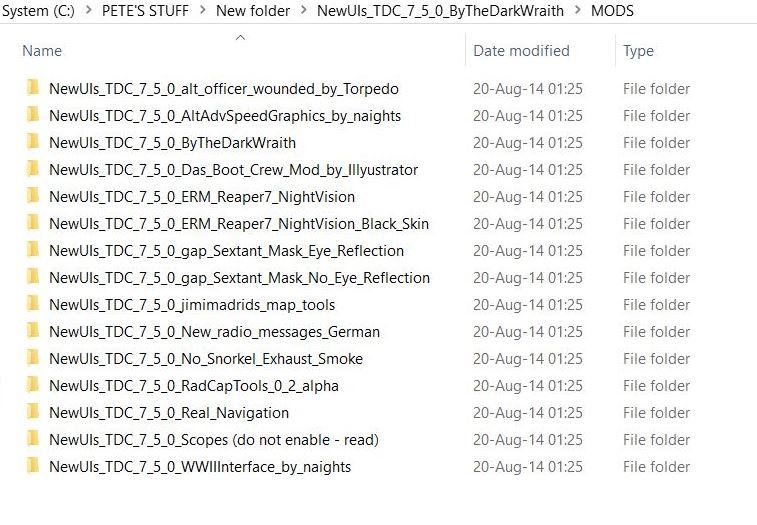 Picture 2> To install this mod correctly create a New Folder. Download the Zipped Mod File into the New Folder. Or copy and paste the mod to the New folder if you have already down loaded it.   Picture 3 > When you unzip the file you will see this. Click on the Copy Tab to select it  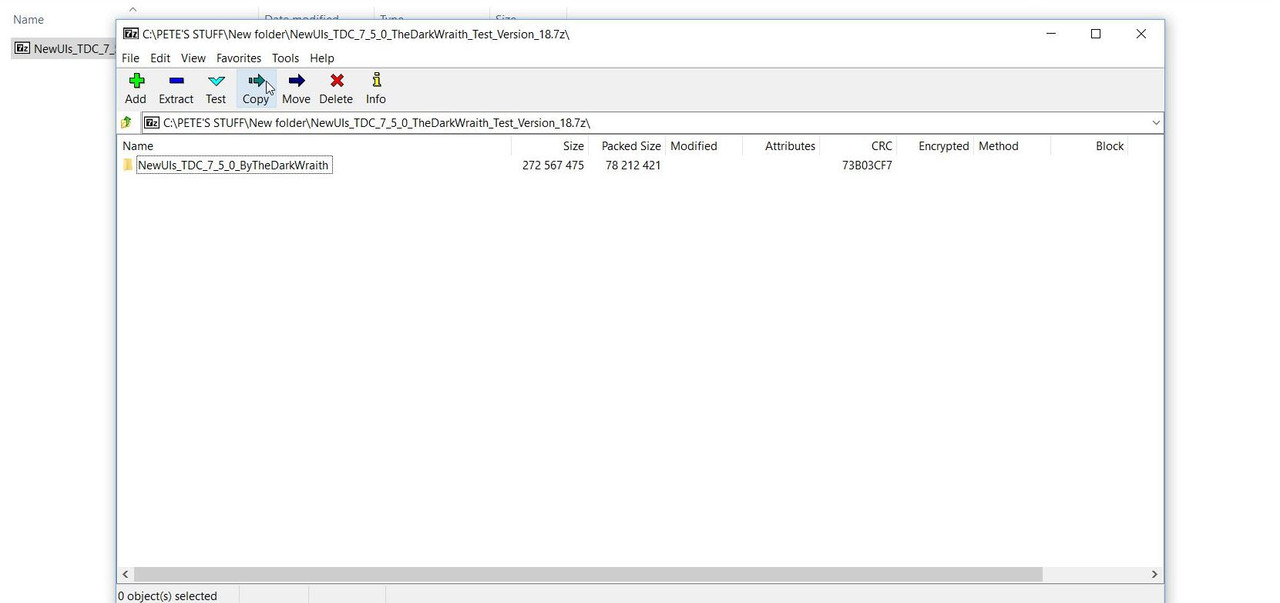 Picture 4 > Press OK to confirm you want to Copy it. Now Exit > X.  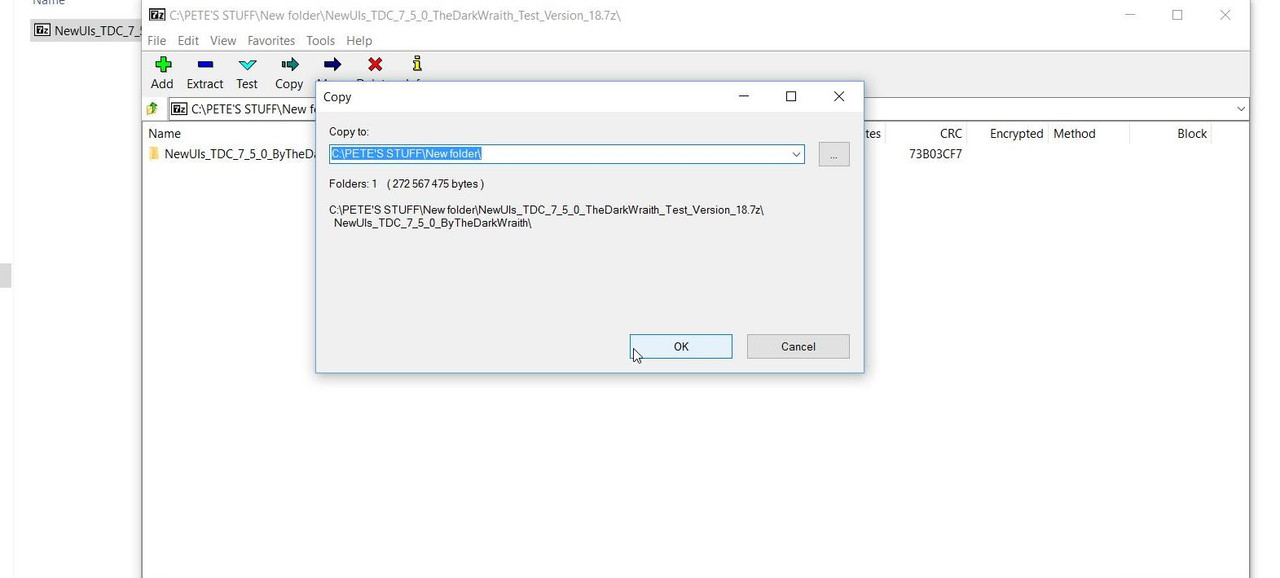 Picture 5 > You now have 2 items in your New Folder. 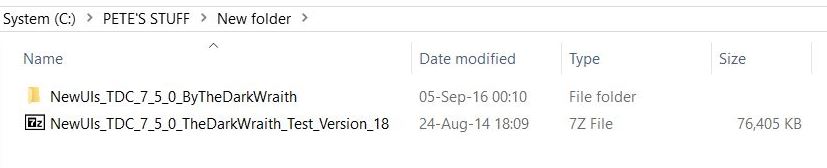 Picture 6 > Open the Folder and you will see 3 File Folders. Dials Folder 1 (Also contains 3 Dials Folders and a text Readme) Mods Folder 2 (Contains the 15 mods) Texts Folder 3 (In various languages shows you how the NewUI is set up)  Picture 7 > Open the Mods Folder and you will see the 15 mods. You can copy and paste any additional mods behind the Main Base Mod (No3). If you intend to use Real Navigation make sure this is not over written by any other enabled mod. 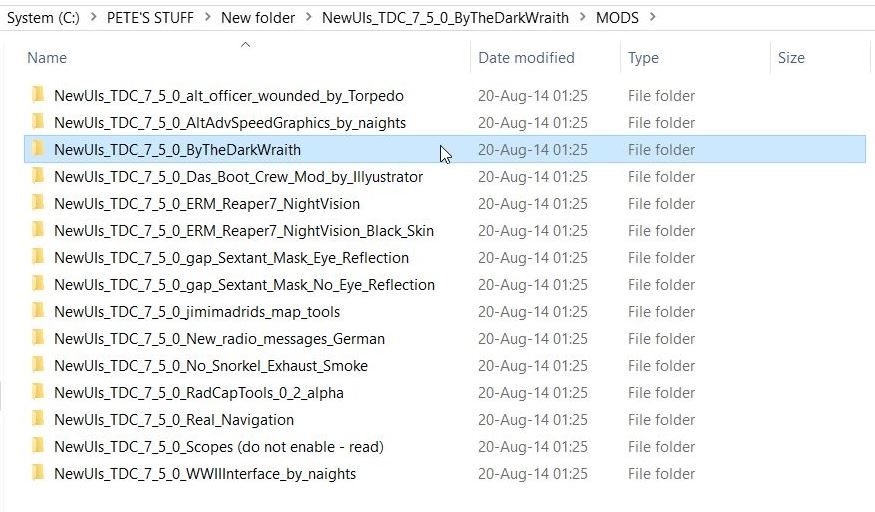 Picture 8 > Copy and Paste Mod number 3 to your JSGME Mods Folder. 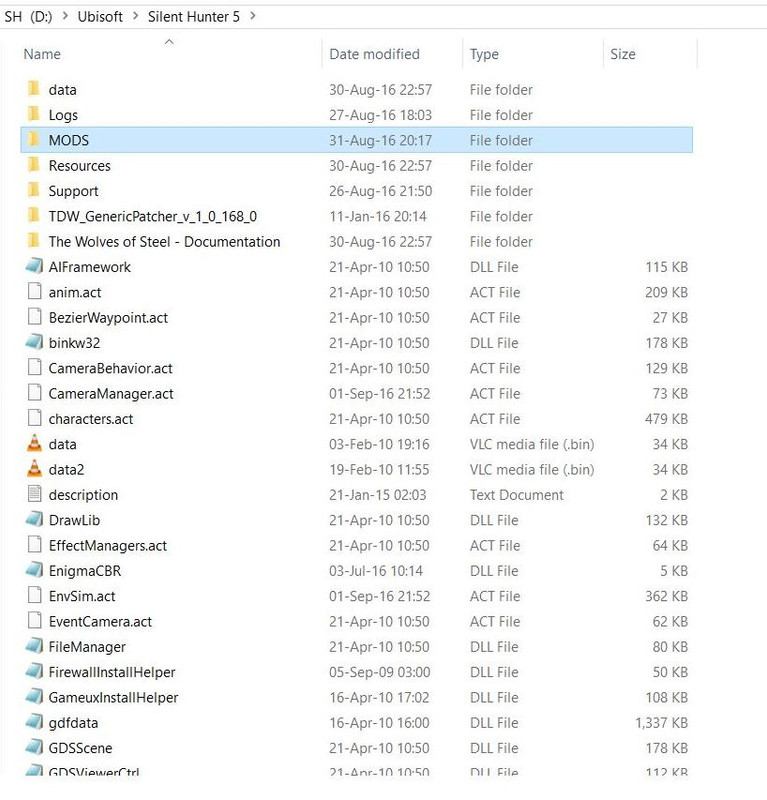 Picture 9 > Go to your JSGME Mods Folder and open the NewUi Mod. You should now see this. You can now Enable the Mod in JSGME. 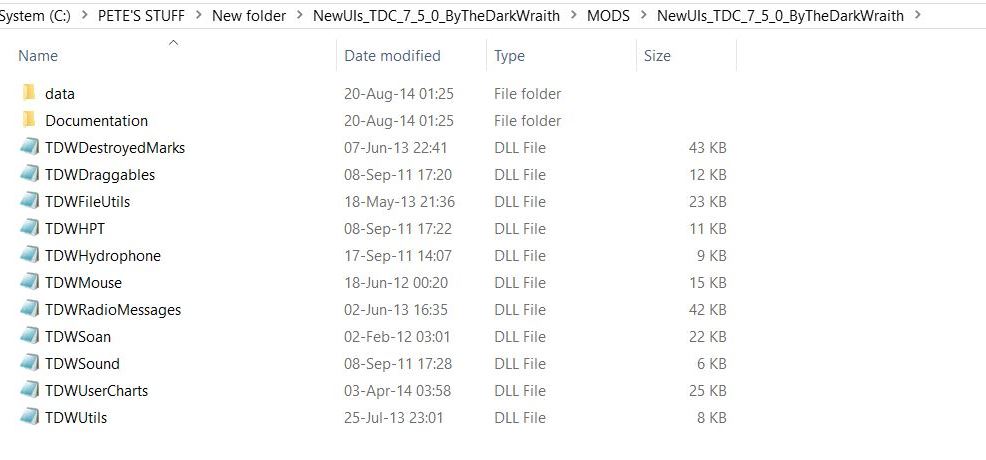 Always check Mods for additional information in the Text Documents. Important You Now Need To Make The Following Change. In order to receive debug messages from the ship's journal feature of the mod you need to ensure the following Developing is set out below in your: Documents SH5 Data Cfg Main DEVELOPING Change this to Modding=Yes > remove ; ;MenuEditor=Yes ;DebugScripts=Yes Important You Now Need To Make The Following Changes. When using TDWs NewUI 7-5-0 a change needs to be made in TDWs Generic File Patcher. Patch 4 showing > Real nav menu.txt entries needs to be enabled (blue) Patch 4 showing > New Game Destroyed Marks (required for TDW UIs mod v7-5-0 and greater) (new_destroyed_marks) needs to be enabled (blue)
__________________
LSH3-2015 <> TUTORIALS <> ALL YOU NEED TO KNOW <> ALL IN ONE PLACE SH4 <> TUTORIALS <> HOW TO DO IT <> INFORMATION <> DOWNLOAD LINKS SH5 <> TUTORIALS <> HOW TO DO IT <> INFORMATION <> DOWNLOAD LINKS Always Here To Help A Fellow 'Subber' | Need An Answer to A Question Just Send Me A PM Last edited by THEBERBSTER; 10-03-19 at 06:11 PM. Reason: Replaced missing pictures |
|
|
|
|
03-07-14, 12:02 PM
|
#7 |
|
Growing Old Disgracefully
Join Date: Dec 2012
Location: Dibden Purlieu - Southampton
Posts: 9,606
Downloads: 1123
Uploads: 0
|
Last updated 14th April 2017
If you are going to install one of TDW's NewUI 7-4-2 or 7-5-0 interface mods to your game you need to make a change to one of your files. In order to receive debug messages from the ship's journal feature of the mod you need to ensure the following Developing is set out below in your Ubisoft\Silent Hunter 5\data\Cfg\main Ubisoft Silent Hunter 5 Data cfg Main "Developing" Change this to Modding=Yes remove this > ; ;MenuEditor=Yes ;DebugScripts=Yes Courtesy acknowledgement to TheDarkWraith
__________________
LSH3-2015 <> TUTORIALS <> ALL YOU NEED TO KNOW <> ALL IN ONE PLACE SH4 <> TUTORIALS <> HOW TO DO IT <> INFORMATION <> DOWNLOAD LINKS SH5 <> TUTORIALS <> HOW TO DO IT <> INFORMATION <> DOWNLOAD LINKS Always Here To Help A Fellow 'Subber' | Need An Answer to A Question Just Send Me A PM Last edited by THEBERBSTER; 01-17-18 at 05:32 PM. |
|
|
|
|
09-25-15, 05:40 AM
|
#8 | |
|
Mate
 Join Date: Sep 2015
Posts: 56
Downloads: 31
Uploads: 0
|
Quote:
|
|
|
|
|
|
09-25-15, 11:25 AM
|
#9 |
|
Growing Old Disgracefully
Join Date: Dec 2012
Location: Dibden Purlieu - Southampton
Posts: 9,606
Downloads: 1123
Uploads: 0
|
Hi drronnie
What a cheat selling a second hand SH5 that cannot be used. The only person who can use it is the one who originally installed it. Important now that you check your Control Panel and see if there is anything relating to SH5 or Ubisoft/Uplay that needs to be removed. Also check your Program (x86) folder also for a Ubisoft folder. Use a registry cleaner. If you do not have one there is a free one in my downloads section. If you want to use German language with your new dvd then choose the custom install. Check out my tutorial list when you have installed as it could save you time and grief. Peter
__________________
LSH3-2015 <> TUTORIALS <> ALL YOU NEED TO KNOW <> ALL IN ONE PLACE SH4 <> TUTORIALS <> HOW TO DO IT <> INFORMATION <> DOWNLOAD LINKS SH5 <> TUTORIALS <> HOW TO DO IT <> INFORMATION <> DOWNLOAD LINKS Always Here To Help A Fellow 'Subber' | Need An Answer to A Question Just Send Me A PM |
|
|
|
|
09-30-15, 07:48 AM
|
#10 | |
|
Mate
Join Date: Sep 2015
Posts: 56
Downloads: 31
Uploads: 0
|
Quote:
|
|
|
|
|
|
03-16-20, 05:55 AM
|
#11 |
|
Swabbie
 Join Date: Jan 2020
Posts: 11
Downloads: 54
Uploads: 0
|
[QUOTE=THEBERBSTER;2182963][SIZE=3][B]Last updated 12th February 2016
When the installation has completed it is important that the game is updated to the latest version v1.2.0 before running the game. Go to the Ubisoft Folder. Go to the main Silent Hunter 5 Folder. Picture 1 shows the Sh5.exe application v1.0.5.0 as installed. Picture 1 Go to the Support Folder Picture 2 Picture 2 Go to the GameUpdater Folder Picture 3 Picture 3 Double click to run the Gu7pCMjJN/6-confrimation-of-the-update.jpg[/IMG] Uplay will now start its own updating process Picture 7 Picture 7 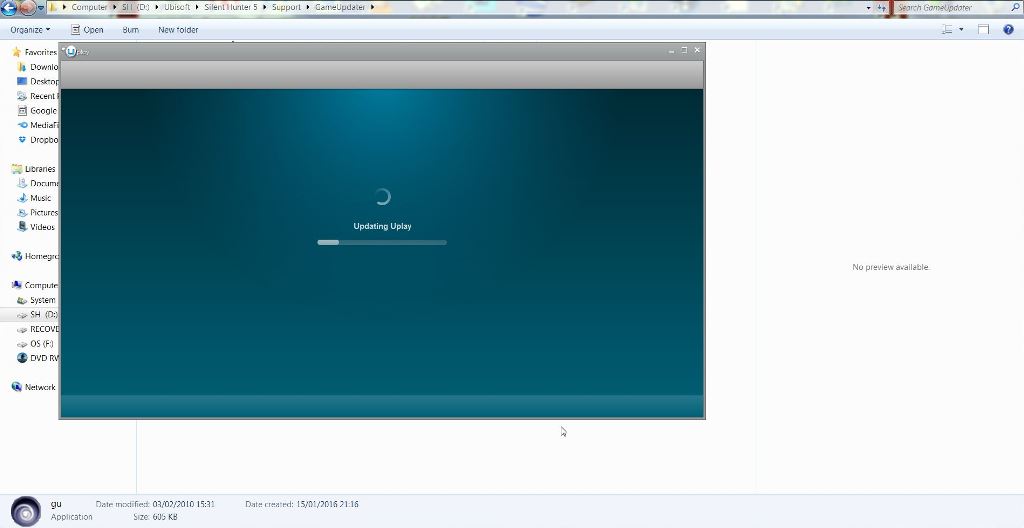 Where will i put that patch file???? |
|
|
|
|
05-05-14, 11:58 PM
|
#12 | |
|
Commander
 Join Date: Dec 2009
Location: Just east of the west coast.
Posts: 462
Downloads: 404
Uploads: 0
|
Quote:

__________________
There are no great men, only great challenges that ordinary men are forced by circumstances to meet. -- Admiral William Halsey |
|
|
|
|
|
05-06-14, 04:33 AM
|
#13 |
|
Growing Old Disgracefully
Join Date: Dec 2012
Location: Dibden Purlieu - Southampton
Posts: 9,606
Downloads: 1123
Uploads: 0
|
Yes Capt. that's what step by step is all about.
You can see why it can be a struggle if you do not how, especially for a newbie or someone coming into SH5. Peter
__________________
LSH3-2015 <> TUTORIALS <> ALL YOU NEED TO KNOW <> ALL IN ONE PLACE SH4 <> TUTORIALS <> HOW TO DO IT <> INFORMATION <> DOWNLOAD LINKS SH5 <> TUTORIALS <> HOW TO DO IT <> INFORMATION <> DOWNLOAD LINKS Always Here To Help A Fellow 'Subber' | Need An Answer to A Question Just Send Me A PM |
|
|
|
|
05-07-14, 07:14 AM
|
#14 |
|
Growing Old Disgracefully
Join Date: Dec 2012
Location: Dibden Purlieu - Southampton
Posts: 9,606
Downloads: 1123
Uploads: 0
|
Last updated 19th March 2019
Change your SH5.exe To Run As An Administrator Look for the SH5 .exe Application icon Picture 1 in the Main SH5 Game folder. Highlight the SH5.exe icon without starting the game. Right click with your mouse on it and select Properties. Click on the Compatibility Tab. Go to the Privilege Level. Click in the box > Run this program as an Administrator. Click on Apply. Click on Ok. Picture 1 > SH5 .exe Application Icon 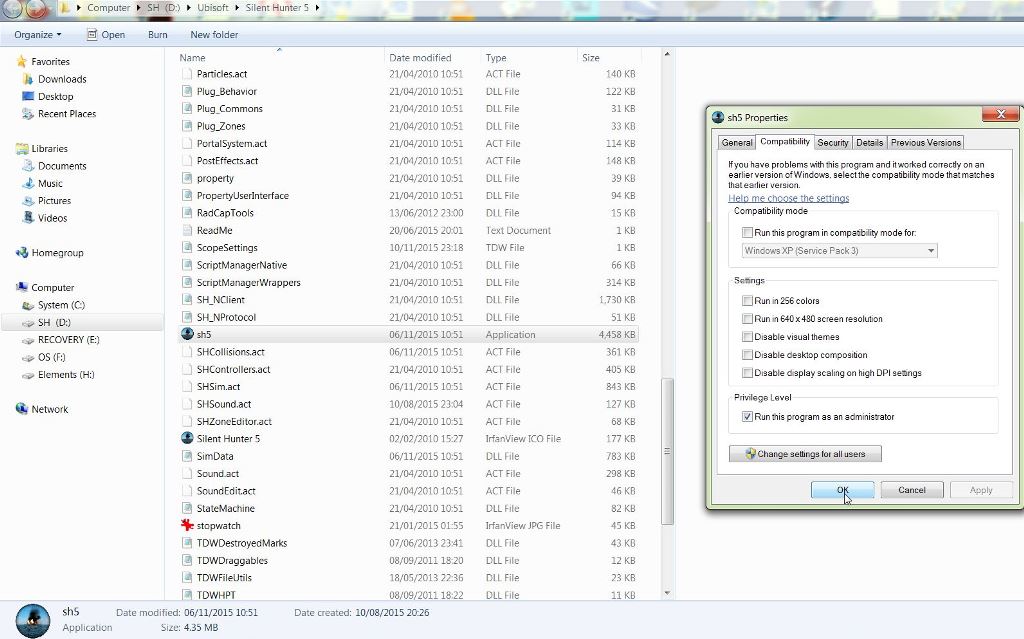 Picture 2 > Right click on the SH5iexe icon again and select Pin to Taskbar. 
__________________
LSH3-2015 <> TUTORIALS <> ALL YOU NEED TO KNOW <> ALL IN ONE PLACE SH4 <> TUTORIALS <> HOW TO DO IT <> INFORMATION <> DOWNLOAD LINKS SH5 <> TUTORIALS <> HOW TO DO IT <> INFORMATION <> DOWNLOAD LINKS Always Here To Help A Fellow 'Subber' | Need An Answer to A Question Just Send Me A PM Last edited by THEBERBSTER; 10-04-19 at 04:48 PM. Reason: Replaced missing pictures |
|
|
|
|
05-07-14, 04:04 PM
|
#15 | |
|
Commander
Join Date: Dec 2009
Location: Just east of the west coast.
Posts: 462
Downloads: 404
Uploads: 0
|
Quote:

__________________
There are no great men, only great challenges that ordinary men are forced by circumstances to meet. -- Admiral William Halsey |
|
|
|
|
 |
|
|


 Hybrid Mode
